
Lawn
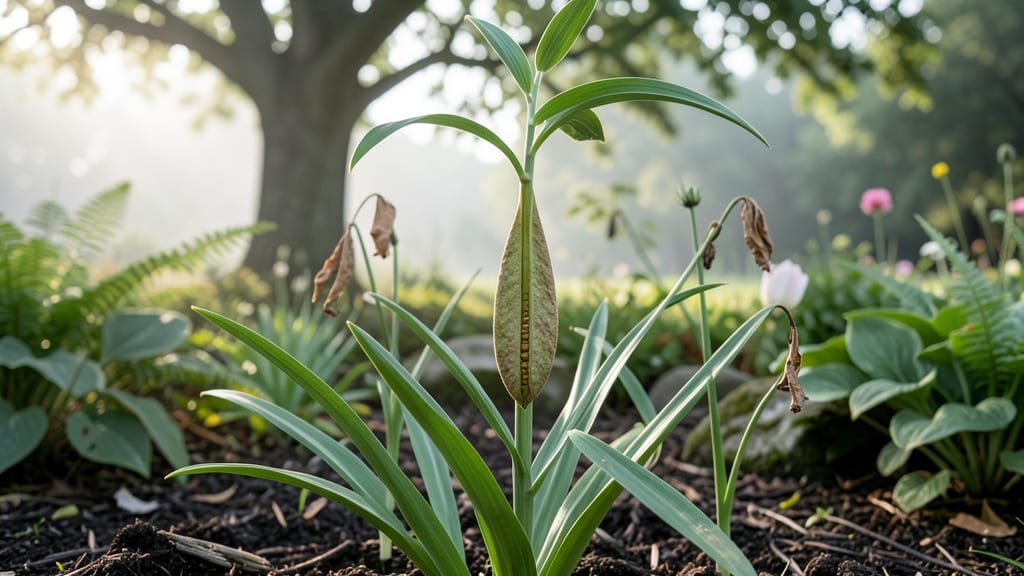
Extracting seeds from lily seed pods without twisting them open unlocks a world of free, homegrown lilies that store-bought plants can't match. 🌸 The trick is patience—waiting for pods to mature fully before harvesting ensures the best germination rates, and handling them just right prevents seed damage.
I've collected hundreds of pods this way, and the key difference between success and failure is often timing and technique.
You'll need just a few simple supplies: sharp scissors or pruning shears, a small bowl for collecting seeds, and a damp paper towel for testing viability.
The process takes about 10 minutes per pod, but the payoff is worth it—each mature pod contains dozens of seeds that can produce stunning lilies in just a few seasons.
Common varieties like Asiatic lilies and Martagon lilies produce the most reliable seed pods, though even hybrid lilies occasionally yield surprises.
Once you crack open the pod, you'll find flat, dark seeds that look nothing like the dramatic blooms they'll produce. The real magic happens when you plant them in well-draining soil and keep them consistently moist—you'll see sprouts within 3-4 weeks if the seeds are viable.
Seed-raised lilies develop stronger root systems and unique color variations that you won't find in nursery plants.
This method works year-round in warm climates, while cooler regions should harvest pods in late summer or early fall before frost. The secret to long-term success is labeling your seeds and keeping detailed notes—what worked one year might need adjustments the next.
With practice, you'll develop an eye for the perfect pod and a collection of lilies that reflect your garden's personality.
📚 In This Guide
- What you need
- Instructions
- Tips and common mistakes
- Wrapping up and next steps
What you need
- ● Mature lily seed pods: Harvest fully dried pods (brown, papery texture) from Lilium species like Tiger Lilies or Asiatic Hybrids. Aim for 5-10 pods per batch.
- ● Sharp pruning shears or scissors: For cleanly snipping pods from stems. Sterilize with rubbing alcohol to prevent contamination.
- ● Paper towels or coffee filters: 2-3 sheets per pod for drying seeds. Use unbleached options to avoid chemical residue.
- ● Small paper bags or envelopes: 1 per pod for seed storage. Opt for breathable materials like kraft paper.
- ● Labeling supplies: Pencil + masking tape or printable seed labels to note variety and date.
- ○ Glove (optional but recommended): Protects hands from lily sap, which can irritate skin.
- ● Magnifying glass: Helps spot viable seeds (plump, firm) vs. shriveled ones.
- ● Fine-tip tweezers: Gently separate seeds from pod membranes without crushing.
- ● Desiccant packs (silica gel): 1-2 packs per storage container to maintain low humidity (critical for long-term viability).
- ● Air-tight containers: Small jars or resealable bags with oxygen absorbers for post-drying storage.
- ● Humidity gauge: Ensures storage conditions stay below 40% humidity.
- ● Notebook: Track seed germination rates and pod sources for future reference.
How to extract lily seeds without twisting the pod
Here’s the gentle method I use to open lily seed pods without damaging the seeds or losing viability.
🌱 Step 1: Wait for the Pod to Fully Mature
Harvest the seed pod only when it turns a deep brown and begins to split open naturally along one seam. If you pick it too early, the seeds inside won’t be fully developed. I like to wait until the pod feels dry and papery to the touch—this usually happens in late summer or early fall, depending on your climate.
Gently twist the pod open by hand if it’s already starting to crack. If it’s still tightly closed, leave it on the plant for another week or two. The seeds inside need to mature completely for the best germination rates. You’ll know it’s ready when the pod opens slightly on its own.
🌿 Step 2: Remove the Seeds Carefully
Once the pod is open, you’ll see rows of flat, black seeds inside. Use a small knife or your fingernail to gently scrape them out—don’t pull or tug, as the seeds can be delicate. Place them on a clean, dry surface like a paper towel or a small tray.
If the pod is still stubbornly closed, I’ve found that soaking it in warm water for 10-15 minutes softens the fibers enough to pry it open without damaging the seeds. Just be sure to dry the seeds thoroughly afterward to prevent mold.
💧 Step 3: Clean and Dry the Seeds
Inspect each seed for debris or damaged outer coatings. Use a soft brush or your fingers to remove any remaining pod fragments. Seeds with intact outer layers will germinate better, so avoid scrubbing too hard.
Spread the seeds out on a mesh screen or paper towel in a warm, dry place for 3-5 days. Stir them gently once a day to ensure even drying. The seeds are ready when they feel dry and firm to the touch. Store them in a cool, dry place in a sealed container until you’re ready to plant.
⏰ Step 4: Stratify for Better Germination (Optional but Recommended)
For the best results, I recommend stratifying the seeds to mimic winter conditions. Place them in a sealed plastic bag with a damp paper towel and store them in the refrigerator for 4-6 weeks. This process breaks dormancy and encourages stronger germination.
After stratification, plant the seeds in well-draining soil, about ½ inch deep. Keep the soil consistently moist but not soggy, and place the container in a warm, bright spot. You should see sprouts within 2-4 weeks, depending on the variety and growing conditions.
☀️ Step 5: Transplant Seedlings When Ready
Once the seedlings reach 3-4 inches tall and have developed their first true leaves, they’re ready to be transplanted. Choose a location with partial shade—lilies prefer dappled sunlight, especially in hotter climates.
Dig a hole slightly larger than the root ball and plant the seedlings at the same depth they were growing in their container. Water them deeply after transplanting to help settle the soil. With proper care, your lilies will reward you with stunning blooms in just a few years.
Tips & tricks for perfect lily seed extraction
Real talk: Patience is your best friend when working with lily seed pods. These delicate tips will help you avoid common mistakes and maximize your seed viability.
Timing is Everything: In Step 1, resist the urge to harvest too early. The pods need that deep brown color and papery texture—this indicates the seeds have fully developed. I’ve learned the hard way that rushing results in shriveled, non-viable seeds. If your climate is unpredictable, mark your calendar for late summer to early fall as your target window.
Gentle Handling Matters: When removing seeds in Step 2, think of them like fragile eggshells. A small knife or fingernail works best—never pull directly on the seeds. For stubborn pods, that 10-15 minute warm water soak is a game-changer. I’ve found placing the pod in a bowl of warm (not hot) water works better than boiling, as it softens the fibers without risking seed damage.
Drying Strategy: The 3-5 day drying period in Step 3 is non-negotiable for germination success. I’ve had the best luck using a mesh screen over a fan on low setting—this creates airflow without creating a draft. Stirring daily prevents clumping and ensures even drying. Once dry, store seeds in a sealed container with a silica gel packet to absorb any remaining moisture.
Optional Stratification: While the 4-6 week cold treatment in Step 4 is optional, I’ve found it dramatically improves germination rates for lily seeds. Use a standard refrigerator (not freezer) and check the seeds weekly. If they show signs of mold, remove them immediately and start fresh with a new batch.
Pro Tips for Lily Seed Pod
- Real talk: Patience is your best friend when working with lily seed pods.
- Timing is Everything: In Step 1, resist the urge to harvest too early.
- Gentle Handling Matters: When removing seeds in Step 2, think of them like fragile eggshells.
Frequently asked questions
Got questions about harvesting lily seed pods without the twist? We’ve got answers! Whether you’re a gardener or just curious, here’s what you need to know:
When is the best time to harvest lily seed pods?
The ideal time is when the pods turn light brown and start splitting open—usually late summer to early fall. Harvest too early, and seeds won’t be mature; wait too long, and they’ll scatter or dry out. Check weekly for the perfect moment!
How do I extract seeds without twisting or damaging the pod?
Gently squeeze the pod between your palms or use a butter knife to pry open the seams. Avoid twisting—it can crush seeds. Once open, tap the pod to release seeds into a bowl. Pro tip: Wear gloves to avoid sticky sap!
Can I save seeds from hybrid lilies for planting next year?
Probably not! Hybrid lilies often won’t reproduce true to type—their seeds may grow into wild, unpredictable plants. Stick to heirloom or species lilies for reliable seed-saving. For hybrids, propagate via bulbs or division instead.
How long do harvested seeds stay viable for planting?
Freshly extracted lily seeds last 1–2 weeks in a cool, dry place before losing viability. For longer storage, dry seeds completely (3–5 days in a paper bag) and refrigerate in a sealed container. Tip: Plant as soon as possible for best germination!
What if my seed pods won’t open naturally?
If pods stay closed, they may need help. Try soaking them in warm water for 24 hours to soften the casing, then gently coax them open. If still stubborn, let them air-dry in a sunny spot—sometimes heat triggers natural splitting.
Wrapping up and next steps
Mastering the art of extracting lily seed pods without twisting ensures you’ll always have viable seeds—no matter the season! 🌱 Whether you’re a gardening enthusiast or a lawn care pro, this method keeps your plants thriving while saving you time and effort.
Now that you’re equipped with the right tools, techniques, and answers to common questions, why not try it this weekend? Grab your gloves, head outdoors, and give your lilies the care they deserve. Happy gardening! 🌿✨