
Propagation
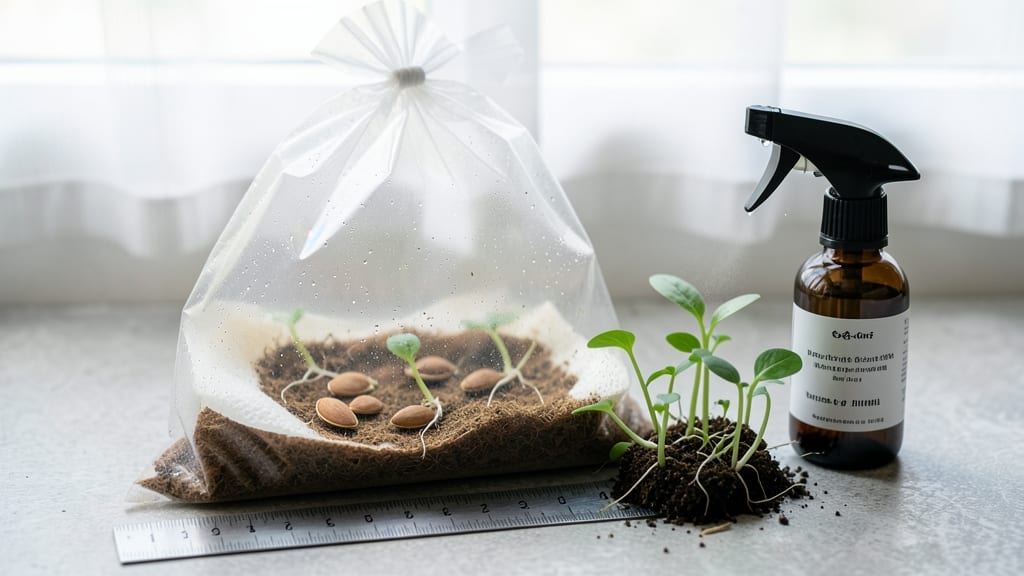
A seed germination plastic bag over your seed tray turns a damp paper towel into a fast, moist greenhouse—no twist ties needed. 🌱 I’ve used this trick for decades, and it’s how I get seedlings popping in half the time of store-bought trays.
The secret? A simple bag creates the perfect humidity without smothering your seeds.
You only need a clear plastic bag, a seed tray or container, and your chosen seeds. No fancy equipment—just what’s sitting in your pantry. The bag traps moisture while letting light through, so you avoid the "damp but not damp enough" guesswork that kills so many starts.
Within 5-7 days, you’ll see tiny sprouts breaking through the soil, ready to handle the world. The method works best for slow starters like tomatoes, peppers, and herbs, but even fast germinators like beans benefit from the consistent moisture.
Watch for condensation on the bag—if it’s dripping, you’ve got too much humidity. A quick poke with a toothpick or opening the bag for 10 minutes fixes it. No mold, no mess, just reliable, speedy results every time.
📚 In This Guide
- What you need
- Instructions
- Tips and common mistakes
- Wrapping up and next steps
What you need
- ● Plastic bags: 1–2 gallon-sized (or larger) sealable bags (e.g., Ziploc or reusable silicone bags). Pro tip: 💡 Opt for clear or translucent bags to monitor moisture and root growth!
- ● Seeds: Your chosen seeds (e.g., herbs, veggies, or flowers). Check seed packets for germination specifics!
- ○ Paper towels or germination sheets: 2–4 sheets (cut to fit seeds comfortably). Optional: Use a seedling mat for extra moisture retention.
- ● Spray bottle: 1 (with a fine mist setting) for gentle hydration. No spray bottle? A clean, damp cloth works in a pinch!
- ● Scissors or knife: 1 (for trimming paper towels to size).
- ● Ruler or measuring tape: 1 (to ensure even seed spacing).
- ● Permanent marker: 1 (to label bags with seed types/dates).
- ● Heat mat: 1 (for faster germination—ideal for slow starters like tomatoes or peppers).
- ● Grow lights or sunny windowsill: Access to indirect light (6+ hours/day) post-sprouting.
- ● Ventilation tool: A toothpick or small knife to poke tiny holes in bags if condensation builds up.
- ● Notebook: 1 (to track germination progress, dates, and conditions).
- ○ Fungicide (optional): A light spray (e.g., hydrogen peroxide solution) to prevent mold if humidity is high.
How to use a plastic bag for faster, moisture-controlled seed germination
Here's the simple twist-free method I use to speed up germination while keeping roots happy and healthy.
🌱 Step 1: Prepare Your Seeds and Container
Start by placing your seeds in a small container filled with moistened seed-starting mix. I like to use a shallow tray or even a clean plastic container with drainage holes. The key here is to keep the mix damp but not soggy—it should hold together when gently squeezed but not drip water. This prevents over-saturation that can rot seeds before they sprout.
For stubborn seeds like chard or tomatoes, I pre-soak them in lukewarm water for 12 hours first. This softens the seed coat and gives you a head start. Just make sure they're not floating—sink them gently with a toothpick if needed. Once your seeds are ready, spread them evenly in the container, following the depth guidelines on your seed packet.
💧 Step 2: Create the Plastic Bag Setup
Place the container inside a clear plastic bag—no twisting required. I use a gallon-sized produce bag for most seeds, but smaller bags work for tiny trays. The bag should be just big enough to contain the container without excessive air space. This creates a mini greenhouse effect while allowing you to monitor moisture levels easily.
Seal the bag loosely—leave about 2 inches open at the top. You want airflow to prevent mold, but you also want to trap humidity. I secure it with a rubber band or twist tie, leaving that gap for circulation. This balance is critical: too tight and you'll get mold; too loose and the soil dries out before germination.
☀️ Step 3: Position for Optimal Germination Conditions
Place your bagged container in a warm, dark spot—ideal temperatures are between 70-85°F. I keep mine on top of my fridge (not inside) because the heat from the compressor creates perfect conditions. You'll see condensation form on the bag's interior—that's your visual cue that moisture levels are perfect for germination.
Check daily for signs of mold or over-saturation. If you see fuzzy growth or the soil smells sour, open the bag for 10 minutes to air it out. Most seeds will sprout within 3-10 days, depending on the variety. The instant you see the first green shoots, move the container to bright, indirect light immediately—this prevents leggy seedlings.
✂️ Step 4: Transition to Normal Care
Once all seeds have sprouted and developed their first true leaves, remove the plastic bag completely. This gradual transition prevents shock to tender seedlings. I like to do this over 2-3 days, opening the bag wider each time to acclimate them to normal humidity levels. You'll notice the seedlings perk up noticeably when they're no longer fighting for moisture.
Now you can move them to your grow light setup or sunny windowsill. Keep the soil consistently moist but not wet—you should see condensation form on the soil surface within 30 minutes after watering. This method gives you strong, disease-free starts ready for transplanting in just a few weeks.
Tips & tricks for perfect seed germination with plastic bags
Here's what I've learned after years of experimenting with this foolproof method—these little tweaks make all the difference between healthy sprouts and sad, moldy failures.
Moisture Balance is Everything: In Step 1, when checking if your seed-starting mix is "damp but not soggy," I mean it should hold together when squeezed like a damp sponge—not drip water like a wet washcloth. Too wet and you'll get mold; too dry and seeds won't activate. I test by squeezing a handful—if water beads form on my fingers, it's too wet. The 12-hour pre-soak for stubborn seeds like tomatoes works best in lukewarm (not hot) water—think bath temperature, not scalding.
Bag Size Matters: In Step 2, resist the urge to use extra-large bags—too much air space means humidity escapes. A gallon-sized bag works for most standard seed trays, but for tiny seedling trays, use a quart-sized bag. The bag should hug the container like a cozy sweater, leaving just that 2-inch gap for airflow. I've ruined batches by using bags that were too big; the condensation would pool at the bottom instead of creating even humidity.
Temperature Hack: The 70-85°F range is ideal, but don't stress if your home falls outside this. I've had great results on top of my fridge (around 80°F) even in winter. For cooler climates, place your bagged seeds near a sunny window during the day, then move them to a warmer spot (like on top of the fridge) at night. The key is consistency—fluctuations slow germination. You'll know it's working when you see condensation form like morning dew on the bag's interior.
Pro Tips for Seed Germination Plastic Bag
- Here's what I've learned after years of experimenting with this foolproof method—these little tweaks make all the dif...
- Moisture Balance is Everything: In Step 1, when checking if your seed-starting mix is "damp but not soggy," I mean it...
- Bag Size Matters: In Step 2, resist the urge to use extra-large bags—too much air space means humidity escapes. A gal...
Frequently asked questions
Got questions about germinating seeds in plastic bags? You’re not alone!
Here are answers to the most common concerns—so you can grow confidently with minimal fuss.
Why use a plastic bag instead of soil for seed germination?
A plastic bag creates a humidity dome that mimics the moist, warm conditions seeds need to sprout. This method speeds up germination (often by days!) and keeps roots safe from drying out or mold—no soil mess or transplant shock. Perfect for tiny seeds like basil or lettuce!
How long does it take for seeds to germinate in a plastic bag?
Timing varies by seed type, but most sprout within 3–14 days in ideal conditions (70–85°F, indirect light). Fast germinators like radishes or beans may sprout in 3–5 days, while slower ones (like tomatoes) take 10–14 days. Check daily for moisture—wrinkled roots mean it’s time to plant!
What do I do if mold grows in my seed germination bag?
Mold is a red flag—act fast! Open the bag immediately to improve airflow, then reduce humidity by loosening the twist or propping it open with a toothpick. If mold persists, discard the batch and sanitize your setup (rubbing alcohol works). Always use sterilized water and avoid overcrowding seeds.
Can I reuse plastic bags for seed germination?
Yes, but only if they’re clean and mold-free! Rinse bags with soapy water, dry thoroughly, and sterilize with a 10-minute boil or bleach soak (1 tsp bleach per gallon of water). Avoid reuse if the bag has tears or weak spots—safety first! For frequent use, opt for reusable mesh germination domes.
What’s a good alternative if I don’t have plastic bags?
No problem! Try these equally effective alternatives:
- Paper towels: Sandwich seeds between damp towels in a sealed container (like a ziplock). Check daily for sprouts!
- Clear plastic containers: Use lids to trap moisture (great for larger seeds like beans).
- Peat pellets: Soak and place seeds inside—naturally retains moisture.
- DIY humidity tent: Cover a tray with plastic wrap, propped open slightly for airflow.
Wrapping up and next steps
Mastering seed germination with a seed germination plastic bag is all about creating the perfect humid, twist-free environment for your little sprouts to thrive! 🌱 By controlling moisture, temperature, and airflow, you’ve unlocked a faster, more reliable way to kickstart your gardening journey.
Whether you're a beginner or a seasoned green thumb, this method simplifies the process and boosts success rates—so don’t hesitate to give it a try.
Now that you’re ready to dive in, pick your favorite seeds and start experimenting! Track your progress, tweak conditions as needed, and soon you’ll be transplanting healthy seedlings into the soil. Happy growing! 🌿