
Lawn
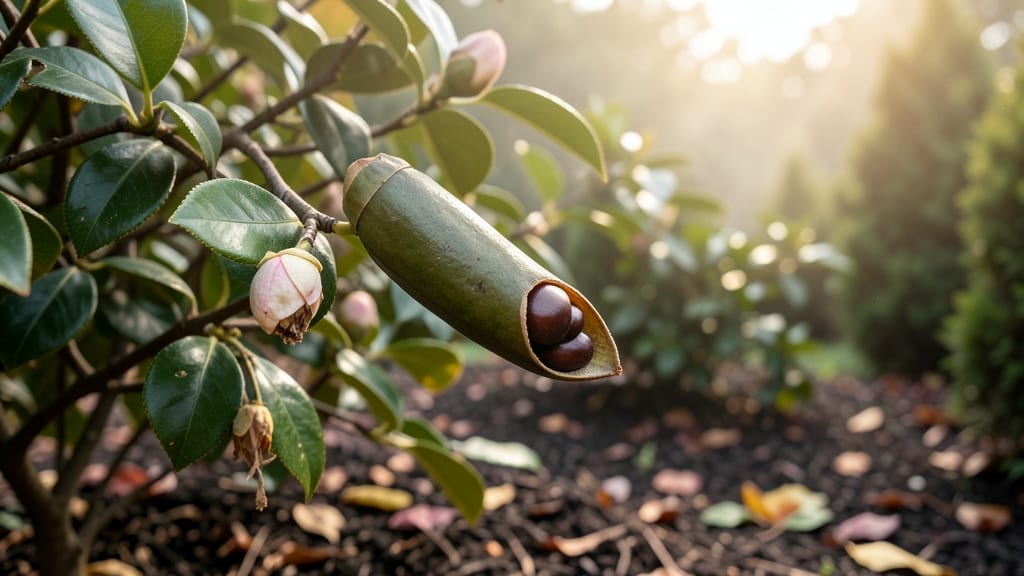
Those woody camellia seed pods hide the future of your garden's most elegant shrubs. 🌱 The trick to reliable germination starts with harvesting them at the perfect moment—when they turn brown but haven't split open yet.
I learned the hard way that waiting too long means the seeds inside lose their viability, while harvesting too early leaves them underdeveloped.
You'll need just a few simple tools: sharp pruning shears, a bucket for collecting pods, and a warm, moist paper towel for seed stratification—nature's way of breaking seed dormancy. The process itself takes about 30 minutes of hands-on work, plus 4-6 weeks of patience while the seeds prepare to sprout.
Most gardeners skip this step and wonder why their seeds never grow.
By following these steps, you'll watch tiny green shoots emerge within 2-4 weeks of planting, leading to sturdy young plants ready for outdoor life. The key is keeping the soil consistently moist but never soggy—camellia seedlings hate wet feet.
With proper care, your first blooms could appear in 3-5 years, though some varieties take even longer to reward your patience.
This method works best in USDA Zones 7-9, where camellias thrive outdoors year-round. For cooler climates, start seeds indoors under grow lights and transplant after the last frost. The real magic happens when you see those glossy, dark green leaves unfurling—proof that your twist-free harvesting paid off.
📚 In This Guide
- What you need
- Instructions
- Tips and common mistakes
- Wrapping up and next steps
What you need
- ● Fresh camellia seed pods: 3–5 fully mature, plump pods (harvested in late fall/winter when they’re brown and slightly soft).
- ● Sharp pruning shears or scissors: For cleanly cutting pods from the tree.
- ● Paper towels or coir mats: 2–3 sheets for stratification (moisture control).
- ● Plastic zip-top bags: 2–3 quart-sized bags (for cold stratification).
- ● Potting mix: 1 bag of well-draining, acidic mix (pH 5.0–6.5; add perlite or sand for aeration).
- ● Small pots or seed trays: 4–6 (3–4 inches deep) with drainage holes.
- ● Spray bottle: For gentle moisture application.
- ● Refrigerator: A space for cold stratification (32–40°F for 60–90 days).
- ● Seed pod opener: A butter knife or small screwdriver to carefully crack open pods.
- ● Humidity dome or clear plastic wrap: To retain moisture during germination.
- ● Grow lights or sunny windowsill: For consistent 60–70°F warmth post-stratification.
- ● pH testing kit: To verify soil acidity before planting.
- ● Fertilizer (balanced, low-nitrogen):** 5-5-5 or similar, diluted to half-strength for seedlings.
Step-by-Step guide to harvesting and germinating camellia seed pods
Here's how to collect, prepare, and plant camellia seeds for reliable germination—no twisting required.
🌿 Step 1: Identify and Harvest Ripe Camellia Seed Pods
Camellia seed pods ripen in late winter or early spring, turning from green to a deep brown or reddish hue. Look for pods that are firm but slightly soft when gently squeezed—this indicates they're ready for harvest. Avoid pods that are still green or have begun to split open naturally, as their seeds may not be viable.
Use clean, sharp pruning shears to cut the pods from the stem, leaving about 1 inch of stem attached. This helps prevent damage to the plant and makes handling the pods easier. Harvest on a dry day to minimize the risk of fungal contamination. Place the pods in a paper bag to allow them to dry further while preventing moisture buildup.
🪴 Step 2: Extract and Prepare the Seeds
Once the pods are fully dry (typically within 1-2 weeks after harvest), carefully open them by slicing along the seam with a sharp knife or pruning shears. Inside, you'll find 1-3 large, glossy seeds surrounded by a fibrous, papery material. Remove the seeds and discard the fibrous material, as it can harbor mold or pests.
Inspect each seed for signs of damage or discoloration—healthy seeds should be plump, smooth, and a uniform dark brown color. Store the seeds in a cool, dry place (around 40-50°F) in a sealed container with a desiccant packet to maintain dryness. This stratification process mimics winter conditions and encourages better germination rates.
☀️ Step 3: Stratify Seeds for Germination
Camellia seeds require a 3-4 month cold stratification period to break dormancy. Place the seeds in a plastic bag with a small amount of moist (not soggy) sphagnum moss or peat moss. Seal the bag and refrigerate it, checking monthly to ensure the moss remains slightly damp. If it dries out, mist it lightly with water and reseal the bag.
After 3-4 months, remove the seeds from the refrigerator and plant them in a well-draining seed-starting mix. Sow the seeds about ½ inch deep in small pots or a seed tray, spacing them 2 inches apart. Keep the soil consistently moist but not waterlogged, as camellia seeds are prone to rot if overwatered.
💧 Step 4: Provide Ideal Germination Conditions
Place the pots in a warm, bright location with indirect light, such as a south-facing window or under a grow light set to provide 12-14 hours of light daily. Maintain soil temperatures between 65-75°F for optimal germination. Germination can take 4-12 weeks, so patience is key—don’t disturb the soil or move the pots until you see signs of sprouting.
Once seedlings emerge, thin them to the strongest 2-3 plants per pot, snipping the weaker ones at the soil line with clean scissors. This prevents overcrowding and ensures the remaining seedlings have enough nutrients and space to grow. Keep the soil lightly moist and gradually introduce them to outdoor conditions over 2-3 weeks before transplanting.
⏰ Step 5: Transplant and Care for Young Camellias
Transplant seedlings outdoors after the last frost date, choosing a location with partial shade to full sun and well-draining soil. Dig a hole slightly larger than the root ball and amend the soil with compost or organic matter to improve fertility. Water the seedlings deeply after transplanting to help them establish roots.
Young camellias benefit from regular watering, especially during their first growing season. Mulch around the base of the plants with 2-3 inches of organic mulch to retain moisture and suppress weeds. Avoid over-fertilizing, as camellias prefer slightly acidic soil with moderate nutrients. With proper care, your seedlings will develop into healthy, flowering camellia plants in 3-5 years.
Tips & tricks for perfect camellia seed pod germination
These insights will help you maximize your success with camellia seeds—no guesswork required.
Pod Selection Precision: In Step 1, when harvesting, focus on pods that are deep brown or reddish with a slight softness when pressed. I've learned that pods that are too firm or already splitting open often contain non-viable seeds. The 1-inch stem attachment isn't just about ease—it preserves the seed's connection to the plant's natural nutrients during the drying process.
Stratification Timing: The 3-4 month cold stratification period in Step 3 is non-negotiable for breaking dormancy, but here's what I've discovered: Place your seeds in the refrigerator by late fall to ensure they complete the full period by early spring. This aligns with their natural outdoor cycle. Use a small amount of moist sphagnum moss—just enough to keep it slightly damp, not soggy—this prevents mold while maintaining humidity.
Lighting Strategy: For Step 4's 12-14 hours of daily light, I recommend using a grow light if your natural light isn't sufficient. Position it about 6 inches above the seedlings and adjust as they grow. The 65-75°F soil temperature range is critical—too cold slows germination, while too hot can cause rot. A heat mat under the pots helps maintain consistent temperatures during cooler months.
Transplanting Transition: When moving seedlings outdoors in Step 5, harden them off gradually over 2-3 weeks. Start with just a few hours of outdoor exposure on mild days, then increase daily. This mimics the natural conditions they'll face and prevents shock. The 2-3 inches of organic mulch isn't just decorative—it creates a microclimate that retains moisture while suppressing weeds, which is especially important during the first growing season.
Pro Tips for Camellia Seed Pod
- These insights will help you maximize your success with camellia seeds—no guesswork required.
- Pod Selection Precision: In Step 1, when harvesting, focus on pods that are deep brown or reddish with a slight softness when pressed.
- This aligns with their natural outdoor cycle.
Frequently asked questions
Got questions about camellia seed pods? You’re not alone! Here are some of the most common queries—and their straightforward answers—to help you navigate harvesting, storage, and germination like a pro.
When is the best time to harvest camellia seed pods?
Harvest seed pods when they’ve turned brown and dry but haven’t split open naturally—usually late winter to early spring (varies by climate). Avoid harvesting green or overly ripe pods, as they won’t germinate well. Pro tip: Tap a pod—if it rattles with seeds inside, it’s ready!
How long can I store camellia seed pods before planting?
Freshness is key! Store pods in a cool, dry place (like a paper bag) for up to 3–6 months. For longer storage, remove seeds, dry them thoroughly, and refrigerate in an airtight container. Warning: Older seeds may take longer to sprout or germinate poorly.
What if my seed pods won’t open naturally?
No stress—you can gently twist or crack them open with pliers or a knife to extract seeds. Avoid damaging the seed inside. If pods are too hard, let them dry longer in a warm, sunny spot (but not direct heat). Need more help? Try soaking them in warm water for 24 hours to soften.
Can I use camellia seed pods from any camellia plant?
Ideally, yes—but with a caveat! While most camellia seeds will grow, hybrid varieties (like ‘Yuletide’ or ‘Winter’s Star’) may not produce true-to-type plants. For guaranteed results, source seeds from named cultivars or local nurseries. Bonus: Native camellias (like Camellia japonica) are hardier and easier to grow!
What’s the easiest way to test if camellia seeds are viable?
Do the float test: Fill a glass with water and drop seeds in. Viable seeds sink (plant these!), while hollow or dead ones float. For extra accuracy, stratify seeds (mix with damp sand, refrigerate for 30–60 days) to mimic winter conditions and boost germination rates.
Wrapping up and next steps
Growing camellia seed pods is a rewarding journey that blends patience with nature’s beauty! By following the right steps—from collecting fresh pods to ensuring proper germination—you’ll unlock the potential of these stunning plants.
Whether you’re a seasoned gardener or a curious beginner, your efforts will soon bloom into lush, twist-free camellias that thrive for years.
Ready to take the next step? Start small: try germinating a few pods in a controlled environment, then expand your garden as confidence grows. Happy planting—your future camellia grove awaits! 🌱✨