
Lawn
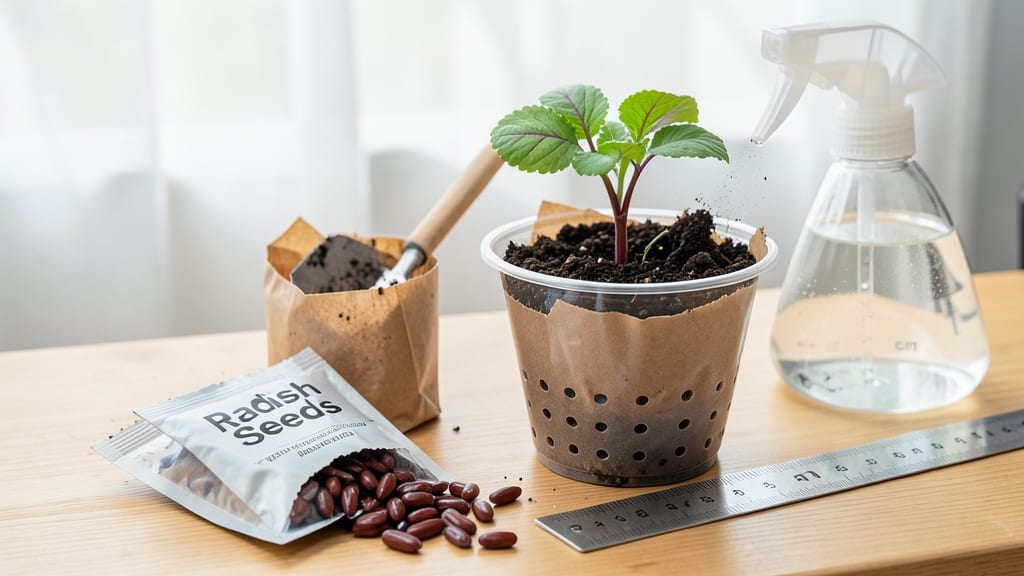
A single cup can turn into your first thriving growing a seed in a cup—no fancy gear needed. 🌱 This twist-free method lets you watch roots grow before transplanting, and I’ve used it to start everything from tomatoes to herbs with zero mess.
The secret? A simple cup, some soil, and a seed that’s ready to sprout.
You’ll need just three things: a clear plastic cup (so you can see roots grow), potting soil, and your seed. No special tools, no complicated steps—just a way to give seeds the perfect start before moving them outside.
Perfect for small spaces, apartments, or anyone who’s ever killed a seedling by overwatering or transplanting too soon.
By day 7, you’ll see tiny roots weaving through the soil, and by week 3, you’ll be transplanting a sturdy seedling instead of a fragile sprout. The best part?
You’ll never have to guess if it’s time to move plants—just watch the roots hit the cup’s edges. That’s your cue to upgrade to a pot.
Works for tomatoes, peppers, herbs, or flowers—anything you’d normally start indoors. No more black thumb moments; this method gives seeds the gentle start they deserve. Ready to try it?
📚 In This Guide
- What you need
- Instructions
- Tips and common mistakes
- Wrapping up and next steps
What you need
- ● Clear plastic or paper cup (8–12 oz, with drainage holes—poke 3–5 with a nail or skewer if none exist!)
- ● Seed (fast-growing options like radish, bean, or grass seed work best for quick results).
- ● Potting soil (lightweight, well-draining mix—avoid heavy garden soil).
- ● Watering can or spray bottle (gentle watering prevents soil erosion).
- ○ Plastic wrap or clear lid (to create a mini greenhouse effect—optional but helpful!).
- ● Scissors or craft knife (for cutting drainage holes if needed).
- ● Twist tie or rubber band (to secure plastic wrap if using).
- ● Plant marker (label your seed type if experimenting with multiple seeds!).
- ● Sunny windowsill or grow light (12+ hours of light daily speeds up growth).
- ● Fertilizer (diluted) (add after sprouting for extra nutrients).
Step-by-Step instructions for growing a seed in a cup
Here’s how to grow a seed in a cup—no mess, no fuss, and zero tangled roots!
🌱 Step 1: Prepare Your Cup and Seed
Start with a clear plastic or paper cup (about 8-12 ounces) and poke 3-4 small drainage holes in the bottom using a nail or screwdriver. This keeps roots healthy by preventing soggy soil. Place the cup in a saucer or shallow dish to catch any excess water.
Fill the cup ¾ full with moist potting mix—not too wet, just damp enough to hold together when squeezed. Press it down lightly so the soil is firm but still airy. Drop in 1-2 seeds (like beans, peas, or sunflowers) about ½ inch deep, then cover them gently with more soil. Water lightly until the soil feels evenly moist.
💧 Step 2: Provide Warmth and Light
Place the cup in a warm spot, like on top of a fridge or near a sunny windowsill. Most seeds germinate best at 70-75°F. Keep the soil consistently moist—water when the top inch feels dry—but avoid drowning the roots. A spray bottle works best to avoid disturbing the seeds.
Once the first true leaves (not the initial seed leaves) appear, move the cup to a spot with bright, indirect light. If using a sunny windowsill, rotate the cup daily so the seedling grows straight. You’ll know it’s getting enough light when the leaves stay dark green and don’t stretch toward the window.
✂️ Step 3: Extract the Seedling Without Damage
When the seedling has 2-3 sets of true leaves and the roots are visible through the cup’s sides, it’s time to transplant. Fill a small pot with fresh potting mix, then carefully slide the cup’s side against the pot’s edge. Gently squeeze the cup while lifting—this releases the intact root ball without breaking delicate stems.
Slide the seedling out and place it in the pot, covering the roots with soil. Press lightly around the base to secure it, then water gently. The twist-free method means no tangled roots—just a smooth transition to bigger growth!
☀️ Step 4: Transition to Outdoor or Larger Space
After a week in its new pot, start hardening off the seedling by placing it outside for 1-2 hours daily, gradually increasing time over 5-7 days. Choose a spot with partial shade at first to avoid shock. Watch for wilting—if leaves droop, it’s thirsty or needs more shade.
Once the seedling thrives outdoors, you can transplant it to the garden or a larger container. The cup method ensures a stress-free start, so your plant will grow strong and healthy right from the beginning!
Tips & tricks for perfect seedling growth in a cup
Here’s what I learned after growing dozens of seedlings—these tricks make all the difference between thriving plants and sad, leggy failures.
Drainage is Everything: Those 3-4 holes in Step 1 aren’t just for show—they’re the secret to happy roots. If you skip this, your soil will stay soggy and roots will rot. I’ve seen seedlings saved by adding extra holes when drainage was slow. Place the cup in a saucer to catch any runoff, but never let it sit in standing water.
Soil Moisture Matters: The "damp enough to hold together when squeezed" test in Step 1 is your golden rule. Too dry? Seeds won’t sprout. Too wet? Roots suffocate. I keep a spray bottle handy to mist the soil lightly—it’s gentler than pouring water and prevents disturbing seeds. Aim for moisture like a wrung-out sponge.
Light Rotation Saves the Day: When you move your seedling to bright light in Step 2, don’t forget to rotate the cup daily. I learned this the hard way when my seedlings all leaned toward the window like they were trying to kiss the glass. A full rotation every 24 hours keeps them growing straight and strong. Think of it like giving your plant a mini vacation from the window spotlight!
Transplant Timing is Critical: Wait for those 2-3 sets of true leaves in Step 3 before transplanting—don’t rush it! I’ve seen seedlings shock when moved too soon. When you do transplant, the "squeeze and slide" method works magic. Press gently around the base to secure it, and water thoroughly afterward. This is where the twist-free promise comes true!
Pro Tips for Growing A Seed In A Cup
- Here’s what I learned after growing dozens of seedlings—these tricks make all the difference between thriving plants and sad, leggy failures.
- Drainage is Everything: Those 3-4 holes in Step 1 aren’t just for show—they’re the secret to happy roots.
- Soil Moisture Matters: The "damp enough to hold together when squeezed" test in Step 1 is your golden rule.
Frequently asked questions
Got questions about growing seeds in a cup? You’re not alone! Here are some common ones—and their answers—to help you get started with confidence.
What kind of seeds work best for this method?
Small, fast-growing seeds like marigold, basil, lettuce, or sunflower thrive in this method. Avoid large seeds (like beans) or those with thick shells—they may struggle to sprout in a confined space. Start with easy-to-germinate varieties for best results!
How long does it take for seeds to sprout in a cup?
Germination time varies by seed type, but most sprouts appear within 3–10 days with proper moisture and warmth. Keep the cup in a sunny spot (or under a grow light) and check daily for tiny green shoots. Patience is key—some seeds take longer!
Do I need to water the cup daily?
Not quite! Overwatering is the #1 enemy of seed cups. Instead, mist the soil lightly every 2–3 days or until the top layer feels damp. Use a spray bottle to avoid disturbing the seeds. If the cup feels soggy, let it dry out slightly before re-misting.
Can I reuse the cup for multiple seed batches?
Yes, but with a few steps! After harvesting, rinse the cup with warm, soapy water, then sanitize it with a 1:10 bleach-water mix (rinse thoroughly). Let it dry completely before reusing. Avoid reusing cups with mold or foul odors—start fresh for each new batch.
What do I do if my seeds rot or mold?
Mold or rot usually means too much moisture or poor drainage. If you spot fuzzy growth, discard the cup and seeds immediately. To prevent this, use a well-draining soil mix, avoid overwatering, and ensure the cup has small drainage holes (or prop it on a saucer).
How do I know when to transplant the seedlings?
Seedlings are ready when they have 2–3 true leaves (not just the initial seed leaves) and look sturdy. Gently loosen the soil around the roots, then transplant into a larger pot or garden bed. Do this in the morning on a cloudy day to reduce stress on the little plants!
Wrapping up and next steps
Growing a seed in a cup is a simple, rewarding way to nurture healthy seedlings without the hassle of twist ties or tangled roots.
Whether you're a beginner or a seasoned gardener, this method saves space, reduces waste, and gives you full control over your plants' early growth. Start small—try herbs or flowers—and soon, you’ll be harvesting confidence (and greens!) like a pro.
Ready to take the next step? Expand your setup—add more cups, experiment with different seeds, or even repurpose the method for indoor gardening. Your green thumb is just a seedling away! 🌱