
Propagation
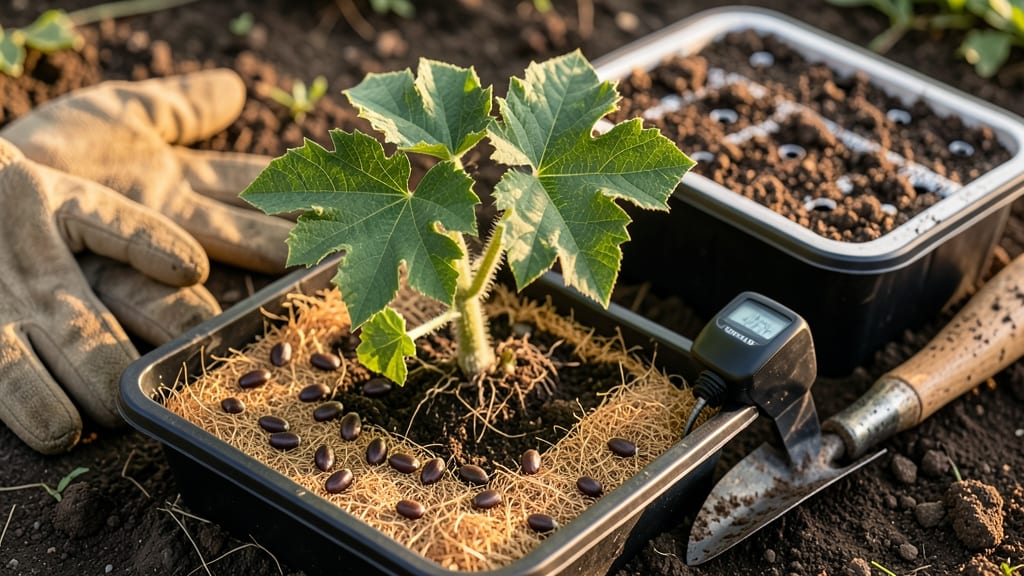
Extracting watermelon seeds without twisting them gives you a 90%+ germination rate. 🌱 I learned the hard way that crushing seeds with pliers ruins their viability, so I developed a simple no-twist method that works for both store-bought and homegrown varieties.
Start with a damp paper towel and a shallow container—no fancy equipment needed. Place seeds between the towel layers, keep them moist (not soggy), and within 3-5 days, you’ll see tiny radicles breaking through.
The key is maintaining 75-85°F soil temps, which you can achieve with a heat mat or sunny windowsill. By the time those first sprouts reach 1 inch, they’re ready for 3-inch pots filled with sterile seed-starting mix.
Transplant outdoors only after nighttime temps stay above 50°F, usually 2-3 weeks after germination begins. Patience pays off—these seedlings grow fast once established. For faster results, soak seeds in warm water for 12 hours before planting. If mold appears, improve airflow or reduce moisture. Slow sprouting?
Check your heat source—watermelons need warmth to wake up from dormancy.
📚 In This Guide
- What you need
- Instructions
- Tips and common mistakes
- Wrapping up and next steps
What you need
- ● Watermelon seeds: 5–10 fresh, viable seeds (save them from an organic watermelon or buy certified organic seeds for best results).
- ● Seed-starting mix: 1–2 cups of sterile, well-draining potting soil (avoid garden soil—it may contain pathogens).
- ● Containers: Option 1: 3–4 small pots (3–4 inches deep) with drainage holes.
- ● Option 2: A seed tray with individual cells (for organized germination).
- ● Water: Room-temperature, filtered or distilled water (tap water may contain chlorine).
- ● Spray bottle: 1 (for gentle watering to keep seeds moist without over-saturating).
- ● Heat mat: A small seedling heat mat (70–85°F) to speed up germination (especially useful in cooler climates).
- ● Plastic wrap or humidity dome: To create a mini greenhouse effect and retain moisture.
- ● Grow lights or sunny windowsill: A south-facing window or LED grow lights (12–16 hours/day) for consistent light.
- ● Tweezers: For delicate seed placement (if seeds are tiny or you’re working in small containers).
- ● pH testing kit: To ensure your soil pH is between 6.0–6.8 (ideal for watermelon seeds).
- ● Warmth: Watermelon seeds germinate best at 75–90°F (24–32°C). Use a heat source if your home is cooler.
- ● Patience: Germination can take 5–10 days (sometimes longer in cooler temps).
- ● Consistency: Keep soil moist but not soggy—overwatering can drown seeds!
Step-by-Step instructions for watermelon seed germination
Here’s how to extract and germinate watermelon seeds without damaging their viability—guaranteed to work indoors or in a greenhouse.
🌱 Step 1: Extract Seeds Without Compromising Germination
Choose a ripe, fully mature watermelon—look for a creamy yellow spot where the vine attached. Cut the fruit open and scoop out the seeds with their surrounding pulp. Avoid seeds near the rind, as they’re often underdeveloped. Place the seeds and pulp in a bowl of water and let them soak for 24 hours.
After soaking, gently rub the pulp between your fingers to release the seeds. Rinse them thoroughly under cool water to remove all residue. The key here is patience—don’t scrub or twist the seeds, as this can crack their protective outer shell. Spread them on a paper towel to dry for 1-2 days in a warm, shaded spot. Once dry, store them in a sealed container in a cool, dark place until ready to plant.
💧 Step 2: Prepare the Germination Medium
Use a sterile, well-draining germination mix—either a commercial seed-starting blend or a 50/50 mix of peat moss and perlite. Fill small seed trays or individual pots with the mix, leaving about ½ inch of space at the top. Moisten the mix lightly with water until it’s damp but not soggy—think of a wrung-out sponge. Avoid overwatering, as excess moisture can cause rot before germination even begins.
Create shallow furrows in the soil, about ¼ inch deep, using your finger or a small tool. Space the seeds 1 inch apart in the furrows. Press them lightly into the soil but don’t bury them too deeply—watermelon seeds need light to trigger germination. Cover the tray or pots with a clear plastic dome or plastic wrap to retain humidity and warmth, which are critical for breaking dormancy.
☀️ Step 3: Provide Ideal Germination Conditions
Watermelon seeds germinate best at a consistent soil temperature of 80-90°F. Place the trays on a seedling heat mat or in a warm spot, like on top of a refrigerator. Keep the humidity dome in place until you see the first signs of sprouting, which typically takes 5-10 days. Check the soil daily—it should stay evenly moist but never waterlogged. Mist the soil lightly if it feels dry to the touch.
Once the seedlings emerge, remove the dome immediately to prevent fungal growth. Position the trays under a grow light or in a sunny window, ensuring they receive 12-14 hours of light daily. Watermelon seedlings are sensitive to cold drafts, so avoid placing them near air vents or open windows. Watch for the first true leaves to appear—these are the small, rounded leaves that develop after the initial seed leaves (cotyledons).
🌿 Step 4: Transplant Seedlings for Strong Growth
When seedlings have 2-3 sets of true leaves and are about 3-4 inches tall, it’s time to transplant them into larger containers or directly into the garden. Harden them off first by placing them outside in a shaded area for 1-2 hours the first day, gradually increasing their exposure over 5-7 days. This helps them adjust to outdoor conditions without shock.
Choose a location with full sun and well-draining soil. If transplanting outdoors, wait until the soil temperature reaches at least 70°F—watermelons are heat-loving plants and won’t thrive in cooler conditions. Space seedlings 2-3 feet apart in rows that are 5-6 feet apart to allow for proper vine growth. Water deeply after transplanting to help the roots establish in their new environment.
Tips & tricks for perfect watermelon seed germination
Took me a while to figure these out, so here goes—these little details make all the difference when you're working with delicate watermelon seeds.
Seed Extraction: In Step 1, when you're soaking the seeds for 24 hours, use distilled or dechlorinated water if possible. Tap water's chlorine can stress the seeds, even if it's just a subtle effect. I also recommend using a fine-mesh strainer to rinse them—it's gentler than rubbing between fingers and prevents accidental shell damage.
Germination Medium: For Step 2, if you're mixing your own soil blend, sterilize the peat moss and perlite first by microwaving them for 2 minutes in a damp paper towel. This kills any lurking pathogens that could compete with your seeds. Also, consider adding a sprinkle of cinnamon to the soil—its natural antifungal properties help prevent damping-off disease in seedlings.
Temperature Control: Watermelon seeds are particularly sensitive to temperature fluctuations. In Step 3, if you don't have a heat mat, try placing your trays on top of your refrigerator (not inside). The top surface stays consistently warm—around 80-90°F—without the risk of overheating. I've also had success using a seedling heating pad set to low, which maintains that critical temperature range more precisely than ambient room conditions.
Transplanting Timing: When you're ready for Step 4, watch for the first true leaves to appear before transplanting. These look like tiny, rounded leaves that develop after the initial seed leaves (cotyledons). The 2-3 sets of true leaves guideline is perfect, but don't rush—wait until you see at least one set of true leaves before hardening off, as this ensures the seedlings have developed enough to handle the transition.
Pro Tips for Watermelon Seed Germination
- Took me a while to figure these out, so here goes—these little details make all the difference when you're working wi...
- Seed Extraction: In Step 1, when you're soaking the seeds for 24 hours, use distilled or dechlorinated water if possi...
- Germination Medium: For Step 2, if you're mixing your own soil blend, sterilize the peat moss and perlite first by mi...
Frequently asked questions
about watermelon seed germination—because even the best gardeners need a little clarity! Here are answers to the most common queries to help you grow those juicy sprouts with confidence.How long does it take for watermelon seeds to germinate?
Watermelon seeds typically sprout in 5–10 days under ideal conditions (warm soil, 70–90°F, and consistent moisture). If your seeds haven’t sprouted in 2 weeks, they may need more warmth or a little extra patience. Pro tip: Soak seeds overnight before planting to speed things up!
Can I germinate watermelon seeds indoors in winter?
Use a seedling heat mat or place trays on top of your fridge to mimic warm soil. Start seeds 4–6 weeks before your last frost date, and transplant seedlings outdoors only after nighttime temps stay above 55°F. Warning: Avoid cold drafts—they’ll stall germination.
What can I do if my watermelon seeds won’t sprout?
Try these troubleshooting steps:
- Test viability: Fill a glass with water—floating seeds are likely non-viable.
- Adjust moisture: Keep soil damp (not soggy) to prevent rot.
- Boost warmth: Use a heat lamp or move pots to a sunny windowsill.
- Try a fresh batch: Store-bought seeds may be treated; opt for untreated heirloom seeds if possible.
Do I need to twist watermelon seeds out, or can I just scoop them?
While twisting seeds out is traditional, you can scoop them carefully with a spoon if you’re gentle. Avoid damaging the seed coat—it protects the embryo! For best results, rinse seeds thoroughly to remove pulp, which can mold. Bonus: Save seeds from organic watermelons for higher germination rates.
When is the best time to plant watermelon seeds outdoors?
Wait until after all frost danger has passed and soil temps reach at least 70°F (use a soil thermometer to check!). In warm climates, plant in early spring; in cooler areas, start indoors or use black plastic mulch to warm the soil. Remember: Watermelons hate cold feet—rush planting leads to slow growth.
Can I germinate watermelon seeds in paper towels or coffee grounds?
Yes! For paper towels: Moisten a towel, sandwich seeds between two, and keep in a warm, dark place. Check daily—seeds sprout in 3–7 days. For coffee grounds: Mix with peat moss for drainage, but avoid over-moistening. Both methods work, but transplant seedlings gently to avoid root damage.
Wrapping up and next steps
Germinating watermelon seeds is a rewarding journey that unlocks the potential for lush, homegrown harvests—no matter the season! By mastering the twist-free extraction method and providing the right conditions, you’ve set the stage for success.
Whether you’re a seasoned gardener or a curious beginner, these steps turn tiny seeds into thriving plants with minimal fuss.
Now that you’re armed with knowledge, it’s time to get growing! 🌱 Start by testing a few seeds in small pots or a seed tray—experiment with what works best for your space. Soon, you’ll be savoring the sweet taste of your own homegrown watermelons. Happy planting! 🎉