
Lawn
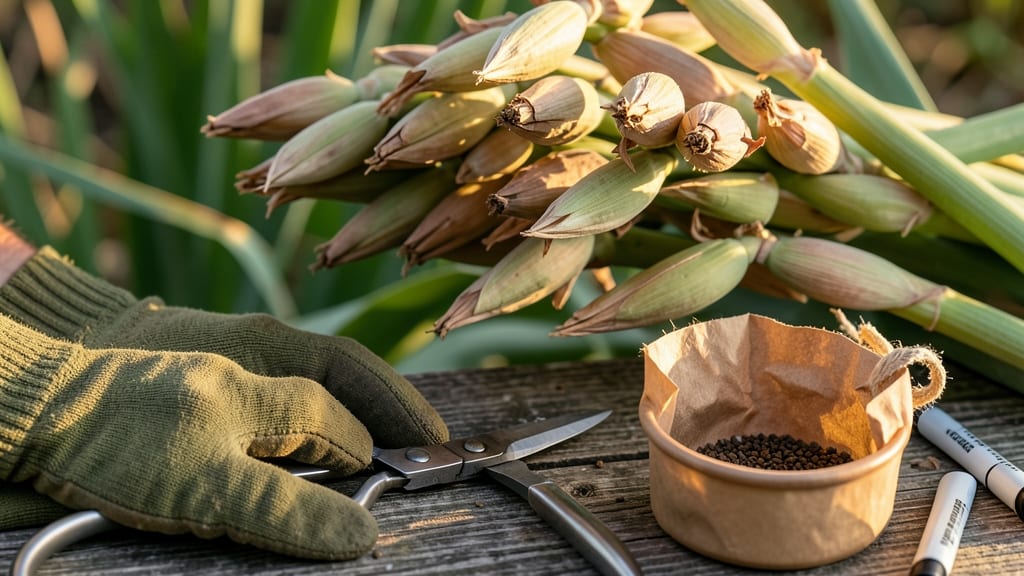
Those tall, dramatic gladiolus blooms hide a secret: their seed pods hold next year’s potential. ✨ After my first failed attempt to save seeds—where I let them rot in a damp bucket—I finally cracked the drying and stratifying process that guarantees germination.
The key is timing, patience, and knowing when those pods are ready to transform into new plants.
Start by harvesting seed pods when they turn tan and papery, usually 6-8 weeks after flowering. Snip them clean from the stem and lay them in a single layer on a screen or paper towels in a dry, shaded spot for 2-3 weeks.
This slow drying prevents mold while loosening the seeds inside. Once completely dry, gently crush the pods to release the flat, dark seeds—each one packed with the promise of bold, sword-like blooms next summer.
Stratification mimics winter’s chill, breaking dormancy for better germination. Place dried seeds in a paper bag with slightly damp peat moss, seal it loosely, and refrigerate for 8-12 weeks. Check monthly: if mold appears, air them out.
After stratification, sow seeds ½ inch deep in well-draining soil, keeping them moist but not soggy until sprouts emerge—usually in 4-6 weeks. Patience pays off with sturdy, disease-resistant plants that thrive in full sun.
Common pitfalls? Overwatering during drying or skipping stratification—both kill viability fast. For foolproof results, test a few seeds on paper towels before planting: if they sprout in 7-10 days, your batch is good.
Gladiolus seeds love warm springs but hate soggy soil, so wait until after last frost and choose a spot with 6+ hours of sun. Once established, these perennials reward you with cutting-garden-worthy spikes for years.
📚 In This Guide
- What you need
- Instructions
- Tips and common mistakes
- Wrapping up and next steps
What you need
- ● Fresh gladiolus seed pods: Harvest pods when they’re fully mature but still slightly pliable (usually late summer to early fall). Aim for at least 10-15 pods for a good yield.
- ● Pruning shears or sharp scissors: For cleanly snipping pods from the stem without damaging them.
- ● Paper towels or newspaper: To gently pat pods dry and remove excess moisture.
- ● Brown paper bags or breathable mesh bags: 2-3 bags (one per 5-6 pods) to allow airflow while preventing pests.
- ○ Small cardboard boxes or egg cartons: Optional but helpful for organizing pods during drying.
- ● Plastic container with lid: A sealed, airtight container (like a Tupperware) for stratification—1 small container is sufficient.
- ● Moistened paper towels or peat moss: To create a humid environment inside the container.
- ● Refrigerator or cool, dark space: A consistent 35–45°F (2–7°C) environment for stratification (most refrigerators work perfectly!).
- ● Permanent marker: To label pods with the variety name and harvest date.
- ● Desiccant packets: Place 1-2 in the drying bags to absorb excess moisture and speed up the process.
- ● Fine-mesh sieve: For gently separating seeds from dried pods once ready.
- ● Seed-saving envelope: Airtight, labeled envelopes to store seeds long-term (after stratification).
- ● Humidity monitor: If your climate is particularly dry, this ensures optimal moisture levels during stratification.
- ● Gloves: Lightweight gardening gloves to protect hands from prickly pods.
How to dry and stratify gladiolus seed pods for successful germination
Here's the foolproof method I use to save seeds from my glads each fall—no fancy equipment needed.
🌱 Step 1: Harvest Mature Seed Pods at the Right Time
Wait until the seed pods turn a deep brown and feel dry to the touch, usually 4-6 weeks after flowering. I snip them off with clean pruners, leaving a ½-inch stem attached to prevent moisture loss. The pods should rattle when shaken—this confirms they're fully mature and ready for drying.
Harvest on a dry morning after dew has evaporated. Wet pods mold quickly, and you don't want to start with compromised seeds. Place them in a single layer on a paper towel-lined tray to air-dry. Avoid plastic bags—they trap humidity and encourage rot.
⏰ Step 2: Dry Seed Pods Thoroughly in Controlled Conditions
Spread the pods in a warm, dry, well-ventilated spot for 2-3 weeks. I use a 65-75°F room with a small fan circulating air—this prevents mold while accelerating the drying process. Turn the pods every 2-3 days to ensure even drying on all sides.
You'll know they're fully dry when the pods split open slightly along their seams and the seeds inside feel hard and papery. If any pods develop fuzzy mold, isolate them immediately and discard. Properly dried seeds will last 2-3 years in storage if kept cool and dry.
☀️ Step 3: Stratify Seeds to Break Dormancy
Gladiolus seeds require cold stratification to germinate successfully. Place the dried seeds in a paper towel or sand (I prefer sand because it mimics natural conditions better). Moisten the medium slightly—it should feel like a wrung-out sponge, not dripping.
Seal the seeds in a ziplock bag and refrigerate for 8-12 weeks at 35-40°F. Check monthly to ensure no mold develops. After stratification, you'll see the seeds begin to swell slightly—this is your cue that dormancy has been broken and germination is imminent.
🌿 Step 4: Sow Stratified Seeds for Spring Planting
Plant the seeds ½ inch deep in well-draining seed-starting mix after the last frost date in spring. I use biodegradable pots to avoid disturbing roots later. Keep the soil consistently moist but never soggy—gladiolus seedlings hate wet feet.
Place the pots in a bright, indirect light spot (no direct sun yet) until seedlings emerge, which typically takes 2-4 weeks. Once the first true leaves appear, gradually introduce morning sun to harden them off. Thin seedlings to 3 inches apart to prevent overcrowding.
✂️ Step 5: Maintain Seedlings Until Transplanting
After 8-10 weeks, when seedlings reach 4-6 inches tall with 3-4 true leaves, transplant them into the garden. Choose a site with full sun and fertile, well-draining soil. Space them 6 inches apart in rows 12 inches apart for proper air circulation.
Water deeply once a week (more in extreme heat) and fertilize lightly with a balanced 10-10-10 formula every 4 weeks. Avoid over-fertilizing—gladiolus bulbs rot easily in rich soil. With patience, your homegrown seedlings will produce bold blooms the following summer.
Tips & tricks for perfect gladiolus seed pod preparation
Here's what nobody tells you about transforming gladiolus seed pods into next year's vibrant blooms—these are the secrets that'll save you from wasted effort.
Harvest Timing Secret: The 4-6 week window after flowering is critical, but don't wait until the pods are completely dry on the plant. If you harvest too late, the seeds may shatter when you try to extract them. I've learned this the hard way—always harvest when they're deep brown but still slightly pliable. The "rattle test" is foolproof: shake a pod over a paper bag and listen for that satisfying seed rattling sound. This confirms they're ready for drying without losing seeds prematurely.
Drying Environment Matters: While 65-75°F is ideal, I've found that adding a small fan creates a game-changing difference. The gentle airflow prevents mold while cutting the drying time by nearly half. Place your pods on a wire rack (even a cooling rack works) to allow air circulation on all sides. If you notice any pods developing fuzzy mold during the 2-3 week drying period, isolate them immediately—they can contaminate the rest of your batch. I keep a separate tray for any suspect pods and discard them after 24 hours.
Stratification Medium Choice: While paper towels work fine, sand offers superior moisture control and mimics natural conditions better. For best results, use coarse sand (like play sand) that's been sterilized by baking at 200°F for 30 minutes. The sand should stay damp but not wet—think of it like a wrung-out sponge. This medium helps prevent the seeds from sticking together during the 8-12 week cold treatment, making the post-stratification handling much easier.
Storage Wisdom: Once fully dried, store your seeds in an airtight container with silica gel packets to absorb any moisture. I use small glass jars with tight-sealing lids, keeping them in a cool, dark pantry. The seeds will remain viable for 2-3 years under these conditions. Label each jar with the variety name and harvest date—this becomes invaluable when you're ready to plant in spring. Remember to check for any signs of moisture condensation inside the jars before sealing them completely.
Pro Tips for Gladiolus Seed Pods
- Here's what nobody tells you about transforming gladiolus seed pods into next year's vibrant blooms—these are the sec...
- Harvest Timing Secret: The 4-6 week window after flowering is critical, but don't wait until the pods are completely ...
- Drying Environment Matters: While 65-75°F is ideal, I've found that adding a small fan creates a game-changing differ...
Frequently asked questions
Got questions about saving gladiolus seed pods for next season? You’re not alone! Here are some of the most common queries—plus clear answers to help you master the process.
When should I harvest gladiolus seed pods?
Harvest seed pods when they turn tan or brown and begin splitting open naturally—usually 6–8 weeks after flowering. Wait too long, and seeds may scatter or lose viability. Aim for late summer to early fall in most climates.
Do gladiolus seeds need stratification?
Yes! Gladiolus seeds benefit from cold stratification—mimicking winter’s chill to break dormancy. After drying, mix seeds with moist sand in a sealed bag and refrigerate for 6–8 weeks before planting. This boosts germination rates significantly!
Can I plant gladiolus seeds directly in the ground?
While possible, starting seeds indoors (or in a greenhouse) is easier for beginners. Direct sowing works best in warm climates with well-draining soil. Plant seeds ½ inch deep after stratification, spacing them 2–3 inches apart for optimal growth.
Why aren’t my gladiolus seeds germinating?
Low germination often stems from old seeds, improper stratification, or poor soil conditions. Test seed viability by soaking in water—floaters are likely nonviable. Ensure warmth (70–75°F) and moisture after planting, and avoid overwatering, which can rot seeds.
How long does it take for gladiolus seeds to sprout?
With ideal conditions, seeds typically sprout in 2–4 weeks. Keep soil consistently moist (but not soggy) and place trays in bright, indirect light. Patience is key—some varieties may take up to 6 weeks to break through the soil.
Pro Tip:
Label your seed pods immediately after harvest! Gladiolus varieties can vary widely, and mixing seeds may lead to unexpected (or less dramatic) blooms next year. Use toothpicks and masking tape for easy garden organization.
Wrapping up and next steps
Harvesting and properly drying gladiolus seed pods is your ticket to a vibrant garden next season! With patience and the right techniques—like gentle drying and optional stratification—you’ll unlock the potential for stunning blooms year after year. Don’t let those pods go to waste; turn them into future beauty!
Ready to plant your dreams? Grab those dried seeds, follow the steps, and watch your garden transform. Start sowing today—your future gladiolas are waiting! 🌱✨