
Propagation
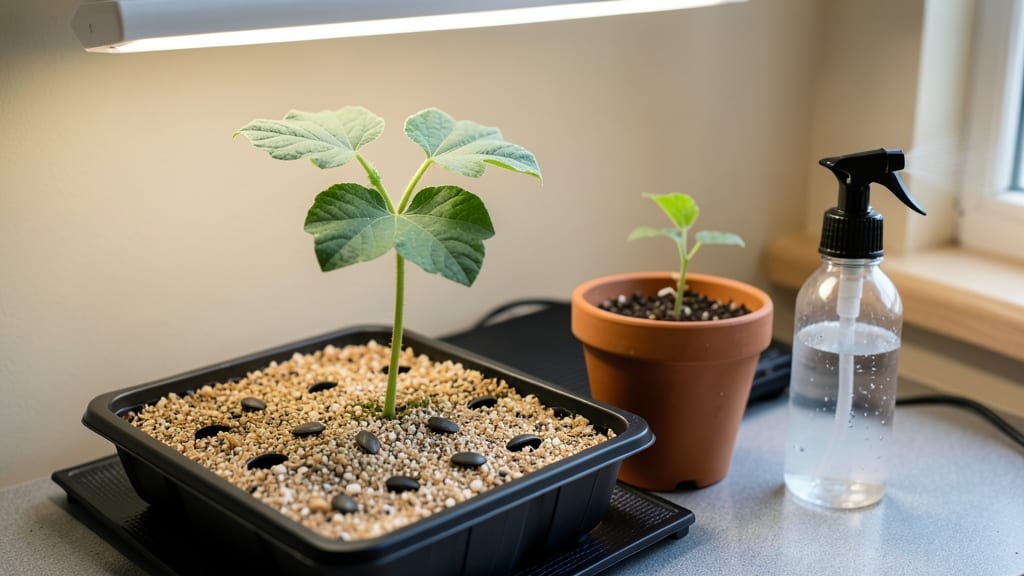
Growing watermelon from seed indoors isn't just possible—it's a fast way to get a head start on summer's juiciest crop. 🌱 I've turned my sunroom into a mini watermelon greenhouse, and the secret lies in mimicking the warm, humid conditions these vines crave before they even hit the soil outside.
The right variety makes all the difference—look for compact types like 'Sugar Baby' or 'Tiny Tim' that thrive in containers and won't outgrow your space. You'll need a heat mat to keep soil between 75-85°F, bright grow lights (14+ hours daily), and pots with drainage.
Germination happens in 3-7 days—just don't let the soil dry out.
By the time you transplant outdoors, your seedlings will be stocky and leafy, ready to take over your garden. The first harvests arrive 60-70 days after transplanting, and the sweetest melons come from vines that spent their early days indoors under perfect conditions.
This method works best in zones 3-10—just adjust your transplant timing to avoid frost. Even if you're new to seed starting, watermelons are surprisingly forgiving once you nail the heat and light. Let's get those seeds sprouting!
📚 In This Guide
- What you need
- Instructions
- Tips and common mistakes
- Wrapping up and next steps
What you need
- ● Watermelon seeds: 3–5 seeds (choose a compact or dwarf variety like 'Sugar Baby' or 'Tiny Tim' for indoor success).
- ● Seed-starting trays or small pots: 2–4 (4–6 inches deep) with drainage holes. Pro tip: 💡 Use biodegradable peat pots if transplanting later!
- ● High-quality seed-starting mix: 2–3 cups (sterilized, peat-based or coconut coir blend). Avoid garden soil—it’s too heavy!
- ● Grow lights or sunny windowsill: 12–16 hours of light daily (full-spectrum LED or fluorescent bulbs work best).
- ● Plastic wrap or humidity dome: 1 sheet (to create a mini greenhouse for germination).
- ● Spray bottle: 1 (for gentle watering).
- ○ Heat mat (optional but helpful): 1 (70–85°F range speeds up germination).
- ● Fertilizer: Balanced liquid fertilizer (5-5-5 or 10-10-10, diluted to half-strength).
- ○ Support stakes or trellis (optional): 1–2 (for vining varieties, even indoors!).
- ○ Thermometer/hygrometer (optional): 1 (to monitor warmth and humidity).
- ● Patience (germination takes 5–10 days).
- ● Dedicated space with consistent warmth (70°F+).
- ● Commitment to daily light and water checks!
Step-by-Step instructions for growing watermelon from seed indoors
Here's how to get those vines thriving indoors—no greenhouse needed.
🌱 Step 1: Prepare Containers and Seed Starting Mix
Watermelon seeds need warmth and moisture to germinate quickly, so start with 4-inch deep containers (one per seedling) filled with sterile seed-starting mix. I avoid garden soil—it's too dense and often carries pathogens that slow germination. Mix in one part perlite to improve drainage and prevent root rot.
Fill each container to 1 inch below the rim, then press the mix down lightly with your fingers until it's firm but not compacted. This creates a stable base for the seedling's roots. Water the mix until it's evenly moist—not soggy, just damp enough that a pinch leaves a slight imprint. This ensures consistent moisture without waterlogging.
🌱 Step 2: Sow Seeds at the Right Depth for Fast Germination
Watermelon seeds are large, so plant one seed per container at a depth of 1 inch—about three times the seed's diameter. Press the seed gently into the soil, then cover it with a thin layer of additional mix. The key here is warmth: place the containers in a 75-85°F environment, like on top of a refrigerator or under a heat mat.
Mist the soil surface lightly with a spray bottle to settle the mix around the seed. Overwatering now can cause the seed to float or rot before it germinates. Keep the soil consistently moist (not wet) until you see sprouts in 5-7 days. If your home runs cooler, germination may take 10-14 days—patience is key here.
☀️ Step 3: Provide Bright Light and Prevent Leggy Growth
The moment those first true leaves appear, move the seedlings under 14-16 hours of bright light daily. A south-facing window works, but watermelons grow leggy quickly without enough intensity. I use a full-spectrum LED grow light positioned 4-6 inches above the plants—raise it as the seedlings grow to maintain that distance.
Leggy seedlings (thin stems, leaves spaced far apart) mean your light isn't strong enough. If you notice this, lower the light immediately. Strong seedlings have thick stems, deep green leaves, and compact spacing between nodes. Rotate the containers quarter-turn daily so plants grow straight instead of leaning toward the light.
🪴 Step 4: Transplant Outdoors After Hardening Off
Once seedlings have 4-5 true leaves (about 3-4 weeks after sowing), it's time to harden them off. Start by placing them outside in a sheltered, shaded spot for 1-2 hours the first day. Gradually increase outdoor time by 1 hour daily over 10-14 days, introducing more sun and wind gradually.
Watermelons hate cold soil, so wait until nighttime temperatures stay above 55°F before transplanting. Choose a sunny, well-draining spot in your garden with at least 8 hours of direct sun. Plant each seedling 12-18 inches apart in rows 5-6 feet apart—this gives vines room to sprawl without crowding.
💧 Step 5: Maintain Moisture and Support for Healthy Vines
Watermelons need consistent moisture, especially during flowering and fruiting. Water deeply 2-3 times per week, soaking the soil to 6 inches deep. Mulch around the base with 2-3 inches of straw to retain moisture and suppress weeds. Avoid overhead watering once flowers appear—wet blossoms can lead to poor fruit set.
As vines grow, train them along a trellis or strong stakes to save space and improve airflow. Prune side shoots to 2-3 main vines per plant to focus energy on fruit production. Watch for yellowing leaves—this often signals overwatering or nutrient deficiency. Adjust watering or add a balanced fertilizer (10-10-10) every 2-3 weeks for best results.
Tips & tricks for perfect indoor watermelon germination
These pro moves will help you skip the common pitfalls and get your watermelon seeds sprouting faster than you'd expect.
Warmth is Non-Negotiable: That 75-85°F range in Step 2 isn't just a suggestion—it's the magic window where watermelon seeds activate their germination enzymes. I've seen seeds take twice as long when kept at room temperature (around 68°F). For fastest results, place your containers on top of your fridge or use a seedling heat mat. If your home runs cooler, consider a small greenhouse dome over each container to trap warmth.
Light Matters More Than You Think: In Step 3, when you're setting up that 14-16 hour light cycle, don't skimp on intensity. A south-facing window might work initially, but watermelon seedlings will quickly become leggy if the light isn't strong enough. I've had better success with a full-spectrum LED grow light—it mimics sunlight's spectrum and prevents that weak, stretched growth. Position it just 4-6 inches above the seedlings at first, then raise it as they grow. The moment you see leaves touching the light, it's too close.
Moisture Balance is Critical: The instructions mention keeping soil "evenly moist," but here's the thing: watermelon seeds need consistent moisture without being waterlogged. In Step 1, after filling your containers, I recommend using a spray bottle to water rather than pouring from above. This prevents seed displacement and creates a more stable environment. For the germination phase (Step 2), check moisture daily—press your finger about 1/2 inch into the soil. If it feels dry, water lightly; if it's damp but not soggy, you're good.
Transplant Timing Secret: When you're ready for Step 4's hardening off process, don't rush it. Those first 1-2 hours outside should be in partial shade, even if your garden gets full sun. Sudden exposure can shock the delicate seedlings. I've found that gradually increasing sunlight over 10-14 days prevents the kind of sunburn you might see on leaves that turn white or yellow. Also, watch your nighttime temperatures—if they dip below 55°F, your seedlings will struggle to establish roots in cold soil.
Pro Tips for Growing Watermelon From Seed Indoors
- These pro moves will help you skip the common pitfalls and get your watermelon seeds sprouting faster than you'd expect.
- Warmth is Non-Negotiable: That 75-85°F range in Step 2 isn't just a suggestion—it's the magic window where watermelon seeds activate their germination enzymes.
- Light Matters More Than You Think: In Step 3, when you're setting up that 14-16 hour light cycle, don't skimp on intensity.
Frequently asked questions
Got questions about growing watermelons from seed indoors?
You’re not alone! Here are answers to the most common queries to help you crush those seed-starting doubts.
How long does it take for watermelon seeds to germinate indoors?
Watermelon seeds typically sprout in 5–10 days indoors, depending on warmth and moisture. Use a heat mat (75–85°F) to speed it up—consistent warmth is key! If they don’t sprout in 2 weeks, they may be bad or too cold.
When should I transplant indoor watermelon seedlings outdoors?
Wait until nighttime temps stay above 55°F (usually late spring) and seedlings have 3–4 true leaves. Harden them off for 7–10 days first—gradually expose them to outdoor conditions to avoid shock.
Can I grow watermelons indoors year-round?
Not easily! Watermelons need long daylight hours (12+ hours) and warm temps to thrive. Use grow lights (14–16 hours/day) and a sunny window, but expect smaller fruits. For full-size melons, transplant outdoors in summer.
Why are my watermelon seedlings wilting or turning yellow?
Common culprits: overwatering (root rot), underwatering (dry soil), or nutrient deficiency. Check soil moisture (keep it damp but not soggy) and use a balanced fertilizer. Yellow leaves? Might need more nitrogen.
What’s the best indoor container size for watermelon seeds?
Start with biodegradable pots (2–3 inches deep) for seeds, then transplant to 5-gallon containers or larger (watermelons have sprawling roots!). Ensure drainage holes are present—no soggy bottoms!
Wrapping up and next steps
Growing watermelon from seed indoors is a rewarding journey that combines patience, care, and a little creativity! 🌱 With the right setup—like proper lighting, warmth, and consistent moisture—you’ll be well on your way to nurturing sweet, homegrown watermelons.
Whether you’re a beginner or a seasoned gardener, this method proves that great things come from tiny seeds.
Now that you’re armed with tips and tricks, take the next step: start your seeds today! Track your progress, adjust as needed, and soon you’ll be harvesting the fruits of your labor. Happy growing—your future watermelon feast awaits! 🍉✨