
Lawn
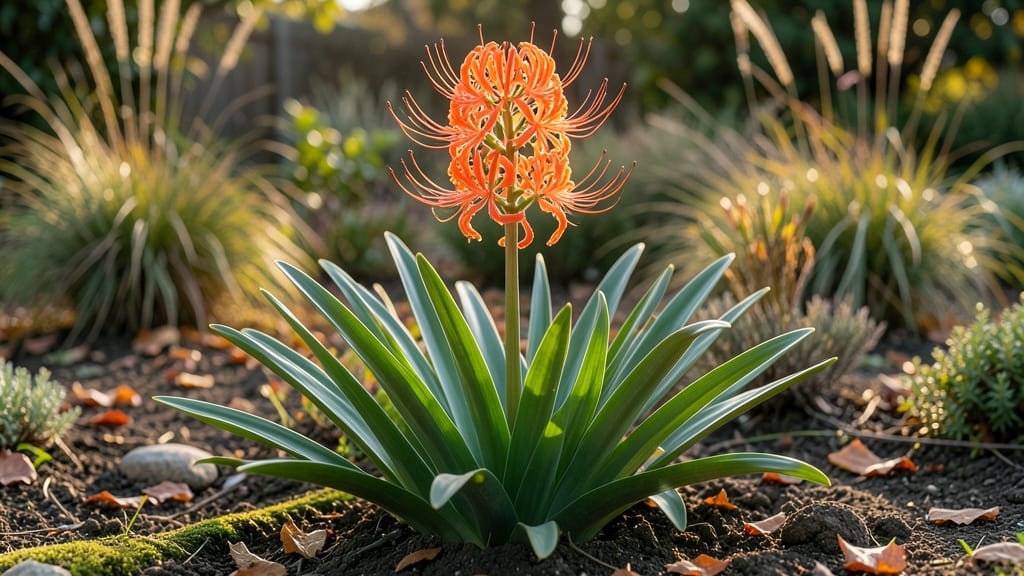
Harvesting blackberry lily seed pods before they twist open means year-round blooms starting next spring. 🌱 I’ve learned the hard way—wait too long, and those pods explode all over your garden, scattering seeds everywhere.
The key is timing: harvest when the pods turn from green to a deep, papery brown, usually in late summer or early fall. You’ll need just a few tools: sharp pruning shears, a paper bag for collecting pods, and a flat surface for drying.
Once you’ve gathered them, lay the pods out in a single layer to dry completely—this prevents mold and ensures the seeds stay viable. Store them in an airtight container in a cool, dry place until planting season. The payoff?
Fresh blackberry lilies popping up in your garden earlier than store-bought plants, with those signature orange-red blooms that hummingbirds adore. Even if germination takes a few tries, the reward is worth it—these perennials multiply like crazy once established.
Works in full sun or partial shade, and the seeds thrive in almost any well-draining soil. Here’s how to make it foolproof the first time around.
📚 In This Guide
- What you need
- Instructions
- Tips and common mistakes
- Wrapping up and next steps
What you need
- ● Blackberry lily seed pods: Freshly matured pods (deep purple/black when ripe, usually late summer to fall). Aim for at least 10-15 pods for reliable germination.
- ● Pruning shears or sharp scissors: Sterilized to prevent disease transfer. Look for bypass-style shears for clean cuts.
- ● Paper towels or newspaper: For drying and separating seeds. Use 2-3 sheets per batch of pods.
- ● Brown paper bags or breathable mesh bags: 2-3 bags (1-2 ft in size) for temporary seed storage before processing.
- ● Small bowls or containers: 2-4 shallow containers (e.g., ceramic or glass) for seed separation.
- ● Labeled envelopes or small jars: 5-10 with your name/date for long-term seed storage.
- ○ Rubbing alcohol (70% isopropyl) and cotton swabs: For sterilizing tools and seed pods (optional but highly recommended).
- ● Permanent marker: For labeling storage containers.
- ● Seed packet: A pre-labeled packet to organize seeds by variety or harvest year.
- ● Desiccant packets: For long-term storage to absorb moisture in sealed containers.
- ● Magnifying glass: To inspect seeds for pests or damage before planting.
- ● Gloves: Nitrile or latex gloves if you’re sensitive to plant sap or dirt.
- ● Notebook or app: To track seed pod maturity dates, storage conditions, and germination notes.
- ● Humidity pack or seed vault: For climate-controlled storage (ideal for large collections).
- ● A healthy blackberry lily plant (Belamcanda chinensis) with mature seed pods.
- ● Access to a well-ventilated, dry workspace (e.g., garage, porch, or kitchen counter).
- ● Basic knowledge of seed pod maturity—wait until pods turn deep purple/black and split open naturally.
- ● Patience! Seed pods may take 1-2 weeks to fully dry post-harvest.
Step-by-Step guide to harvesting blackberry lily seed pods
Here’s how to collect seed pods without breaking them—so you can grow more of these striking plants next season.
🌱 Step 1: Identify Mature Seed Pods
Blackberry lily seed pods start as bright orange berries and ripen to a deep red when ready for harvest. Look for pods that feel slightly soft but not mushy—this means the seeds inside are fully developed. I always check pods in late summer or early fall, just as the foliage begins to yellow and die back.
Gently squeeze the pod between your fingers. If it gives slightly but doesn’t squish, it’s time to harvest. If it’s still hard, wait a few more days. Overripe pods will burst open on their own, spilling seeds everywhere, so timing is key.
✂️ Step 2: Harvest Without Twisting or Breaking
Use clean, sharp scissors or pruning shears to cut the stem just above the pod. Twisting or pulling can damage the pod and make it harder to open later. I like to make a clean cut at a slight angle to prevent water from pooling on the stem stub, which could cause rot.
Place the harvested pods in a paper bag or breathable mesh sack. Avoid plastic containers—they trap moisture and can cause the pods to mold before you’re ready to process them. Label the bag with the date to track ripeness if you’re storing them for later.
🪴 Step 3: Dry and Store Seed Pods Properly
Spread the pods out in a single layer on a tray lined with paper towels. Place them in a warm, dry spot with good airflow—like a sunny windowsill or a well-ventilated room. It should take about 1-2 weeks for the pods to dry completely. They’re ready when they’re light and papery to the touch.
Once dry, store the pods in an airtight container filled with silica gel or rice to absorb excess moisture. Keep them in a cool, dark place, like a pantry or seed storage box. Properly stored, these pods can remain viable for 1-2 years, giving you plenty of time to plant them when conditions are right.
🌿 Step 4: Plant Dried Seed Pods for Next Season
When you’re ready to sow, gently crush the dried pods with your fingers to release the seeds. Scatter them lightly on the surface of moist, well-draining soil in late winter or early spring. Blackberry lilies thrive in partial shade to full sun and prefer soil that’s rich in organic matter.
Press the seeds lightly into the soil—just enough to cover them with a thin layer of dirt. Water gently but thoroughly, keeping the soil consistently moist until germination, which typically occurs in 4-8 weeks. Avoid overwatering, as soggy soil can cause the seeds to rot.
⏰ Step 5: Encourage Year-Round Blooms
After planting, mulch around the base of the seedlings with 2-3 inches of organic mulch to retain moisture and suppress weeds. Blackberry lilies are hardy perennials, but they benefit from a light feeding of balanced fertilizer in early spring to encourage strong growth and abundant blooms.
Once established, these plants will naturalize and spread on their own, giving you more striking orange flowers year after year. If you want to ensure a continuous display, harvest a few pods from different plants each season to maintain genetic diversity in your garden.
Tips & tricks for perfect blackberry lily seed pod harvesting
Real talk: Harvesting these delicate pods without destroying them takes patience—but these tricks will help you nail it every time.
Pod Ripeness Test: The squeeze test in Step 1 is your best friend. A mature pod should give just slightly under gentle finger pressure, like a ripe peach. If it springs back immediately, it needs more time; if it squishes easily, you’ve missed the window. I’ve learned this the hard way after watching overripe pods explode all over my garden tools!
Cutting Technique: That slight angle cut in Step 2 isn’t just for looks—it’s about preventing water damage. When rain hits a flat-cut stem stub, it pools and rots the pod. A 30-degree angle lets water run off naturally. Use pruning shears for clean cuts; scissors can crush the delicate stem and damage the pod’s integrity.
Drying Strategy: For Step 3’s 1-2 week drying period, I recommend placing your tray near a fan on low setting. This creates gentle airflow without creating drafts that could scatter your pods. Check daily—pods are ready when they rattle slightly when shaken (like a dry corn husk). Too much heat speeds up drying but can make pods brittle and harder to open later.
Planting Timing: The late winter/early spring window in Step 4 is critical for germination success. In colder climates, wait until after the last frost date—blackberry lily seeds need consistent soil temperatures around 60°F to sprout. I mark my calendar for this date each year so I don’t miss the perfect planting window.
Pro Tips for Blackberry Lily Seed Pods
- Real talk: Harvesting these delicate pods without destroying them takes patience—but these tricks will help you nail ...
- Pod Ripeness Test: The squeeze test in Step 1 is your best friend. A mature pod should give just slightly under gentl...
- Cutting Technique: That slight angle cut in Step 2 isn’t just for looks—it’s about preventing water damage. When rain...
Frequently asked questions
Got questions about harvesting and growing blackberry lily seed pods? You’re not alone—these striking plants can be tricky to work with! Below, we’ve rounded up the most common queries to help you navigate seed collection, storage, and troubleshooting like a pro.
How do I know when blackberry lily seed pods are ready to harvest?
Seed pods are ready when they turn a deep brown, feel dry to the touch, and split open naturally. If you hear a popping sound or see seeds spilling out, it’s time! Harvest them before birds or wind scatter them—usually in late summer to early fall, depending on your climate. Pro tip: Wear gloves; the pods can be prickly!
Can I save blackberry lily seeds for next year, or do they need to be planted right away?
Yes, you can store them! Once harvested, let the seeds dry completely (1–2 weeks in a paper bag) before storing them in an airtight container in a cool, dark place. They’ll stay viable for 6–12 months. For best results, plant them as soon as possible in spring—they germinate best when fresh. Fun fact: These seeds are not cold-hardy, so avoid refrigeration!
Why won’t my blackberry lily seed pods open naturally? What can I do?
If pods stay closed, they might need a little help! Try placing them in a paper bag for a few days to encourage natural drying and splitting. Avoid moisture—humidity can cause rot. If they’re still stubborn, gently squeeze the pod (wear gloves!) to release seeds. Troubleshooting tip: Overly green pods mean they’re not mature enough—wait a few more weeks.
Are there alternatives to growing from seed pods if I want blackberry lilies faster?
For quicker blooms, opt for dividing mature rhizomes in early spring or fall. Simply dig up clumps, separate the roots, and replant them 3–4 inches deep. Another option is buying potted plants from nurseries—they’ll flower the same year! Bonus: Rhizomes are perennial, so they’ll return year after year with minimal effort.
How do I protect blackberry lily seed pods from birds or squirrels?
These critters love blackberry lily seeds! Cover harvested pods with a breathable mesh bag or place them in a hanging basket until fully dry. For in-ground plants, try netting over the area once pods form. If you’re late to the game, scatter coffee grounds or cayenne pepper around the base to deter wildlife. Warning: Birds are sneaky—check daily!
Wrapping up and next steps
Growing blackberry lily seed pods is a rewarding way to enjoy vibrant blooms year after year—with a little patience and the right techniques!
By mastering twist-resistant harvesting and proper care, you’ll unlock a garden full of striking, low-maintenance beauty. Now that you’re equipped with the know-how, why not share your newfound skills?
- 🌱 Start small: Try harvesting a few pods this season to refine your method.
- 📸 Document progress: Snap photos of your blooms and share tips with fellow gardeners!
- 🌿 Expand your garden: Use saved seeds to grow more blackberry lilies next spring!
Your green thumb is about to shine brighter than ever—happy gardening! 🌺