
Lawn
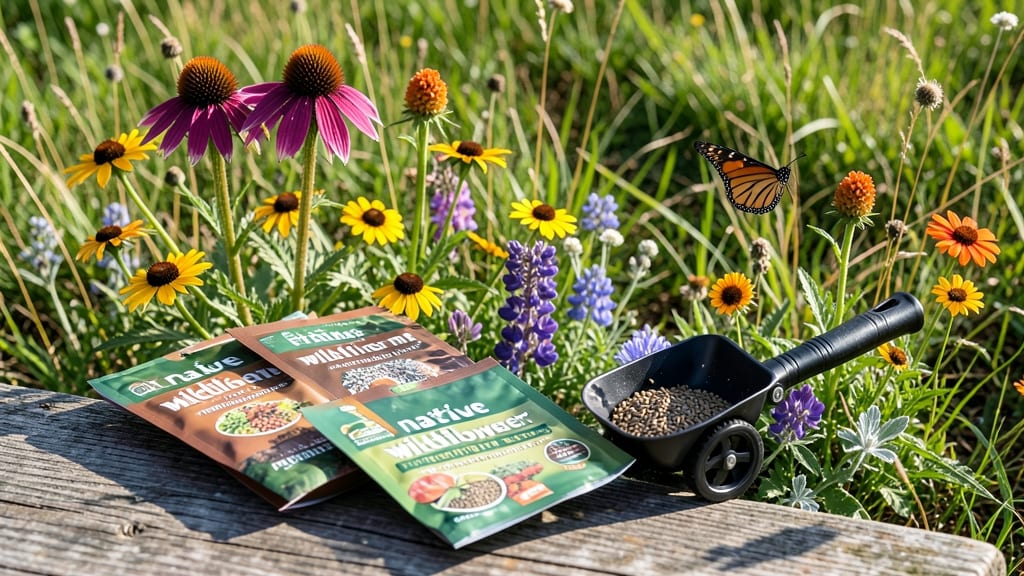
This wild seed project transforms forgotten corners into vibrant, buzzing ecosystems that thrive with almost no effort from you. 🌿 The magic starts with dried seeds—native wildflowers that bring color, wildlife, and resilience to your landscape, even when you're not looking.
I learned the hard way that cheap seed mixes from big-box stores often flop in local climates. Instead, source seeds from regional suppliers or collect them yourself from established wildflower patches. The payoff? Blooms from spring through fall, with some varieties even adding winter interest.
You'll end up with a garden that supports pollinators year-round, reduces water needs, and looks stunning without constant upkeep. The best part? Once established, these meadows practically maintain themselves. Perfect for sunny lawn edges, meadow-style gardens, or even container plantings.
Here's how to get started with the right seeds and simple prep work!
📚 In This Guide
- What you need
- Instructions
- Tips and common mistakes
- Wrapping up and next steps
What you need
- ● Dried wildflower seeds: 1–5 lbs (depending on project size). Look for native, drought-tolerant mixes like Black-Eyed Susan, Coneflower, or Milkweed.
- ● Soil: Native topsoil or a well-draining potting mix (avoid heavy clay). For large areas, 2–3 cubic yards may be needed.
- ● Compost or organic matter: 1–2 bags (to enrich soil and retain moisture).
- ○ Mulch (optional but recommended): Straw or wood chips (5–10 bags) to suppress weeds and retain moisture.
- ● Garden rake: 1 (for leveling soil and removing debris).
- ● Hoe or broadfork: 1 (to loosen soil without disturbing roots).
- ● Hand trowel or transplanting tool: 1 (for precision planting).
- ● Watering can or hose with a gentle nozzle: 1 (for even moisture distribution).
- ● Garden gloves: 1 pair (to protect your hands from prickly seeds or soil).
- ● Measuring tape or string: 1 (to mark planting areas for uniformity).
- ● Seedling trays or biodegradable pots: For starting seeds indoors (if extending your growing season).
- ● Drip irrigation kit: To automate watering and save time.
- ● Wildlife-friendly additions: Small rocks or logs (to attract pollinators and beneficial insects).
- ● Seed germination tester: A small tray with a damp paper towel to pre-sprout seeds before planting.
Step-by-Step instructions for collecting and cultivating wildflower seeds
Turn nature's bounty into a vibrant, self-sustaining garden with these clear steps.
🌱 Step 1: Harvest Seeds at Peak Maturity
Collect seeds when seed pods turn brown and begin splitting open—this signals full maturity. I prefer late summer or early fall when most wildflowers have finished blooming but haven't yet released their seeds to the wind. Use clean, dry paper bags to gently scoop seeds from pods, shaking them over the bag to avoid missing any.
Timing matters most here. If you harvest too early, seeds won't germinate properly. If you wait too long, they'll scatter naturally. Watch for the pods to open slightly—this is your cue that seeds are ready. Store collected seeds in a cool, dry place until planting, ideally within a few weeks.
🌿 Step 2: Prepare Seed Mix for Planting
Combine your harvested seeds with a high-quality, well-draining wildflower seed mix to ensure even germination and growth. I like to mix 1 part wild-collected seeds with 3 parts store-bought wildflower blend for better coverage. Spread the mix evenly over prepared soil in your garden bed or containers.
For best results, sow seeds directly into the ground where they'll bloom. If planting in containers, use at least 6-inch deep pots to accommodate root growth. Lightly rake the soil surface to create a fine, even layer for seeds to settle into without being buried too deeply.
☀️ Step 3: Create Ideal Germination Conditions
Wildflower seeds thrive with minimal intervention, but they do need consistent moisture to germinate. Water the soil gently but thoroughly after sowing, keeping it evenly moist for the first 2-4 weeks. Avoid soaking the soil—you want it damp, not soggy. A light misting with a spray bottle works best for delicate seeds.
Place your planting area in full sun to partial shade, depending on the wildflowers you've collected. Most native wildflowers prefer 6+ hours of sunlight daily, but some, like black-eyed Susans, tolerate partial shade. If starting indoors, use a seedling heat mat to maintain soil temperatures between 65-75°F for faster germination.
💧 Step 4: Maintain Through Establishment
Once seedlings emerge, reduce watering frequency but increase volume. Water deeply once a week to encourage strong root development, then taper off as plants mature. Wildflowers are drought-tolerant once established, but young plants need consistent moisture to thrive. You'll know they're doing well when new leaves appear regularly and stems grow upright.
Thin seedlings to 6-12 inches apart, depending on the species, to give each plant enough space to grow. This step prevents overcrowding and ensures stronger, healthier blooms. If you're unsure which seedlings to keep, wait until they develop their first true leaves—then select the healthiest ones.
✂️ Step 5: Enjoy Year-Round Blooms and Harvest New Seeds
With proper care, your wildflower patch will bloom for months, attracting pollinators and adding color to your garden. Once flowers fade, allow some seed heads to remain on the plants to collect new seeds for next season. I like to leave a few stems standing until they turn brown and dry—this ensures a continuous cycle of blooms and seeds.
After the first year, your wildflower garden will become self-sustaining. You'll notice new seedlings popping up naturally in spring, and the variety of blooms will increase over time. The key to long-term success is minimal intervention—just water during dry spells and enjoy the show nature provides.
Tips & tricks for year-round wildflower cultivation
Transforming dried wildflower seeds into a thriving garden requires patience and attention to detail—here's how to maximize your success.
Timing is Everything: In Step 1, don't rush the seed collection. The pods should be fully brown and just beginning to split—this is the sweet spot for viability. I've learned the hard way that harvesting too early means immature seeds that won't germinate, while waiting too long results in seeds scattering before you can collect them. Watch for those telltale cracks in the pods as your cue. For best results, collect on a dry morning when dew isn't present, as moisture can accelerate seed dispersal.
Seed Mix Ratio: When preparing your mix in Step 2, stick to that 1:3 ratio of wild-collected to store-bought seeds. This balance ensures good coverage while maintaining the natural diversity of your local ecosystem. Pro tip: If you're planting in containers, consider adding a handful of native wildflower seeds specifically chosen for container growing—they often have smaller root systems that adapt better to limited space. The 6-inch depth requirement is non-negotiable for most wildflowers, as their roots need room to establish before becoming drought-tolerant.
Germination Conditions: The 2-4 week moist period in Step 3 is critical—this is when seeds decide whether to germinate or remain dormant. I've found that using a simple spray bottle for daily misting creates the perfect microclimate without waterlogging the soil. For indoor starts, that 65-75°F range on a seedling heat mat makes all the difference in germination speed. Place a humidity dome or clear plastic wrap over your containers to trap moisture during these early weeks, then remove it once you see sprouts.
Thinning Strategy: In Step 4, when thinning seedlings to 6-12 inches apart, consider spacing based on mature plant size rather than current size. Larger wildflowers like coneflowers need the full 12 inches, while smaller varieties like bluebells can thrive at 6 inches. I like to wait until seedlings have their first true leaves before thinning—this gives me a better sense of which plants are strongest. Use clean scissors to snip unwanted seedlings at soil level rather than pulling, which can disturb remaining plants' roots.
Pro Tips for Wild Seed Project
- Transforming dried wildflower seeds into a thriving garden requires patience and attention to detail—here's how to maximize your success.
- Timing is Everything: In Step 1, don't rush the seed collection.
- Seed Mix Ratio: When preparing your mix in Step 2, stick to that 1:3 ratio of wild-collected to store-bought seeds.
Frequently asked questions
Got questions about the Wild Seed Project? You’re not alone! Here are answers to the most common queries to help you get started with year-round blooms from dried seeds.
What types of seeds work best for the Wild Seed Project?
The Wild Seed Project focuses on native wildflower seeds, including species like black-eyed Susan, coneflower, and milkweed. These are drought-resistant, support pollinators, and thrive in local climates. Avoid hybrid seeds—they often don’t reproduce true to form!
How long does it take for wild seeds to germinate and bloom?
Germination time varies by species but typically takes 2–6 weeks under ideal conditions (warm soil, moisture). First blooms may appear in 60–90 days, but full coverage and vibrant displays can take 1–2 years for established meadows. Patience pays off!
Do I need to water wild seeds after planting?
Yes! Keep seeds consistently moist for the first 2–3 weeks to encourage germination. After that, most native wildflowers are drought-tolerant once established. Water deeply but infrequently—overwatering can wash seeds away or cause rot.
Can I use wild seeds in containers or just outdoor spaces?
Wild seeds grow well in containers, raised beds, or window boxes—just ensure they have 6+ inches of soil depth and good drainage. For outdoor spaces, larger areas (like meadows or borders) yield the most dramatic results. Mix in native grasses for texture!
Will wild seeds attract pests like weeds or insects?
Wild seeds support beneficial insects (bees, butterflies) and birds—but they won’t create a "weedy" mess if planted correctly. To minimize unwanted growth, remove invasive plants before sowing and choose region-specific seed mixes. Native species outcompete weeds naturally over time!
What if my seeds don’t sprout? Troubleshooting tips.
Try these fixes if germination fails:
- Check soil moisture—seeds need consistent dampness (not soggy).
- Verify seed viability—test a few seeds in a damp paper towel for 48 hours.
- Adjust timing—some seeds need cold stratification (refrigerate for 4–6 weeks before planting).
- Scarify hard-coated seeds lightly with sandpaper or soak in warm water overnight.
If all else fails, contact the Wild Seed Project for guidance—they often provide planting guides tailored to your zone!
Wrapping up and next steps
The Wild Seed Project proves that year-round blooms aren’t just a dream—they’re a doable reality! By harnessing the power of dried seeds and a little creativity, you can transform even the simplest spaces into vibrant, low-maintenance gardens.
Whether you’re a seasoned gardener or just starting out, this project is your ticket to color, life, and connection to nature—no green thumb required.
Ready to take the next step? Start small: pick one corner of your yard, balcony, or even a windowsill, and plant a few wild seed mixes. Watch as your efforts bloom into beauty—and maybe even inspire your neighbors to join in! 🌱✨