
Size
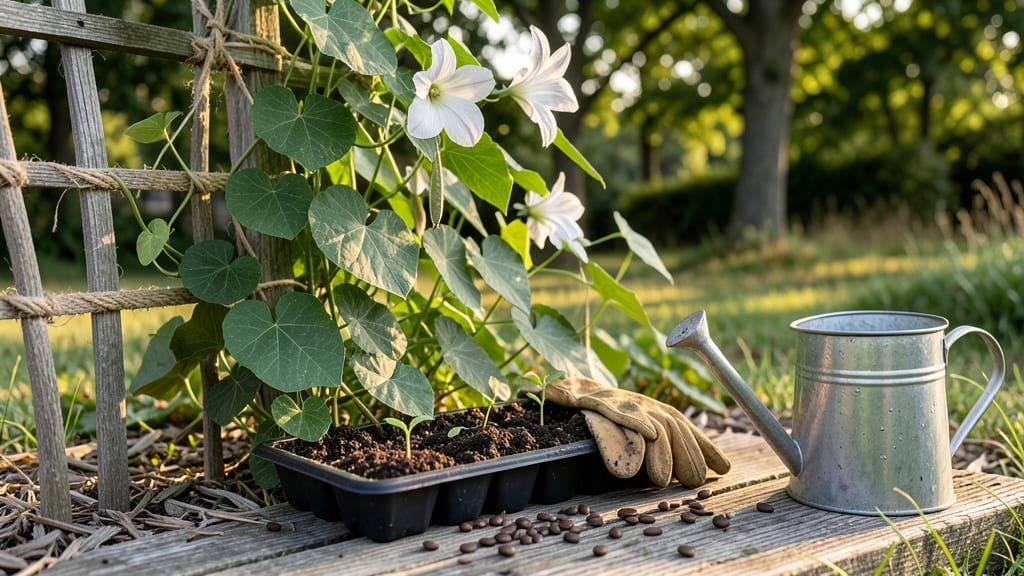
Growing moonflower seeds transforms your garden into a magical nighttime retreat. 🌙 These vines produce giant, fragrant white blooms that open only after sunset, creating an enchanting display that hummingbirds and moths adore.
I've grown them for years, and the secret lies in patience—they're slow to germinate but reward you with dramatic, moonlit beauty.
Start with seeds sown indoors 8-10 weeks before your last frost, or directly in the garden after all danger of frost has passed. Moonflowers need full sun (at least 6-8 hours daily) and well-draining soil—amend heavy clay with compost to prevent root rot.
Plant seeds just ½ inch deep in warm soil (at least 70°F), as they won't sprout in cool conditions. A trellis or fence is essential; these vines can climb 10-15 feet in a single season.
Once established, moonflowers are surprisingly low-maintenance. Water deeply 1-2 times per week, letting the soil dry slightly between waterings. The real magic happens at dusk when blooms unfurl, filling the air with a sweet, intoxicating fragrance.
Deadhead spent flowers in the morning to encourage more blooms, and watch as your garden becomes a nocturnal spectacle. Pests are rarely an issue, but keep an eye out for spider mites in dry conditions.
For best results, plant moonflowers near patios, decks, or seating areas where you can enjoy their evening show. They thrive in USDA zones 3-11, making them adaptable to most climates.
If you love vines that offer both beauty and function, moonflowers deliver—just be prepared to wait for those first magical blooms to appear. The wait is worth every second of twilight enchantment.
📚 In This Guide
- What you need
- Instructions
- Tips and common mistakes
- Wrapping up and next steps
What you need
- ● Moonflower seeds – 5–10 seeds (or more for a fuller display). Look for Ipomoea alba or Ipomoea noctiflora varieties.
- ● Seed-starting mix – 1–2 cups of lightweight, well-draining potting soil (or coco coir for eco-friendly growing).
- ● Containers – Small pots (3–4 inches deep) or seed trays with drainage holes (1–2 per seedling).
- ○ Grow lights or sunny windowsill – A 6–8 inch LED grow light (optional but helpful for indoor starts).
- ● Spray bottle – For gentle watering (avoid oversaturating seeds!).
- ● Trowel or small shovel – For transplanting seedlings into the garden.
- ○ Garden gloves – Optional but recommended for handling soil and vines.
- ● Trellis, fence, or arbor – A 6–10 foot tall structure for climbing (moonflowers can grow fast!).
- ○ Fertilizer (optional) – Balanced liquid fertilizer (e.g., 10-10-10) or compost tea for a nutrient boost.
- ● Sunlight – Full sun (6+ hours daily) for outdoor planting or a south-facing window for indoor starts.
- ● Warmth – Seeds germinate best in soil temperatures of 70–85°F (21–29°C).
- ● Patience – Germination takes 7–14 days, and vines grow aggressively (prune regularly!).
- ● Space – Moonflowers spread widely; plant at least 3–5 feet apart.
Step-by-step instructions for growing moonflowers from seed
Moonflowers bring magic to your garden—here’s how to coax those luminous night blooms from tiny seeds.
🌱 Step 1: Start Seeds Indoors 8-10 Weeks Before Last Frost
Moonflowers (Ipomoea alba) need warmth to germinate, so begin indoors with a seedling heat mat set to 75-80°F. Fill biodegradable peat pots (3 inches deep) with sterile seed-starting mix—moisten it until damp like a wrung-out sponge. Press one seed ½ inch deep in each pot, then cover lightly with extra mix.
Place pots under grow lights (14-16 hours daily) or in a south-facing window where soil stays consistently warm. Keep the mix evenly moist—not soggy, not dry. Germination takes 7-14 days, but don’t be discouraged if it takes longer. Moonflower seeds are patient; they’ll wait for the right conditions.
☀️ Step 2: Harden Off and Transplant After Frost
Once seedlings show first true leaves (about 4-6 weeks after sowing), begin hardening off by moving them outside for 1-2 hours daily in a sheltered spot. Gradually increase exposure over 10-14 days, ending with full sun. Moonflowers thrive in full sun to partial shade, but their vines need 6+ hours of direct light for robust growth.
After the last frost date, transplant seedlings 12-18 inches apart in well-draining soil enriched with compost. Bury the peat pots—roots will grow through them naturally. Choose a trellis, fence, or arbor for vertical support; moonflowers climb aggressively and can reach 10-15 feet in one season.
💧 Step 3: Water and Fertilize for Lush Vines
Water deeply 2-3 times per week, ensuring moisture reaches 6 inches down—moonflowers hate dry soil but despise soggy roots. Mulch with 2-3 inches of shredded bark to retain moisture and suppress weeds. Fertilize lightly every 4-6 weeks with a balanced, water-soluble fertilizer (10-10-10), but avoid overfeeding—too much nitrogen reduces blooms.
Watch for large, heart-shaped leaves unfolding rapidly. When vines reach 4-6 feet, they’ll begin producing buds that swell into those iconic white, trumpet-shaped flowers—each one opens at dusk and wilts by morning. The scent? Like vanilla and jasmine on a summer night.
⏰ Step 4: Prune and Support for Maximum Blooms
Train vines along the trellis by gently tying them with soft twine every 2-3 feet. Prune leggy growth to encourage bushier plants, but avoid cutting back more than ⅓ of the vine at once. Deadhead spent blooms (though they’re beautiful, they drain energy) to redirect the plant’s focus to new flowers.
Moonflowers are annuals in most climates, so they’ll die back with frost. If you’re in USDA Zones 9-11, they may self-seed—just let a few flowers go to seed and they’ll return next year. In cooler zones, save seeds from dried pods to replant.
🌿 Step 5: Enjoy the Nightly Show
As evening falls, watch for the first blooms to unfurl—silvery-white trumpets that glow under moonlight. To extend the display, plant evening primrose nearby; their yellow blooms contrast beautifully. Moonflowers attract moths and hummingbirds, turning your garden into a nocturnal hotspot.
Real talk: These vines grow fast, so stay ahead with regular watering and pruning. The payoff? A garden that comes alive after dark, smelling like a tropical paradise. That’s the magic of moonflowers—patience in the day, spectacle at night.
Tips & tricks for growing moonflowers from seed
Here's what nobody tells you about growing these ethereal night bloomers—details that make all the difference between wilting vines and a garden that sparkles after dark.
Heat Mat Precision: That 75-80°F heat mat temperature is non-negotiable for germination. I've seen seeds fail to sprout when the mat was set to 70°F—too cool for their tropical roots. Place a small thermometer on the mat surface to monitor consistency. If your home stays below 65°F at night, consider a greenhouse setup or move pots to a warmer room like a basement with a space heater.
Lighting Strategy: The 14-16 hours of daily light is crucial, but quality matters more than quantity. LED grow lights are more efficient than fluorescent—you'll need fewer bulbs to cover the same area. Position lights just 6 inches above the seedlings and adjust as they grow. For south-facing windows, rotate pots weekly to prevent lopsided growth toward the light source. I've had seedlings stretch painfully toward one side when left stationary.
Transplant Timing: Wait until you see those first true leaves (about 4-6 weeks in) before hardening off, but don't delay too long. Seedlings become root-bound quickly in 3-inch peat pots. When transplanting, water the pots thoroughly the day before to reduce shock. Bury the pots completely—the roots will naturally grow through the biodegradable material. This creates less disturbance than removing fragile seedlings.
Nighttime Support: Moonflowers need sturdy support from the start. Install your trellis or arbor before transplanting—these vines grow aggressively and can reach 10 feet in a season. Use soft twine or garden tape to tie vines every 2-3 feet, but avoid anything that could damage the tender stems. I've seen vines snap under their own weight when tied too tightly or to weak supports.
Pro Tips for Moonflower Seed Grow A Garden
- Here's what nobody tells you about growing these ethereal night bloomers—details that make all the difference between...
- Heat Mat Precision: That 75-80°F heat mat temperature is non-negotiable for germination. I've seen seeds fail to spro...
- Lighting Strategy: The 14-16 hours of daily light is crucial, but quality matters more than quantity. LED grow lights...
Frequently asked questions
Got questions about growing moonflowers from seed? You’re not alone!
Here are some of the most common queries—and their answers—to help you cultivate a dreamy, night-blooming garden with ease.
How long does it take for moonflower seeds to germinate?
Moonflower seeds typically germinate in 7–21 days after planting, depending on temperature and soil conditions. For fastest results, keep the soil consistently moist and warm (around 70–80°F). If you’re in a cooler climate, consider starting seeds indoors 4–6 weeks before the last frost date.
When is the best time to plant moonflower seeds?
Moonflowers thrive in warm weather, so plant seeds after the last frost when soil temperatures are above 60°F. In most regions, this means late spring to early summer. If you’re in a tropical or subtropical zone, you can plant year-round—but avoid frost-prone periods.
Can moonflower seeds grow in containers or do they need a garden bed?
Moonflowers adapt well to containers as long as the pot is at least 12–18 inches deep and has drainage holes. Use a fast-draining potting mix and provide a trellis or sturdy support for vining. Just ensure the container gets full sun (6+ hours daily) for best blooms.
Why aren’t my moonflower seeds sprouting? Troubleshooting tips.
If your seeds aren’t germinating, check these common issues:
- Cold soil: Moonflowers need warmth—wait until soil is at least 60°F.
- Too much water: Keep soil moist but not soggy to avoid rot.
- Old seeds: Fresh seeds germinate better; store-bought seeds are usually fine if planted within 1–2 years.
- Depth: Plant seeds ½ inch deep—too shallow or deep can hinder sprouting.
How do I keep moonflowers blooming all season?
To encourage continuous blooms, deadhead spent flowers (remove faded blooms) and fertilize lightly with a balanced, water-soluble fertilizer every 4–6 weeks. Ensure they get full sun and consistent watering—moonflowers love warmth but hate soggy roots. In cooler climates, they may fade in fall but often self-seed for next year!
Wrapping up and next steps
Growing moonflowers from seed is a rewarding journey that brings magical nighttime blooms and lush greenery to your garden. With the right soil, patience, and care, you’ll soon enjoy their delicate, fragrant flowers—perfect for attracting pollinators and adding a touch of enchantment. 🌙✨
Ready to transform your garden? Start by planting your seeds soon—whether in containers or directly in the ground—and watch your moonflower vine flourish. Happy gardening! 🌱💚