
Lawn
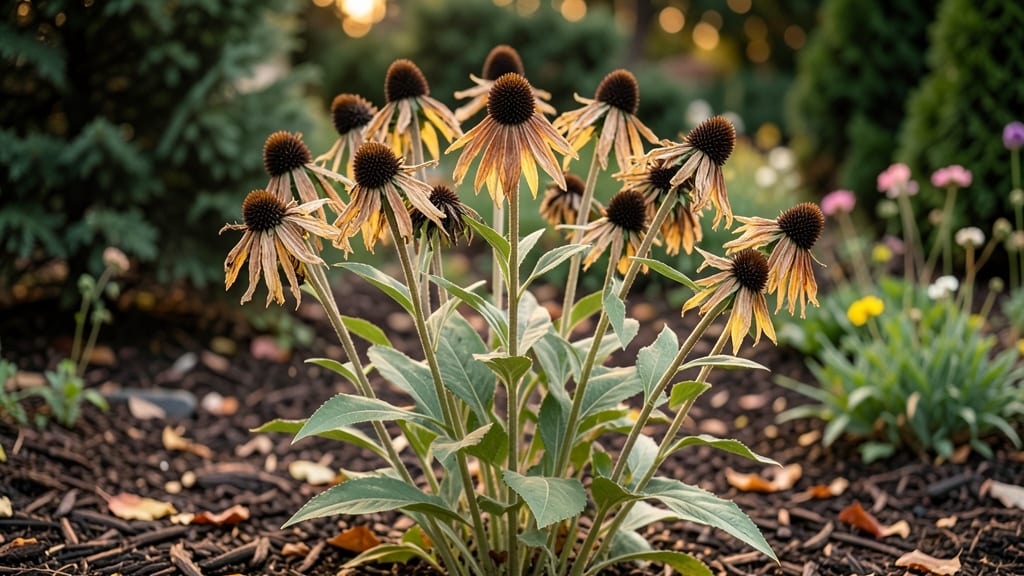
Harvesting black-eyed Susan seed heads the right way means next year’s garden gets free, fresh plants—and no more twisting those stubborn stems. 🌻 I’ve wrestled with these tough seed pods for years, but there’s a simple trick that makes the process effortless, from late summer through fall.
The key is patience and timing: wait until the seed heads turn completely brown and begin cracking open naturally. Grab a pair of clean pruners and snip the stems just above where the seed head meets the flower stalk—this prevents disease from spreading up the plant.
Once collected, lay the seed heads on a tray in a dry, well-ventilated spot for a week or two to fully dry.
What you’ll end up with is a stash of viable seeds that’ll sprout like crazy next spring, plus dried seed heads perfect for winter arrangements or rustic garden decor. The best part? You’ll skip the nursery costs and get plants that thrive exactly where you planted them.
For extra insurance, store seeds in a paper envelope (not plastic) in a cool, dark place—viability lasts up to two years if kept dry. Pro tip: Mix a few seeds into your fall mulch for surprise spring blooms!
📚 In This Guide
- What you need
- Instructions
- Tips and common mistakes
- Wrapping up and next steps
What you need
- ● Black Eyed Susan plants (mature, with fully developed seed heads—look for brown, papery centers).
- ● Pruning shears or sharp garden scissors (sterilized to prevent disease spread).
- ● Paper bags or breathable seed-saving envelopes (labeled with the plant name and date; 1 per seed head).
- ● Newspaper or cardboard (for drying—1 sheet per batch).
- ● Pencil or marker (for labeling).
- ● Rubbing alcohol (70% isopropyl) or bleach solution (for sterilizing tools—1:10 dilution for bleach).
- ● Small bowl or container (for cleaning seeds, if needed).
- ○ Fine-mesh strainer or sifter (optional but helpful for separating seeds from chaff).
- ● Seed storage jars or airtight containers (with silica gel packets for long-term viability).
- ● Desiccant packs (to absorb moisture during drying).
- ● Magnifying glass (for inspecting seeds before storage).
- ● Gloves (if handling large quantities or sensitive skin).
- ● Humidity monitor (if storing seeds long-term in a climate-controlled space).
- ● 🌡️ Harvest seed heads on a dry, sunny day to minimize mold risk.
- ● ✨ Sterilize tools before and after use to avoid cross-contamination.
- ● 📊 Label everything immediately—mix-ups happen!
Instructions for harvesting black Eyed Susan seed heads without twisting
Here’s the gentle method I use to collect seeds that stay intact and ready for next year’s garden.
🌿 Step 1: Identify Mature Seed Heads
Wait until the seed heads turn a deep brown color and the papery petals have completely dried out and fallen away. This usually happens in late fall or early winter, depending on your climate. You’ll know they’re ready when the seed pods look like tiny, dry, brown balls clustered together.
Gently shake a seed head over a clean paper bag to test its readiness. If seeds rain down easily, it’s time to harvest. If they cling stubbornly, wait another week. The goal is to collect seeds when they’re fully mature but before they scatter naturally or get soggy from rain.
✂️ Step 2: Cut the Seed Heads at the Right Time
Use clean, sharp scissors or pruning shears to snip the seed heads from the stem. Cut about 2 inches below the seed head to avoid damaging the plant’s remaining growth. I like to harvest on a dry morning after the dew has evaporated—this helps prevent moisture from sticking to the seeds.
Place the cut seed heads in a dry, well-ventilated area, like a mesh bag or a cardboard box with holes. Avoid plastic bags, which trap moisture and can cause mold. The key here is airflow—it keeps the seeds dry and preserves their viability for next year.
🪴 Step 3: Dry and Process the Seed Heads
Let the seed heads dry indoors for 7-10 days in a warm, dry spot away from direct sunlight. You’ll hear the seeds rattling inside as they finish maturing. Once fully dry, gently rub the seed heads between your hands over a clean paper bag or tray. The seeds will separate easily from the chaff.
If some seeds still cling stubbornly, place the dried heads in a paper bag and shake it vigorously. The seeds will fall out while the lighter debris stays behind. Sift the collected seeds through a fine mesh screen to remove any remaining plant debris. Store the clean seeds in a labeled envelope or small jar in a cool, dark place until planting time.
💧 Step 4: Store Seeds Properly for Next Year
Label your seed envelope with the variety name and the harvest date. Black Eyed Susan seeds can stay viable for 2-3 years if stored correctly. Keep them in a sealed container with a silica gel packet or a small packet of rice to absorb excess moisture.
Check the seeds periodically for signs of mold or pests. If you notice any issues, transfer them to a new container immediately. When it’s time to plant, sprinkle the seeds directly onto prepared soil in early spring. Press them lightly into the top layer of soil—no need to bury them deeply.
⏰ Step 5: Plant the Seeds in Early Spring
Scatter the seeds over well-drained soil in a sunny location. Black Eyed Susans thrive in full sun and tolerate poor soil, but they do best with moderate moisture. Water the area lightly after planting to settle the seeds into the soil.
Keep the soil consistently moist but not soggy until the seedlings emerge, which typically takes 10-14 days. Once the plants are established, they’re drought-tolerant and require minimal care. You’ll be rewarded with vibrant blooms the following summer!
Tips & tricks for perfect black Eyed Susan seed collection
Here's what I've learned over years of harvesting these seeds without a single twisted stem or lost seed.
Timing is Everything: Harvest on a dry morning after the dew has evaporated—this prevents moisture from sticking to the seeds and keeps them clean. I've found that harvesting right after a light frost can actually help dry out the seed heads faster, making the drying process in Step 3 even more efficient. The key is to work with nature's natural drying cycle rather than fighting it.
Equipment Matters: Sharp scissors or pruning shears make all the difference in Step 2. Dull blades can crush the delicate seed heads, reducing your yield. I keep a dedicated pair of garden shears just for seed harvesting and sharpen them at the start of each season. For processing, a fine mesh screen (like those used for sifting flour) works perfectly for removing chaff in Step 3.
Drying Strategy: During the 7-10 day drying period in Step 3, I place the seed heads in a single layer on a baking sheet lined with paper towels. This allows maximum airflow while preventing any seeds from falling through. If you're short on time, you can speed up the process slightly by placing the seed heads in a warm, dry spot near a sunny window—but avoid direct sunlight which can overheat and damage the seeds.
Storage Wisdom: For long-term storage in Step 4, I've had the best results using small glass jars with tight-sealing lids. The glass helps me see the seeds clearly, and I add a small packet of rice to absorb any moisture that might develop. I always date my seed envelopes so I can track their viability—Black Eyed Susan seeds typically stay good for 2-3 years when stored this way, but I've successfully grown plants from seeds stored for up to 5 years!
Pro Tips for Black Eyed Susan Seed Heads
- Here's what I've learned over years of harvesting these seeds without a single twisted stem or lost seed.
- Timing is Everything: Harvest on a dry morning after the dew has evaporated—this prevents moisture from sticking to t...
- Equipment Matters: Sharp scissors or pruning shears make all the difference in Step 2. Dull blades can crush the deli...
Frequently asked questions
Got questions about harvesting black-eyed Susan seed heads? You're not alone! Here are some of the most common concerns—and their answers—to help you save those seeds like a pro for next year's blooms.
When is the best time to harvest black-eyed Susan seed heads?
Harvest seed heads once they’ve turned fully brown and begin to split open (usually late summer to early fall). Wait too long, and the seeds may scatter—or worse, sprout in the flower head! Aim for dry, sunny days to avoid moisture issues.
How do I harvest the seeds without twisting the stems?
Gently snip the seed heads with clean pruners or scissors, leaving the stem intact. Avoid tugging or twisting, which can damage the plant. For stubborn stems, wrap a small cloth around the base to protect the foliage while cutting.
Can I save seeds from black-eyed Susans grown from store-bought flowers?
Yes! Store-bought flowers are often grown from hybrid seeds, but you can still harvest viable seeds for next year. However, expect some variation in color or size—nature loves surprises! For consistent blooms, opt for heirloom varieties.
How should I store black-eyed Susan seeds until planting?
Let harvested seeds dry completely in a paper bag (not plastic!) for 1–2 weeks in a cool, dry place. Once fully dry, transfer them to an airtight container (like a mason jar) and store in the fridge for up to 2 years. Label them—trust us!
What if my seed heads attract pests like aphids or beetles?
Don’t worry—these critters are usually harmless to your plants. For heavy infestations, blast them off with a strong spray of water or use neem oil. Healthy plants with strong stems are less appealing to pests, so keep your garden well-maintained!
Wrapping up and next steps
Harvesting black-eyed Susan seed heads doesn’t have to be a tangled mess—with the right techniques, you can collect viable seeds effortlessly for next year’s garden. 🌻 Whether you’re saving seeds for sustainability, sharing with fellow gardeners, or simply enjoying the beauty of these cheerful blooms, a little patience and the right tools make all the difference.
Now that you’re equipped with the know-how, why not give it a try? Grab your pruners, head outside, and let nature’s bounty inspire your next gardening adventure!