
Lawn
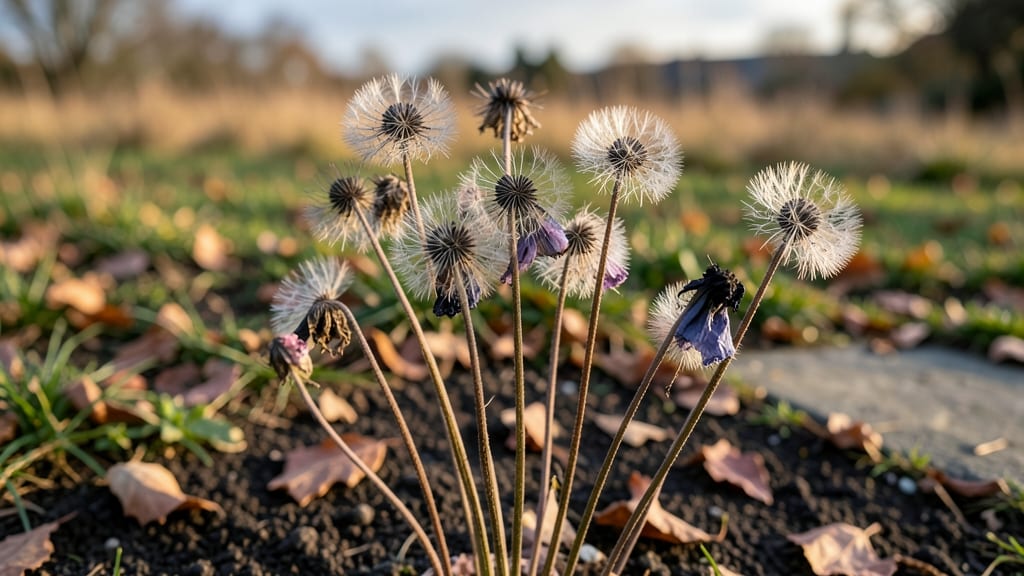
Those papery anemone seed heads hold the secret to next year's blooms. 🌱 I've learned that skipping their care means losing a free, foolproof way to multiply your favorite varieties—and create stunning winter arrangements while you wait for spring.
The best time to collect them is when they turn brown and crispy, usually late fall after the first frost. Snip them cleanly with pruners, leaving the stems about 2 inches long, then bundle them upside-down in a paper bag.
In 2-3 weeks, they'll release seeds ready for planting. You'll end up with dozens of new plants next spring, plus dried seed heads that look like delicate lace in vases. The plants themselves grow easier from seed than from divisions, and you'll have more color than you started with.
This method works for Japanese anemones, windflowers, and meadow anemones alike. Just store the seeds in a cool, dry place until planting time—no fancy equipment needed. Here's how to make it work!"
📚 In This Guide
- What you need
- Instructions
- Tips and common mistakes
- Wrapping up and next steps
What you need
- ● Mature anemone seed heads – Collect only fully dried, brown seed pods (avoid green or wilted ones). Aim for at least 10-15 healthy heads for reliable germination.
- ● Paper bags (kraft or brown) – Use 2-3 breathable bags (10”x12” or larger) to store seeds. Poke small holes in the bottom for airflow.
- ● Labeling tags & marker – Write the anemone variety and harvest date on each bag (e.g., "Anemone ‘Honorine Jobert’ – Oct 2024").
- ● Scissors or pruning shears – For cleanly snipping seed heads from stems (sterilize blades with rubbing alcohol if reusing).
- ● Drying rack or mesh screen – A wire rack or old window screen works to air-dry seeds in a shady, dry spot (avoid direct sun).
- ○ Glove – Protects hands from prickly stems (optional but handy!).
- ● Desiccant packets – Place 1-2 in seed bags to absorb excess moisture (great for humid climates).
- ● Seed envelope (paper) – For long-term storage, transfer seeds to a small envelope labeled with the variety after drying.
- ○ Humidity monitor – Ensures storage conditions stay below 40% humidity (optional but ideal).
Step-by-Step guide to harvesting, drying, and storing anemone seed heads
Here's how to preserve anemone seed heads for reliable spring blooms year after year.
🌿 Step 1: Harvest Seed Heads at Peak Maturity
Collect seed heads when they've fully dried on the plant but before they shatter and scatter seeds. Look for heads that have turned a uniform brown color and feel crisp to the touch—this usually occurs in late summer or early fall, depending on your climate. Use clean, sharp pruning shears to cut the stems about 2 inches below the seed head to ensure the base remains intact.
Harvest on a dry morning after any morning dew has evaporated. This prevents moisture from accelerating mold growth during storage. I always gather seed heads in small batches—processing them fresh keeps quality high. Place them immediately in a well-ventilated area to begin drying, as prolonged exposure to humidity can ruin the seeds inside.
☀️ Step 2: Dry Seed Heads Properly for Viability
Spread the harvested seed heads in a single layer on a clean, dry surface in a warm, dry location with good airflow. A mesh screen or paper towels work well for this purpose. Choose a spot that receives indirect sunlight—direct sun can overheat the heads and reduce seed viability. Ideal drying conditions maintain temperatures between 65-75°F with relative humidity below 50%.
Turn the seed heads every 2-3 days to ensure even drying. You'll know they're ready when the seed pods rattle when shaken gently and the stems snap easily when bent. This typically takes 1-2 weeks, depending on your climate. If you notice any signs of mold or moisture, move the seed heads to a drier location immediately—this is the most common point where seeds lose viability.
🪴 Step 3: Extract and Store Seeds Correctly
Once fully dried, gently crush the seed heads over a clean, white surface to release the seeds. Anemone seeds are small and dark, so a white background makes them easier to see. Use a small sieve or fine mesh to separate seeds from chaff. Discard any seed heads that show signs of damage or pest activity—they may contain compromised seeds.
Store the clean seeds in an airtight container, such as a small glass jar or resealable plastic bag. Add a desiccant packet to absorb any residual moisture. Label the container with the variety name and harvest date. Store in a cool, dark place like a pantry or seed storage box. Under these conditions, anemone seeds remain viable for 2-3 years, though germination rates decline slightly after the first year.
⏰ Step 4: Prepare Seed Heads for Spring Planting
In early spring, before the last frost date, prepare the stored seeds for planting. Soak the seeds in lukewarm water for 12-24 hours to soften the outer coating and improve germination. This step is especially important for anemones, as their seeds have a hard outer shell that can delay or prevent germination without this treatment.
After soaking, plant the seeds in a well-draining potting mix at a depth of ¼ inch. Keep the soil consistently moist but not soggy, and place the container in a location with bright, indirect light. Germination can take 2-4 weeks, so be patient. Once seedlings emerge, provide 12-14 hours of light daily to encourage strong, healthy growth. Transplant outdoors after the last frost when seedlings have developed 2-3 true leaves.
Tips & tricks for perfect anemone seed head preservation
Preserving anemone seed heads successfully requires attention to detail at every stage—here's how to avoid common pitfalls and maximize your spring blooms.
Harvest Timing: The 2-inch stem cut in Step 1 is crucial because it preserves the seed head's structural integrity while allowing proper airflow during drying. I've found that harvesting on dry mornings after dew evaporation prevents moisture-related mold issues during storage—this is where most beginners go wrong. If you're unsure about maturity, gently squeeze the seed head; it should feel completely dry and papery with no give.
Drying Conditions: Maintaining the 65-75°F temperature range with humidity below 50% in Step 2 creates the ideal environment for seed viability. I recommend placing a small fan nearby to circulate air without creating drafts that could scatter seeds prematurely. The 2-3 day turning schedule ensures even drying—neglecting this can lead to uneven moisture levels that compromise seed quality. Watch for those signature rattling pods and snapping stems as your cue for readiness.
Seed Extraction: When crushing dried seed heads in Step 3, use a clean white surface to create contrast—this makes those tiny dark seeds instantly visible against the background. I've discovered that gently tapping the seed heads with a wooden spoon works better than aggressive crushing, which can damage the delicate seeds. The white background isn't just helpful; it's essential for spotting any remaining chaff or damaged seeds that should be discarded immediately.
Storage Wisdom: The 2-3 year viability window mentioned in Step 3 assumes proper storage conditions. I've learned to add an extra desiccant packet when storing in humid climates, and to check containers annually for any signs of moisture. Labeling with both variety name and harvest date helps track germination rates—you'll notice older seeds germinate more slowly but still reliably for at least 2 years.
Pro Tips for Anemone Seed Heads
- Preserving anemone seed heads successfully requires attention to detail at every stage—here's how to avoid common pit...
- Harvest Timing: The 2-inch stem cut in Step 1 is crucial because it preserves the seed head's structural integrity wh...
- Drying Conditions: Maintaining the 65-75°F temperature range with humidity below 50% in Step 2 creates the ideal envi...
Frequently asked questions
Got questions about saving and storing anemone seed heads for next season?
You’re in the right place! Here are answers to the most common queries—from timing to troubleshooting—so you can keep those delicate blooms coming back year after year.
When is the best time to harvest anemone seed heads?
Harvest seed heads after they’ve fully dried on the plant—usually late summer to early fall (August–September). Wait until the pods turn brown and begin cracking open naturally. Cut stems with 2–3 inches of stalk attached for stability during drying.
How long does it take for anemone seed heads to dry?
Drying takes 2–4 weeks, depending on humidity and airflow. Hang seed heads upside down in a well-ventilated, dry spot (like a garage or shed). Avoid direct sunlight, which can scorch the delicate pods. Patience pays off—rush it, and seeds may not germinate!
What’s the best way to store anemone seeds long-term?
Once fully dry, remove seeds from pods and store them in a paper envelope or airtight container with a desiccant packet (to absorb moisture). Label with the date and variety, then refrigerate or freeze for up to 2 years. Avoid plastic bags—condensation ruins seeds!
Why aren’t my anemone seeds germinating?
Common culprits:
- Freshness: Seeds lose viability over time—use them within 1–2 years.
- Stratification: Anemones need a cold period (6–8 weeks in the fridge) to break dormancy.
- Depth: Plant seeds ¼ inch deep—too deep = rot; too shallow = desiccation.
Can I use store-bought anemone seeds instead of saving my own?
Store-bought seeds (like Anemone coronaria or Anemone hupehensis) are a great backup, but saved seeds ensure true-to-type blooms. Just confirm the variety matches your climate—some anemones thrive in zones 3–9, while others prefer milder regions.
Wrapping up and next steps
Harvesting and storing anemone seed heads is a simple yet rewarding way to ensure a burst of color in your garden next spring! With just a few tools and a little patience, you can collect seeds, dry them properly, and store them for future planting.
Whether you're a seasoned gardener or just starting out, this process is easy and exciting—so grab those seed heads and get ready to grow!
Ready to take the next step? Try planting your stored seeds in early spring for a stunning display. Happy gardening! 🌱✨