
Lawn
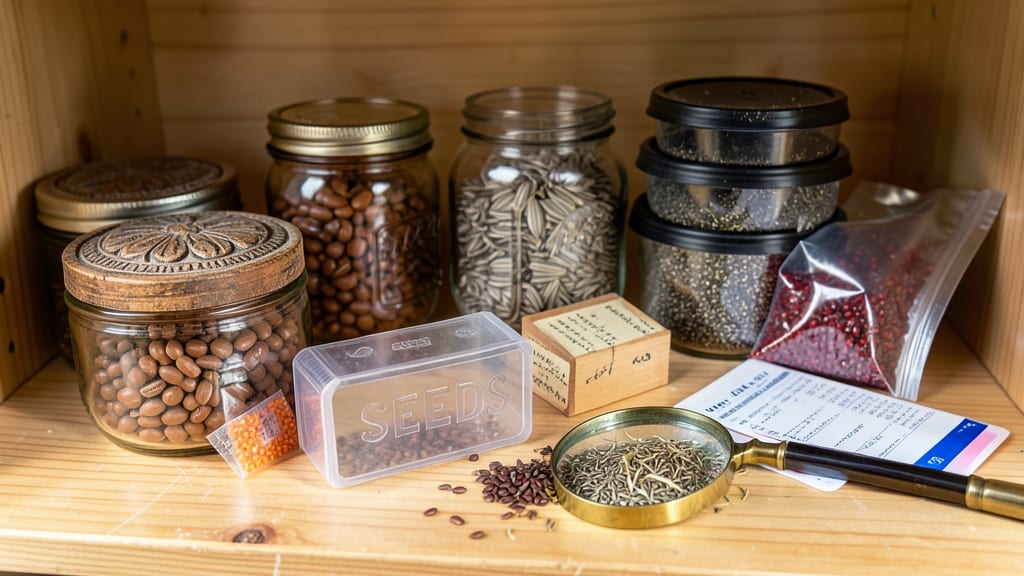
Proper seed packet storage means the difference between next year's garden dreams and wasted money. ✨ I learned this the hard way when my heirloom tomato seeds sprouted mold after sitting in a damp basement for three months—now I treat seed storage like a science.
The key is controlling moisture, temperature, and light. Use airtight containers with silica gel packets (or even a small bag of rice) to absorb humidity, store them in a cool, dark place like a pantry or fridge, and label everything with the variety and year.
Most seeds last 2-5 years if stored right—some even longer. You'll save money by not buying replacements, avoid disappointing germination rates, and keep your garden plans flexible for years. The right setup takes 10 minutes but pays off with every seed you plant.
Common mistakes include storing seeds in the fridge without protection (condensation ruins them) or keeping them in the original packets (they're not airtight enough). Here's how to do it right!
📚 In This Guide
- What you need
- Instructions
- Tips and common mistakes
- Wrapping up and next steps
What you need
- ● Air-tight containers: 3–5 hermetically sealed containers (e.g., blank">Mylar bags with zip locks, blank">food-grade buckets with gamma seals, or blank">vacuum-sealed bags). Choose containers sized to fit your seed packet quantity.
- ● Desiccant packets: 2–4 silica gel or clay-based moisture absorbers (1–2 packets per container). Avoid reusable desiccants if they’ve absorbed moisture.
- ● Seed packets: All seeds to be stored (remove from original packaging if damaged or non-airtight). Label each with seed type, variety, and date using a blank">fine-tip permanent marker.
- ○ Optional: Digital blank">hygrometer (to monitor humidity levels, ideally <10%).
- ● Small blank">baking sheet (for pre-drying seeds if stored in a humid climate).
- ● Freezer-safe ziplock bags (for short-term storage before sealing).
- ● Prerequisites: Cool, dark space (ideal temp: 32–41°F or 0–5°C).
- ● Patience! Let seeds acclimate to storage conditions for 24 hours before sealing.
How to store seed packets long-term without losing viability
Keep your seeds fresh and ready for planting with these simple, science-backed storage tricks.
🪴 Step 1: Choose the Right Containers for Dry Storage
Use airtight containers like glass jars, plastic bins with tight seals, or even resealable plastic bags with all the air squeezed out. I like mason jars because they let me see the seed packets while keeping moisture out. Label each container with the seed type and year—you’ll forget what’s inside after a few seasons.
Never use paper envelopes or cardboard boxes long-term. They absorb moisture and let humidity creep in, which is the #1 enemy of seed viability. If you’re repurposing containers, clean them thoroughly first—even a little old seed dust can introduce mold.
💧 Step 2: Control Humidity With Desiccants
Place a moisture absorber like silica gel packets or uncooked rice in each container. I use small breathable fabric pouches filled with rice—cheap, reusable, and effective. The goal is to keep humidity below 30%. Too much moisture speeds up seed aging, while dry conditions slow decay.
Check your storage spot monthly. If the rice smells musty or the silica gel changes color, it’s time to refresh it. A simple kitchen scale helps—rice should weigh about 1-2 ounces per quart container to maintain the right balance.
☀️ Step 3: Store in a Cool, Dark Place
Ideal seed storage temperatures hover around 32-41°F—think refrigerator or basement, not a pantry near the stove. I keep mine in the crisper drawer of my fridge, where it’s dark and consistently cool. Avoid freezers unless you’re storing seeds for decades, as freeze-thaw cycles can damage seed coats.
Light exposure breaks down seed oils and proteins, so opaque containers are best. If using clear jars, wrap them in aluminum foil or store them in a cabinet. You’ll know it’s working when packets stay crisp and don’t develop a stale smell after a year.
⏰ Step 4: Organize by Viability Lifespan
Group seeds by their natural shelf life. Most veggies last 2-5 years, while onions and leeks can survive 5-7 years if stored properly. I color-code my containers: green for 1-year seeds, blue for 2-3 years, and red for 4+ years. This prevents planting outdated seeds that won’t germinate.
Write the purchase year on each packet—even if the printed date is still valid. Seeds lose viability faster in warm climates, so adjust your timeline if you live in a hot area. Test a few seeds annually by planting them in a small pot to confirm they’re still good.
🌱 Step 5: Refresh Seeds Before Planting
If seeds are past their prime but not completely dead, soak them in lukewarm water for 12 hours to soften the coat. This jump-starts germination for older packets. I also add a pinch of honey or vinegar to the water—it kills mold spores that might hitch a ride on dried seeds.
Plant refreshed seeds in a small pot first to test germination. If 50% or more sprout within 10-14 days, they’re still viable. Discard the rest—old, weak seeds often grow into leggy, disease-prone plants that won’t thrive.
Tips & tricks for perfect seed packet preservation
Preserving seed viability takes more than just tucking them away—these small details make all the difference between fresh seeds and dried-out disappointments.
Container Selection Matters: For Step 1, avoid anything with seams or weak seals—even tiny gaps let moisture sneak in. I've found that vacuum-sealed bags work wonders for bulk storage, but if you prefer jars, use the ones with rubber gaskets. The key is eliminating every possible air pocket. Pro tip: Place a small piece of paper towel inside before sealing to absorb any residual moisture from the seeds themselves.
Desiccant Placement Strategy: In Step 2, don't just toss in silica gel packets—position them strategically. Place them near the container walls rather than directly against the seed packets. This creates a moisture gradient that protects seeds more effectively. I've noticed that rice pouches work best when placed in the corners of larger containers, creating multiple drying zones.
Temperature Consistency is Critical: For Step 3, refrigerator crispers aren't the only option—consider a dedicated seed storage box in your basement if you have one. The temperature range of 32-41°F is non-negotiable, but what matters more is consistency. I've seen seeds stored at 40°F for years, but those exposed to temperature swings (like moving between fridge and pantry) lose viability faster. Use a small thermometer in your storage area to monitor fluctuations.
Viability Testing Shortcut: When testing germination in Step 5, don't just count sprouts—watch for root development too. Healthy seeds will show both a strong sprout and visible roots within 5-7 days. I've found that seeds that sprout but don't develop roots are often too old to be worth planting, even if they break through the soil.
Pro Tips for Seed Packet Storage
- Preserving seed viability takes more than just tucking them away—these small details make all the difference between ...
- Container Selection Matters: For Step 1, avoid anything with seams or weak seals—even tiny gaps let moisture sneak in...
- Desiccant Placement Strategy: In Step 2, don't just toss in silica gel packets—position them strategically. Place the...
Frequently asked questions
Got questions about keeping your seed packets fresh? You’re in the right place! Here are some of the most common concerns—and their solutions—to ensure your seeds stay viable and ready for planting.
How long can seeds stored properly last?
With the right storage (cool, dry, airtight), many seeds—like vegetables and flowers—remain viable for 1–5 years. Fast-growing varieties (e.g., lettuce, radishes) may only last 1–2 years, while hardy seeds (e.g., beans, peas) can last 3–5+ years. Always check the packet for a “best if used by” date!
What’s the best temperature for seed storage?
Ideal storage temps hover between 32–41°F (0–5°C), like a fridge or root cellar. Avoid freezers (temperature fluctuations harm seeds) or warm basements. A cool, dark pantry works in a pinch, but humidity control is critical—use silica gel packs or desiccants to stay safe.
Can I store seed packets in the fridge or freezer?
Fridges (YES) extend seed life, but freezers (NO) are risky due to moisture and thawing cycles. If refrigerating, place seeds in airtight, moisture-proof containers (like Mylar bags with oxygen absorbers) to prevent condensation. Label everything—fridge temps slow aging but won’t replace proper long-term storage.
What’s the best alternative to Mylar bags for seed storage?
If Mylar isn’t an option, try these humidity-proof alternatives:
- Glass jars with tight lids + silica gel packets (great for small batches).
- Vacuum-sealed bags (remove air first to prevent mold).
- Plastic containers with desiccant (like those for coffee beans).
- Wax-coated paper envelopes (for short-term storage, 6–12 months).
Just avoid Ziploc bags—they trap moisture!
My seeds feel damp or moldy—what now?
Don’t panic! If seeds are slightly damp, spread them on a paper towel in a warm, dry place for 24–48 hours to air-dry. For mold (fuzzy growth), discard the batch—mold spores can survive and ruin future plantings. Prevention tip: Always store seeds in low-humidity environments (use a hygrometer to aim for <30% humidity).
Wrapping up and next steps
Proper seed packet storage is your secret weapon for keeping seeds viable and ready to grow whenever inspiration strikes! 🌱 By controlling humidity, temperature, and light exposure, you’ve learned how to extend the lifespan of your precious seeds—whether you’re a seasoned gardener or just starting out.
Now that you’re armed with these humidity-proof secrets, it’s time to put them into action.
Ready to take the next step? Start by auditing your current seed collection—organize, label, and store them using the methods you’ve discovered. Then, share your newfound knowledge with fellow gardeners or dive deeper into advanced seed-saving techniques to become a true green-thumb expert!