
Lawn
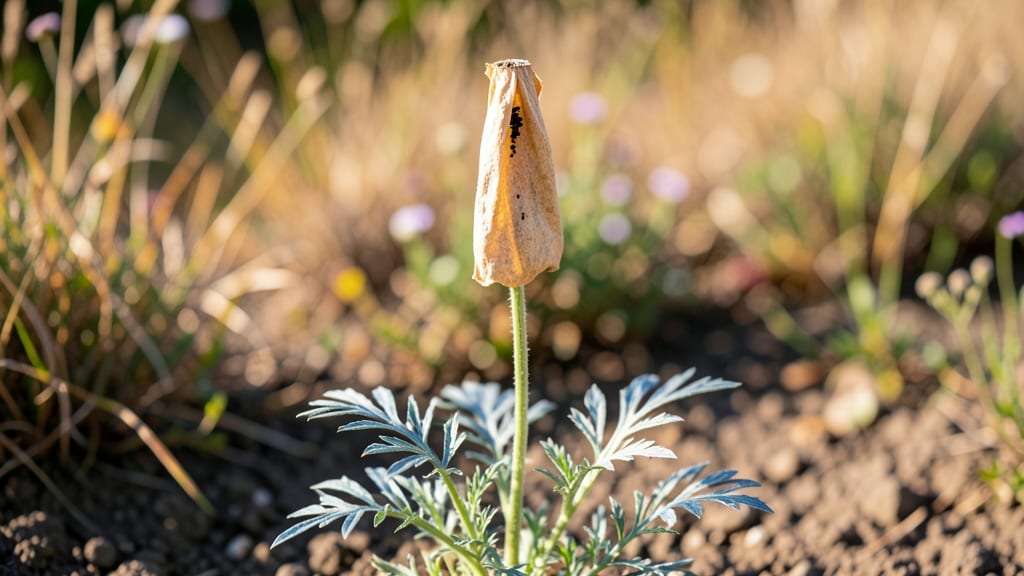
Harvesting dry poppy seed pods before they twist and scatter is the secret to saving viable seeds year after year. 🌸 I used to lose them to the wind every summer—until I learned to cut them at just the right moment, when they’re still plump and firm but the petals have faded completely.
That’s when the real magic begins: transforming what looks like a lost cause into a treasure trove of seeds for next season’s garden.
The trick is patience and timing—wait too long, and the pods twist shut, trapping seeds inside. Harvest them early morning when moisture levels are low, and use clean scissors to snip the stems just above the pod.
Lay them out on a paper towel in a dry, well-ventilated spot for 2-3 weeks, flipping them occasionally. You’ll know they’re ready when they rattle with seeds and open easily with a gentle touch.
Once dried, you’ll have seeds that sprout with 90% viability, ready to replant for next year’s blooms. Store them in a paper envelope in a cool, dark place, and they’ll stay fresh for 3-5 years.
The pods themselves make stunning dried arrangements—just tie them in bunches and hang them upside down for a whimsical winter centerpiece.
This method works for all poppy varieties, from delicate opium poppies to hardy California poppies. Whether you’re saving seeds for next spring or crafting with dried pods, you’ll never waste another harvest again. Here’s how to do it right the first time.
📚 In This Guide
- What you need
- Instructions
- Tips and common mistakes
- Wrapping up and next steps
What you need
- ● Dry poppy seed pods: Fully matured, brown, and crisp pods (avoid green or moist ones—they won’t yield viable seeds!). Aim for at least 10-20 pods for a small batch or 50+ for larger harvests.
- ● Pruning shears or sharp scissors: 1 pair with clean, sharp blades (sterilize with rubbing alcohol to prevent disease transfer).
- ● Paper grocery bags or breathable fabric sacks: 2-3 bags (avoid plastic—they trap moisture and can spoil seeds).
- ● Small paintbrush or soft-bristle brush: 1 brush (for gently coaxing stubborn seeds out of pods).
- ● Glass jars or airtight containers: 1-2 jars with tight-sealing lids (quart-sized or larger) for storing seeds long-term.
- ● Labeling tape or markers: 1 roll (to label jars with harvest dates and seed types).
- ● Magnifying glass: For inspecting pods and seeds up close (great for spotting pests or damaged seeds).
- ● Fine-mesh sieve or colander: To sift out debris and separate seeds from chaff.
- ● Humidity pack (silica gel): 1-2 packets to place in seed jars to absorb excess moisture and extend shelf life.
- ● Gloves (nitrile or cotton): To protect your hands from prickly stems or sap.
- ● Digital scale: For weighing seeds (helpful if you’re saving them for planting or selling).
How to harvest poppy seed pods without breaking them
Twisting pods open the wrong way ruins seeds—here's the gentle method I use every season.
🌿 Step 1: Wait for Pods to Fully Mature
Poppy seed pods are ready when they turn from green to a dry, papery brown and develop a slight crack along one seam. You'll see this change most clearly on the pod's underside, where the seam splits naturally. If you try harvesting too early, the pods will still be green and rubbery, making them impossible to open without damaging the seeds inside.
I like to check pods in the morning when dew has evaporated, as this makes the dry texture easier to assess. A fully mature pod will feel light in your hand and make a faint rattling sound when shaken—this means the seeds have dried completely and are ready for collection.
✂️ Step 2: Cut Pods from the Stem
Use clean, sharp scissors or pruners to snip the pods directly from the stem, leaving about 1 inch of stem attached to each pod. This prevents the pod from splitting open prematurely during handling. Work on a dry day when the pods are completely dry—any moisture will make them stick to your fingers or tools.
Place the freshly cut pods in a single layer on a clean, dry surface like a baking sheet or newspaper. Avoid stacking them, as this can cause premature crushing. I like to lay them out in the shade to finish drying for a few hours, which helps prevent any remaining moisture from causing mold later.
🪴 Step 3: Store Pods Properly for Drying
Find a well-ventilated area with low humidity—a pantry with a small fan works well. Place the pods in a single layer inside a breathable container like a paper bag or a mesh produce bag. Never use plastic or airtight containers, as trapped moisture will cause the pods to rot or mold before they open naturally.
Leave the pods undisturbed for 1-2 weeks, checking occasionally for signs of moisture or mold. A properly stored pod will eventually split open on its own when fully dry. If you see any pods developing mold or dampness, remove them immediately and discard them to prevent spoilage of the rest.
🌱 Step 4: Collect Seeds Gently
Once the pods have split open naturally, use a small bowl or paper to catch the seeds as you gently tap each pod. Avoid shaking or rubbing the pods, as this can damage the delicate seeds or cause them to scatter. I find it easiest to tap each pod lightly with a finger or a small wooden stick to release the seeds one at a time.
Store the collected seeds in a cool, dry place in a sealed container, like a small glass jar with a tight lid. Label the jar with the date and variety if you're saving seeds from different poppies. Properly stored seeds can remain viable for 2-3 years, making this a great way to save seeds for future plantings.
⏰ Step 5: Plant Saved Seeds Next Season
Poppy seeds germinate best when sown directly in the garden in early spring or late summer. Scatter the seeds on the soil surface and lightly press them into the top ¼ inch of soil. They don’t need light to germinate, so covering them lightly is sufficient. Keep the soil consistently moist but not soggy until germination, which typically occurs within 1-3 weeks.
Young poppy seedlings are delicate, so avoid disturbing them once they emerge. Thin seedlings to 12-18 inches apart to give them room to grow into strong, healthy plants. With proper care, your saved seeds will produce beautiful poppies just like the original plants.
Tips & tricks for perfect poppy seed pod harvesting
Here's what nobody tells you about saving poppy seeds without the frustration of broken pods.
Timing is Everything: The 1-2 week drying period in Step 3 is non-negotiable for pod integrity. I've learned this the hard way—rushing this step leads to premature splitting and seed loss. Place pods in a location with consistent airflow (like a pantry with a small fan) and maintain humidity below 50%. A simple hygrometer helps track this, but even without one, you'll notice mold or dampness as red flags.
Handling Technique: When cutting pods in Step 2, leave that 1-inch stem attached—it's not just about preventing premature opening. The stem provides structural support during the drying process. I've found that using clean, sharp scissors is crucial; dull blades crush pods and release seeds prematurely. If you don't have pruners, kitchen shears work fine, but sterilize them first with rubbing alcohol.
Seed Collection Strategy: For Step 4, I recommend using a small wooden spoon or chopstick instead of fingers to tap pods. The blunt surface prevents accidental crushing while providing just enough force to release seeds. Place a white paper plate under the pods—it creates a high contrast that makes seeds instantly visible against any background, preventing losses.
Storage Wisdom: The 2-3 year viability claim in Step 4 holds true only if seeds remain completely dry. After collecting seeds, place them in the freezer for 24 hours to kill any potential mold spores before transferring to your storage jar. This extra step has saved me from ruined batches multiple times. Label your jars with both the date and variety—trust me, you'll forget in a year!
Pro Tips for Dry Poppy Seed Pods
- Here's what nobody tells you about saving poppy seeds without the frustration of broken pods.
- Timing is Everything: The 1-2 week drying period in Step 3 is non-negotiable for pod integrity.
- Handling Technique: When cutting pods in Step 2, leave that 1-inch stem attached—it's not just about preventing premature opening.
Frequently asked questions
Got questions about dry poppy seed pods? You’re not alone!
Here are the answers to some of the most common queries—whether you're harvesting for seeds, troubleshooting stubborn pods, or just curious about the process. Let’s dive in!
Why won’t my poppy seed pods open or release seeds?
Poppy seed pods are notorious for their twist-and-lock mechanism! If they’re not opening naturally, they may need a little encouragement. Try gently twisting the pod between your fingers or placing it in a paper bag for a day—movement often triggers seed release. If pods are still sealed, they might not be fully mature yet.
How long does it take for poppy seed pods to dry and release seeds?
Drying time varies by climate, but most poppy pods take 2–4 weeks after flowering to mature. In dry conditions, they’ll crack open on their own. If humidity is high, speed things up by harvesting pods when they turn brown and brittle, then drying them indoors (out of direct sunlight) for a few days. Patience is key—rushing can ruin viability!
Can I harvest poppy seeds from pods that are still green?
Nope! Green pods mean the seeds aren’t ready—harvesting too early results in low viability or no seeds at all. Wait until pods are fully brown, dry, and papery (they’ll rattle when shaken). If you’re unsure, split one open: seeds should be dark and plump, not shriveled or hollow.
What can I do with poppy seed pods that won’t open?
Don’t toss them! Try these tricks:
- Freeze them overnight—the temperature change can loosen the grip.
- Roll them on a hard surface (like a countertop) to crack them open.
- Use a mortar and pestle (gently!) to break them apart.
Are there alternatives to harvesting poppy seeds from pods?
If you’re not into the twisty challenge, consider:
- Store-bought poppy seeds—available in baking aisles or health food stores.
- Growing poppies from seed—many varieties (like California poppies) self-seed easily.
- Pressing dried pods for crafts or potpourri (just skip the seed extraction!).
Pro Tip:
For year-round harvesting, grow poppies in a controlled environment (like a greenhouse) or store dried pods in a cool, dry place. Label them with the date—freshness matters for germination!
Wrapping up and next steps
Harvesting dry poppy seed pods year-round doesn’t have to be a struggle—with the right tools and techniques, you can enjoy a steady supply of viable seeds for gardening or culinary use.
Whether you’re dealing with stubborn pods or simply optimizing your process, this guide has equipped you with practical, twist-resistant strategies to make the task easier. 🌱
Now that you’re armed with knowledge, why not put it into action? Start small—try harvesting a few pods this weekend and experiment with the methods that work best for your garden. Happy harvesting, and may your poppy patches thrive! 🌸