
Lawn
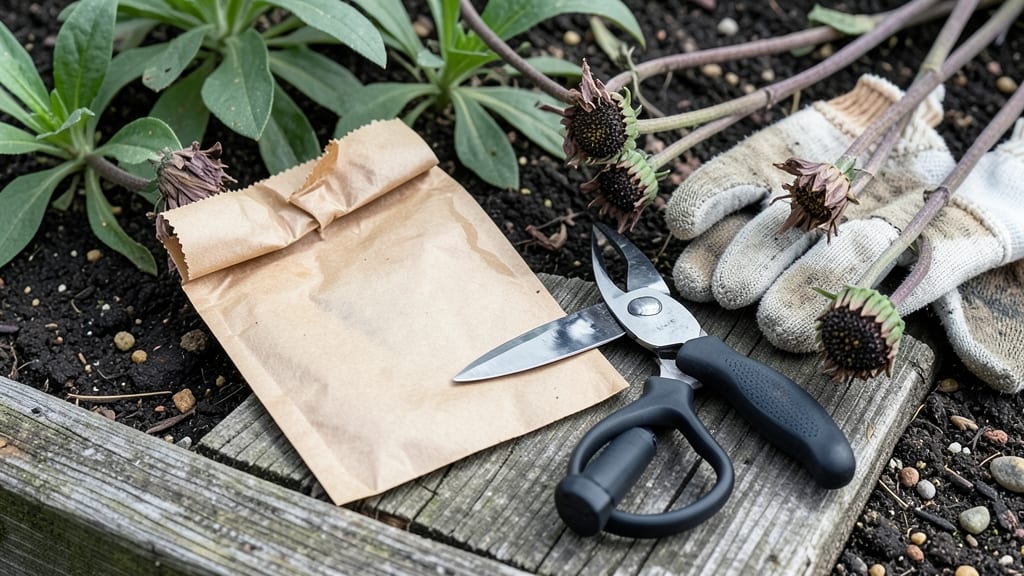
Saving the zinnia seed collection means next summer’s blooms cost you nothing. 🌻 The moment those papery seed heads form, you’re holding the key to free, heirloom-quality flowers—no store-bought packets needed.
I’ve collected seeds from my own garden for years, and the results are always shockingly lush, with colors that match exactly what I grew before.
You’ll need just three things: patience, a paper bag for drying, and a cool, dark spot for storage. The process starts when zinnias develop those classic puffballs—wait until they’re fully brown and dry to the touch before harvesting.
Snip them off cleanly, then let them finish drying indoors for a week or two before gently rubbing out the seeds.
With proper storage in an airtight container, these seeds stay viable for 3-4 years, ready to plant whenever you’re ready. Imagine walking through your garden next summer surrounded by the same vibrant colors, knowing every bloom came from seeds you saved yourself.
The best part? You’ll never buy zinnia seeds again.
This method works for any zinnia variety—dwarf, giant, or everything in between. Whether you’re a seasoned gardener or just starting, seed saving is the ultimate sustainable practice. Let’s get those seeds ready for next year’s garden!
📚 In This Guide
- What you need
- Instructions
- Tips and common mistakes
- Wrapping up and next steps
What you need
- ● Mature zinnia plants – Choose healthy, disease-free blooms with fully developed seed heads (brown, papery centers). Aim for at least 10-15 plants for a good seed harvest.
- ● Scissors or pruning shears – Sharp, clean tools to snip seed heads without damaging stems.
- ● Brown paper bags (1-2 per plant) – Labeled with the zinnia variety and date (e.g., "Benary’s Giant – 2024"). Use unbleached, breathable bags to prevent mold.
- ○ Small mesh bags or breathable fabric sacks (optional) – For long-term storage if humidity is high in your area.
- ● Permanent marker – To label bags with variety names and harvest dates.
- ● Clean, dry workspace – A table or tray lined with newspaper or parchment paper.
- ● Fine-mesh sieve or colander – To separate seeds from chaff (3–5mm holes work best).
- ● Small bowls or containers – For sorting seeds by variety.
- ● Air-tight containers (glass jars, seed envelopes, or resealable plastic bags) – Choose containers with desiccant packets or silica gel to absorb moisture.
- ● Rubbing alcohol (70% isopropyl) and cotton swabs – For sterilizing tools between varieties (prevents cross-contamination).
- ● Dry, warm conditions – Ideal temps: 60–75°F (15–24°C) with <50% humidity. Avoid damp or mold-prone areas.
- ● Indoor space – A dry, well-ventilated area (like a garage, shed, or pantry) for initial drying (2–4 weeks).
- ● Sunlight (indirect) – Place drying seed heads in a spot with gentle light to avoid overheating.
- ● Seed catalog or notebook – To track varieties, germination rates, and growing notes.
- ● Humidity pack or hygrometer – Monitors moisture levels in storage containers.
- ● Vacuum sealer – Extends seed viability for 2–3 years beyond standard storage.
- ● Plant labels with QR codes – For digital backup of seed details (fun for tech-savvy gardeners!).
Step-by-Step guide to collecting zinnia seeds
Here’s how I save seeds from my favorite zinnias year after year—simple, foolproof, and ready for next spring.
🌿 Step 1: Select the Healthiest Blooms
Pick zinnias that are fully open but still vibrant, with no signs of disease or pest damage. Look for blooms that have already started to fade—these are the ones that will produce the best seeds. I avoid flowers that have been nibbled by insects or show brown spots, as those seeds may not grow true to type.
Use clean, sharp scissors to snip the entire flower head just above the base stem. The seed heads will form on the dried flower stems, so leave about 2-3 inches of stem attached. This helps the seed heads stay upright and dry properly. Collect seeds in the late afternoon when humidity is lower—this prevents premature mold.
🌱 Step 2: Dry the Seed Heads Properly
Hang the cut zinnias upside down in a dry, well-ventilated area. I use a mesh bag or paper lunch bag with holes punched in it to allow airflow. Place them in a spot with indirect sunlight—direct sun can overheat the seeds and cause them to dry too quickly. A garage, shed, or even a sunny windowsill works well.
Let the seed heads dry for 2-3 weeks until they turn brown and crispy. You’ll know they’re ready when the petals have fallen away completely and the seed pods are rattling when shaken. If you’re in a humid climate, drying may take longer—just be patient. Avoid rushing the process, as damp seeds won’t store well and may mold.
🪴 Step 3: Extract and Clean the Seeds
Once the seed heads are fully dry, gently rub them between your fingers or tap them lightly over a clean sheet of paper. The seeds will fall out easily, leaving behind empty chaff. I like to use a small bowl to catch the seeds, then sift them through a fine-mesh strainer to remove any remaining debris. This ensures you’re left with only the clean, viable seeds.
Store the extracted seeds in a small envelope or airtight container. Label it with the zinnia variety and the year—trust me, you’ll forget by next spring! Keep the container in a cool, dark place, like a pantry or seed storage box. Zinnia seeds stay viable for 3-5 years if stored properly, so you’ll have plenty for future gardens.
⏰ Step 4: Test and Store for Next Season
Before storing, I like to test a few seeds to ensure they’re viable. Plant a small batch in a pot or seed tray and check for germination in 7-14 days. If they sprout well, you know your saved seeds are ready for long-term storage. If germination is slow or patchy, you may need to collect more seeds next year or adjust your drying process.
For long-term storage, place the sealed container in the refrigerator or freezer. The cooler temperature slows seed aging and keeps them fresh longer. I also add a small packet of silica gel to absorb any moisture—this extra step can extend seed viability by another year or two. Now you’re all set for next year’s colorful zinnias!
Tips & tricks for perfect zinnia seed preservation
These little details make all the difference between seeds that sprout beautifully next spring and ones that disappoint.
Selection Timing: The late afternoon collection time in Step 1 isn't just about avoiding humidity—it's also when zinnias have had time to fully absorb morning dew. This natural drying process starts immediately after cutting, giving you a head start on the 2-3 week drying period. I've noticed that seeds collected in the morning often take an extra week to dry properly, even in dry climates.
Drying Environment: For Step 2, I've found that placing seed heads near a small fan on low setting (not directly blowing on them) creates the perfect airflow without disturbing the delicate drying process. This cuts drying time by about 30% in humid conditions. Just make sure the fan isn't creating drafts—gentle, consistent airflow is key. The indirect sunlight recommendation is crucial: direct sun can create hot spots that cause uneven drying and potential seed damage.
Storage Wisdom: When storing your cleaned seeds in Step 3, I recommend adding a tiny pinch of silica gel to the container along with your seeds. This extra step isn't mentioned in the instructions but can extend seed viability by another year or two. The silica gel absorbs any residual moisture that might cause mold during long-term storage. For labeling, I use small glassine envelopes with a permanent marker—these won't yellow over time like paper does.
Pro Tips for Zinnia Seed Collection
- These little details make all the difference between seeds that sprout beautifully next spring and ones that disappoint.
- Selection Timing: The late afternoon collection time in Step 1 isn't just about avoiding humidity—it's also when zinnias have had time to fully absorb morning dew.
- Drying Environment: For Step 2, I've found that placing seed heads near a small fan on low setting (not directly blowing on them) creates the perfect airflow without disturbing the delicate drying process.
Frequently asked questions
Got questions about saving zinnia seeds for next season? You’re not alone! Here are answers to the most common queries to help you master the process like a pro.
When is the best time to collect zinnia seeds?
Collect seeds once the flower heads turn brown and dry out—usually 4–6 weeks after blooming. Wait until the petals drop naturally to avoid moisture, which can spoil seeds. Early fall (after the first frost) is ideal for most zinnia varieties.
How do I know if my zinnia seeds are ready to harvest?
Ready seeds will feel lightweight and rattle when shaken. The seed heads should be fully brown and crispy, not green or damp. If they crumble easily, they’re ready! Avoid harvesting if the heads are still plump or sticky.
Can I store zinnia seeds in paper envelopes instead of airtight containers?
Paper envelopes work for short-term storage (1–2 months), but for long-term viability (up to 3 years), use airtight containers like glass jars or resealable bags. Add a silica gel packet to absorb moisture and extend shelf life.
What should I do if my stored zinnia seeds get moldy?
Moldy seeds are a sign of high humidity. Discard affected seeds immediately—mold can spread and ruin your entire batch. Store seeds in a cool, dry place (35–40°F) and use moisture absorbers like rice or silica gel to prevent future issues.
How long can zinnia seeds stay viable if stored properly?
Under ideal conditions (cool, dry, dark), zinnia seeds stay viable for 2–3 years. Test germination by planting a few seeds annually—if they sprout, your seeds are still good! Older seeds may take longer to germinate but can still work.
Wrapping up and next steps
Collecting zinnia seeds is a rewarding way to ensure next year’s garden bursts with color—and you’re now equipped with the know-how! 🌻 From selecting the best blooms to mastering proper drying and storage, every step brings you closer to a thriving garden. Your future self (and pollinators!) will thank you.
Ready to take the next step? Plant those seeds in early spring and watch your garden transform into a dazzling display. Grab your gardening tools and start planning your zinnia masterpiece today!