
Transplanting
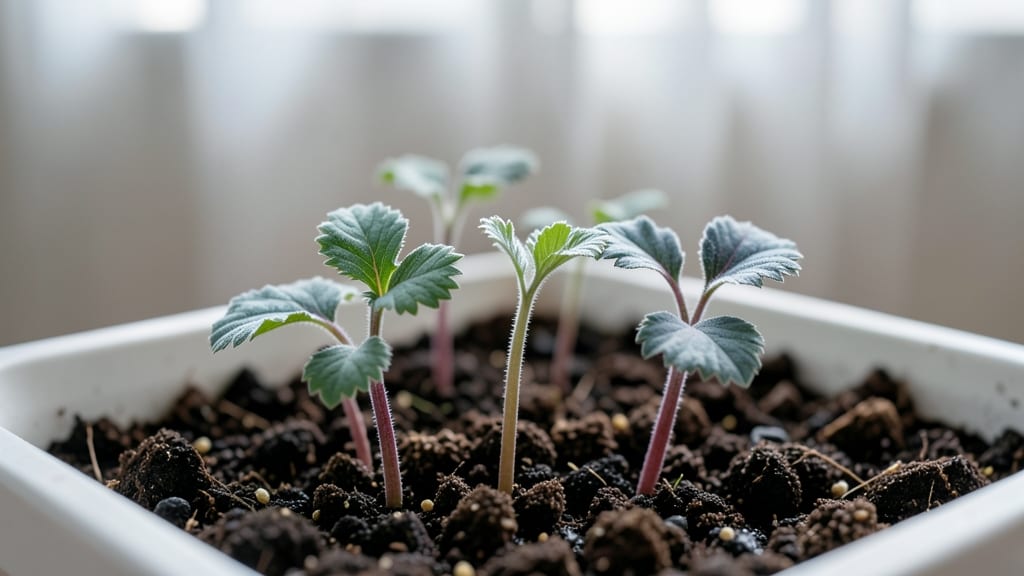
Extracting breadseed poppy seedlings without twisting their delicate stems is the secret to keeping them thriving. 🌱 I learned the hard way—my first batch of poppies wilted within days because I handled them like tougher seedlings.
These plants are famously finicky, but with the right technique, you'll see strong, vibrant seedlings ready for transplant in just 2-3 weeks.
The key is patience and gentle hands. Start by preparing a light, well-draining soil mix—poppies hate soggy roots. Plant seeds just ¼-inch deep in individual pots or trays, as they need space to grow without competing.
Keep the soil consistently moist but never waterlogged, and place them in a spot with full sun (or the brightest window you have).
Once the seedlings sprout, you'll notice their first true leaves—these are your cue to start hardening them off. Poppies are tough once established, but they despise being jostled.
When transplanting, use a small tool or your fingers to loosen the soil around the roots, then slide them out gently, never pulling by the stem. This twist-free method ensures they stay upright and ready to grow.
Common mistakes include overwatering (which causes damping off) or letting the soil dry out completely. If you see yellowing leaves, it’s often a sign of stress—adjust your watering or light exposure.
With the right care, your breadseed poppies will reward you with bold, papery blooms that attract pollinators all season long.
📚 In This Guide
- What you need
- Instructions
- Tips and common mistakes
- Wrapping up and next steps
What you need
- ● Breadseed poppy seeds – 1–2 tbsp (or ~15–30g), organic and untreated for best viability.
- ● Seed-starting mix – 2–3 cups (or ~500–750g), sterile, well-draining potting soil (avoid garden soil—it can harbor pests!).
- ● Seedling trays or small pots – 2–4 (3–4" deep), with drainage holes to prevent root rot.
- ● Spray bottle – For gentle watering (avoid over-saturating seeds!).
- ● Clear plastic dome or plastic wrap – To create a mini greenhouse and retain humidity.
- ● Grow lights or sunny windowsill – 6–8 hours of light daily (poppies love brightness!).
- ● Small hand trowel or spoon – For planting seeds at ¼" depth.
- ● Labels & marker – To track planting dates (breadseed poppies germinate in 7–14 days).
- ○ Fertilizer (optional) – Balanced liquid fertilizer (5-5-5), diluted to half-strength after seedlings sprout.
- ○ Pruning shears (optional) – For trimming leggy seedlings later.
How to extract and grow breadseed poppy seedlings without twisting
Twisting stems are the enemy of healthy poppy seedlings—here’s how to handle them properly for strong, viable plants.
🌱 Step 1: Identify and Prepare Seedlings for Extraction
Poppy seedlings often twist when competing for light, but you can salvage them by acting at the right time. Wait until seedlings reach 2-3 inches tall with 3-4 true leaves—this is when their stems are sturdy enough to handle but still flexible. Avoid extracting earlier, as delicate stems snap easily.
Gently cup the base of each seedling with your thumb and forefinger, feeling for the thickened root ball where the stem meets the soil. Twisted stems usually show a spiral pattern near the soil line. Don’t pull yet—this is just the assessment phase. A sharp twist at this stage can damage the root system permanently.
✂️ Step 2: Use the Twist-Free Extraction Method
Here’s the trick: never pull straight up. Instead, slide your fingers under the root ball at a 45-degree angle, creating a small gap between soil and stem. Poppy roots are surprisingly delicate—think of them like fine threads rather than thick taproots. With a gentle rocking motion, ease the seedling out while keeping the stem straight and aligned with your fingers.
If you encounter resistance, stop immediately. Twisting the stem now will cause it to kink permanently. Instead, use a small butter knife to carefully slice around the root ball in a circle, then repeat the extraction. The goal is to remove the entire root mass intact—even if it means leaving a bit of soil clinging to the roots.
🪴 Step 3: Transplant into Individual Pots
Poppy seedlings despise crowding, so divide them into 3-4 inch pots filled with light, well-draining soil. I like to mix 50% potting mix with 50% perlite for the first transplant—this prevents compaction and encourages root spread. Press the soil lightly around the base to eliminate air pockets, but don’t pack it down.
Place each seedling at the same depth it grew in the original container. Burying the stem too deep triggers rot, while exposing the root crown leads to weak anchorage. Water lightly until moisture reaches the bottom of the pot—you’ll know it’s right when the surface looks damp but not soggy. Avoid overhead watering, as wet foliage invites fungal issues.
☀️ Step 4: Provide Optimal Light and Support
Poppy seedlings need bright, indirect light for the first week post-transplant to recover from stress. A south-facing window works, but supplement with a grow light if stems appear elongated or pale. Keep the light 2-3 inches above the seedlings and adjust as they grow—leggy growth is a sign they’re stretching for more intensity.
Here’s where many growers fail: poppy stems are naturally weak. To prevent future twisting, insert a small bamboo stake (about 4 inches tall) next to each seedling at transplant. Gently tie the main stem to the stake with a soft twist tie as it grows. This gives the plant structural support without restricting airflow around the stem.
💧 Step 5: Monitor Moisture and Adjust Care
Water when the top inch of soil feels dry to the touch, but avoid a routine schedule—poppy seedlings are drought-tolerant once established. Overwatering is the real enemy, as it causes stems to weaken and twist as they struggle to support their own weight. If you notice wilting, water deeply and place the pot in a shady spot for 24 hours to recover.
Fertilize lightly with a balanced 10-10-10 solution at half-strength two weeks after transplanting. Poppy seedlings don’t need much—too much nitrogen leads to lush foliage at the expense of flower buds. Watch for yellowing leaves, which signal over-fertilization, and flush the soil with water immediately if it happens.
Tips & tricks for perfect breadseed poppy seedling extraction
Between us, saving those delicate poppy stems from twisting is all about timing and technique—here's how to master it.
Timing is Everything: Those 2-3 inches and 3-4 true leaves are your golden window. I learned this the hard way after losing seedlings that were too small—delicate stems snap like twigs if you pull too early. Wait until you see that sturdy root ball forming, then act fast. The spiral pattern near the soil line is your warning sign that twisting has already started.
The Extraction Technique That Changed Everything: Never pull straight up—that's how you create permanent kinks. Instead, angle your fingers at 45 degrees and rock gently while keeping the stem aligned. Think of it like loosening a stubborn screw: patience prevents damage. If resistance builds, pause and use a butter knife to slice around the root ball. This method preserves the entire root mass, which is crucial for regrowth.
Transplanting Wisdom: That 50-50 mix of potting soil and perlite isn't just random—I've seen seedlings drown in pure potting mix. The perlite creates air pockets that prevent compaction while encouraging roots to spread. When placing your seedlings, match the original depth exactly. Too deep and you'll trigger rot; too shallow and the plant won't anchor properly. Light watering until damp (not soggy) is key—overhead watering is a fungal magnet.
Light and Support Strategy: Poppy stems are naturally weak, so that 4-inch bamboo stake isn't optional—it's insurance. I've seen seedlings snap under their own weight when left unsupported. Position the light 2-3 inches above and watch for leggy growth; that's your cue to adjust. The twist ties should be soft and allow for growth—think of them as training wheels for your poppy's stem.
Pro Tips for Breadseed Poppy Seedlings
- Between us, saving those delicate poppy stems from twisting is all about timing and technique—here's how to master it.
- Timing is Everything: Those 2-3 inches and 3-4 true leaves are your golden window. I learned this the hard way after ...
- The Extraction Technique That Changed Everything: Never pull straight up—that's how you create permanent kinks. Inste...
Frequently asked questions
Got questions about growing breadseed poppy seedlings?
You’re not alone! Here are some of the most common concerns—and their straightforward solutions—to help you cultivate healthy, twist-free plants with confidence.
How long does it take for breadseed poppy seedlings to germinate?
Germination typically takes 7–14 days under ideal conditions (warmth, moisture, and indirect light). Keep soil consistently moist but not soggy, and place trays in a sunny windowsill or under grow lights. Patience is key—some seeds may take up to 3 weeks!
Why are my seedlings twisting or leaning? How do I fix it?
Twisting or "damping-off" often signals overcrowding or poor light. Thin seedlings to 2 inches apart and ensure they get 6+ hours of sunlight daily. If stems look weak, support them with toothpicks or transplant them into larger pots immediately.
When is the best time to transplant breadseed poppy seedlings outdoors?
Aim for after the last frost when soil temps reach 50°F+ (usually late spring). Harden off seedlings by gradually exposing them to outdoor conditions for 1–2 weeks before transplanting. Choose a spot with full sun and well-draining soil to prevent root rot.
Can I grow breadseed poppies from store-bought poppy seeds?
Yes! Most breadseed poppy varieties (like 'Blue Lake' or 'Black Spanish') are available at seed shops or online. Avoid wildflower mixes—opt for certified organic, non-GMO seeds for the best germination rates. Pro tip: Soak seeds overnight to speed up sprouting!
What pests or diseases should I watch for in seedlings?
Keep an eye out for aphids, slugs, or fungal issues (like powdery mildew). Use neem oil for pests and ensure good airflow to prevent mold. If leaves yellow, check for overwatering—poppies hate soggy roots! Early intervention keeps your seedlings thriving.
Wrapping up and next steps
Growing breadseed poppy seedlings with twist-free extraction is totally doable—even for beginners! 🌱 By following the right steps, you’ll ensure healthy, viable plants ready for transplanting. The key is patience, proper spacing, and gentle handling to avoid stressing those delicate seedlings.
Now that you’re armed with the know-how, why not take the next step? Start your seedlings indoors or in a controlled environment, and soon you’ll be harvesting seeds for culinary or garden use. Happy growing—your future poppy patch awaits! 🌟