
Propagation
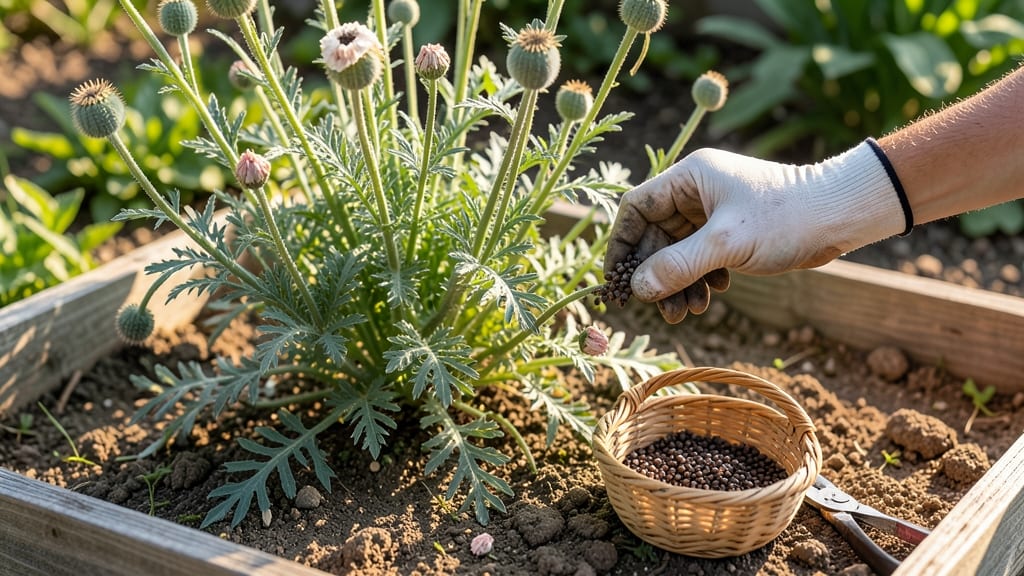
Cold-stratifying breadseed poppy seeds unlocks the secret to reliable blooms every season—no more waiting years for those delicate, papery flowers to appear. 🌸 I learned the hard way that skipping this step means seeds either rot or sprout erratically, leaving you staring at bare soil where poppies should be.
The trick is mimicking winter's natural chilling period right in your fridge, and it transforms germination rates from hit-or-miss to consistent success within weeks.
You'll need just three things: a sealed bag of damp paper towels, your fridge's crisper drawer, and patience (about 6-8 weeks). The payoff?
Seeds that wake up eager to grow, producing those signature deep blue, pink, or white blooms that hummingbirds adore—and yes, you can even sprinkle them on salads or baked goods once fully mature.
Most gardeners overlook this step, but it's the difference between a patch of poppies and a full-blown meadow.
Once stratified, plant them 1/4-inch deep in well-draining soil and 6-12 inches apart for those classic poppy spacing. They thrive in full sun and dry conditions—overwatering is their kryptonite. By late spring, you'll see the first velvety leaves pushing through, followed by stems that reach 2-3 feet tall before blooming.
The blooms last just a day, but they self-sow like crazy, giving you free poppies for years.
Watch for slugs and snails—they adore young seedlings—and use coffee grounds or diatomaceous earth as a barrier. If your climate gets too hot, poppies bolt quickly, so plant early in cooler zones.
The real magic? These seeds stay viable for decades if stored properly, making them a gardener's time capsule. Ready to turn your garden into a poppy paradise?
📚 In This Guide
- What you need
- Instructions
- Tips and common mistakes
- Wrapping up and next steps
What you need
- ● Breadseed poppy seeds: 50–100 seeds (adjust based on desired yield; store-bought or freshly harvested works best).
- ● Germination medium: Option 1: 1 small container (4–6 inches deep) with well-draining potting mix (e.g., 50% peat moss + 50% perlite/sand).
- ● Option 2: 1–2 paper towels or dampened coffee filters (for pre-sprouting).
- ● Cold stratification setup: A sealed plastic bag (ziplock or reclosable) or a small, lidded container (e.g., a clean takeout container).
- ● Ice cube tray or small plastic container with lid (for wet stratification method).
- ● Misting bottle or spray nozzle (to keep seeds moist without overwatering).
- ● Refrigerator (set to 34–40°F (1–4°C) for stratification).
- ● Grow lights or sunny windowsill (for post-stratification growth; 6+ hours of light/day).
- ● Humidity dome or clear plastic wrap (to retain moisture during early growth).
- ● Seedling heat mat (if your space is chilly post-stratification).
- ● Labeling tags (to track stratification start dates!).
- ● Fertilizer: A balanced liquid fertilizer (diluted to half-strength) for transplanting.
Step-by-Step instructions for cold-stratifying breadseed poppy seeds
Here's how I reliably break dormancy and coax these finicky seeds into vigorous, blooming plants.
🌱 Step 1: Prepare the Seeds for Stratification
Breadseed poppies need a cold period to mimic their natural growing cycle. Start by placing your seeds in a quart-sized resealable plastic bag—I use a zip-top bag that fits snugly. Add just enough moistened paper towels to surround the seeds completely without smothering them. The towels should feel damp like a wrung-out sponge, not dripping wet.
Seal the bag and place it in your refrigerator's crisp drawer (around 35-40°F). This mimics winter conditions without freezing. Check the bag weekly—if the towels dry out, mist them lightly with water. After 4-6 weeks, your seeds will be ready for planting when they look slightly plump and firm to the touch.
💧 Step 2: Plant the Stratified Seeds
Fill 2-3 inch deep seed-starting trays with a sterile seed-starting mix—never garden soil, as it's too dense and may harbor pathogens. Poppy seeds are tiny, so I use a toothpick to create tiny holes about ¼ inch deep in the soil. Place 2-3 seeds per hole since germination rates can be unpredictable.
Cover the seeds lightly with a thin layer of soil—just enough to bury them but not press them deep. Mist the surface gently with water until the soil is evenly moist but not soggy. Place the trays in a warm location (around 65-70°F) with bright, indirect light—direct sun at this stage can scorch the delicate seedlings.
☀️ Step 3: Provide Ideal Germination Conditions
Poppy seeds germinate best in consistent warmth and moisture. Keep the soil surface damp by misting lightly every 2-3 days—you'll know it's right when the top inch feels moist but not waterlogged. Avoid overwatering, which can cause damping-off, a fungal disease that collapses seedlings overnight.
Once the first true leaves appear (not the initial cotyledons), move the trays to a sunny windowsill or under grow lights for 12-14 hours daily. You'll see leggy growth if the light is insufficient—this means the seedlings are stretching toward any available light source. Strong seedlings have sturdy stems and deep green leaves spaced evenly apart.
✂️ Step 4: Thin and Transplant Seedlings
When seedlings reach 1-2 inches tall, thin them to the strongest plant per hole using small scissors. Snip the weaker seedlings at soil level to avoid disturbing the roots of the remaining plants. Poppies hate being transplanted, so I recommend direct-sowing them outdoors once they're 3-4 inches tall and have 4-5 true leaves.
Choose a sunny, well-drained spot in your garden—poppies thrive in full sun (6+ hours daily) and poor, sandy soil. Space them 6-12 inches apart to allow for their delicate, airy blooms. Water deeply after planting to settle the soil, but avoid overwatering, as poppies are drought-tolerant once established.
🌿 Step 5: Maintain Through Blooming Season
Poppies need minimal care once established. Water deeply once a week unless your region experiences a heatwave—then increase to every 3-4 days. You'll know they need water when the top inch of soil feels dry. Deadhead spent blooms by snipping the flower heads just above the foliage to encourage more flowers and prevent self-seeding if you don't want volunteers popping up everywhere.
Fertilize lightly once a month with a balanced, water-soluble fertilizer (10-10-10) diluted to half strength. Poppies are sensitive to over-fertilization, which can lead to leafy growth at the expense of blooms. Watch for aphids or Japanese beetles—both love poppy flowers. Handpick pests early to avoid damage to the delicate petals.
Tips & tricks for perfect breadseed poppy germination
These simple strategies will help you break dormancy and coax reliable blooms from your finicky breadseed poppies.
Stratification Temperature: The 35-40°F range in your refrigerator's crisp drawer is ideal because it mimics natural winter conditions without freezing. If your fridge runs cooler, place the bag on a shelf near the back where it's slightly warmer. Too cold (below 35°F) can damage the seeds, while warmer temps won't trigger proper dormancy breaking. I've found that checking the bag weekly ensures consistent moisture without risking mold.
Lighting Strategy: For Step 3, when you move seedlings to 12-14 hours of light, use a simple grow light if your windowsill isn't sunny enough. I position mine about 6 inches above the trays to prevent leggy growth. The key is bright, indirect light—direct sun at this stage can scorch the delicate seedlings. You'll notice strong seedlings develop sturdy stems and deep green leaves spaced evenly apart.
Transplanting Timing: In Step 4, direct-sowing outdoors when seedlings are 3-4 inches tall with 4-5 true leaves is crucial. Poppies hate being transplanted, so this approach minimizes stress. Choose a sunny, well-drained spot with poor, sandy soil to match their natural habitat. Water deeply after planting to settle the soil, but avoid overwatering—they're drought-tolerant once established.
Fertilizer Wisdom: When you fertilize monthly with diluted 10-10-10, remember poppies are sensitive to over-fertilization. Too much nitrogen leads to leafy growth at the expense of blooms. I use half-strength solution and apply it directly to the soil, not the leaves. Watch for aphids or Japanese beetles—they love poppy flowers, so handpick pests early to protect delicate petals.
Pro Tips for Breadseed Poppy Seeds
- These simple strategies will help you break dormancy and coax reliable blooms from your finicky breadseed poppies.
- Stratification Temperature: The 35-40°F range in your refrigerator's crisp drawer is ideal because it mimics natural ...
- Lighting Strategy: For Step 3, when you move seedlings to 12-14 hours of light, use a simple grow light if your windo...
Frequently asked questions
How long does cold stratification for breadseed poppy seeds take?
Cold stratification typically requires 4–8 weeks in the fridge. Place moistened seeds in a sealed bag with damp peat moss or paper towels, then refrigerate at 34–40°F (1–4°C). Patience is key—some varieties need longer! Check periodically for sprouting (usually within 2–4 weeks of stratification).
Can I skip cold stratification and still grow breadseed poppies?
While possible, skipping stratification reduces germination rates (often <10%). For best results, stratify—especially in warm climates. If you’re impatient, try soaking seeds in warm water for 24 hours first, then sow directly. However, cold treatment mimics winter conditions, breaking dormancy naturally.
What’s the best soil mix for germinating breadseed poppy seeds?
Use a light, well-draining mix like:
- 50% peat moss or coco coir (for moisture retention)
- 30% perlite or coarse sand (for aeration)
- 20% compost or worm castings (for nutrients)
Why aren’t my seeds germinating after stratification?
Check these troubleshooting tips:
- Temperature: Keep soil at 60–70°F (15–21°C) post-stratification.
- Moisture: Keep soil consistently damp (not waterlogged).
- Depth: Sow seeds ¼ inch deep—they need light to sprout.
- Freshness: Old seeds (<2 years) may fail; test viability with a saltwater float test.
Can I grow breadseed poppies from store-bought poppy seed bags?
Store-bought poppy seeds (like those in bagels) are culinary varieties and won’t germinate—they’re processed for flavor, not propagation. For growing, buy raw breadseed poppy seeds labeled for gardening (e.g., Papaver somniferum) from seed suppliers. Pro tip: Look for "opium poppy" seeds (non-drug strains) at specialty nurseries!
Wrapping up and next steps
Breadseed poppy seeds may seem finicky, but with the right cold-stratification technique, you’re well on your way to vibrant blooms! Remember: patience and precision are key—whether you’re using the fridge, freezer, or outdoor method, consistency ensures success.
Now that you’ve mastered the process, why not put those sprouts to work? Try planting them in your garden, sharing seeds with fellow gardeners, or experimenting with varieties to see what thrives best in your climate. Happy growing—your future poppy patches are waiting! 🌱✨