
Lawn
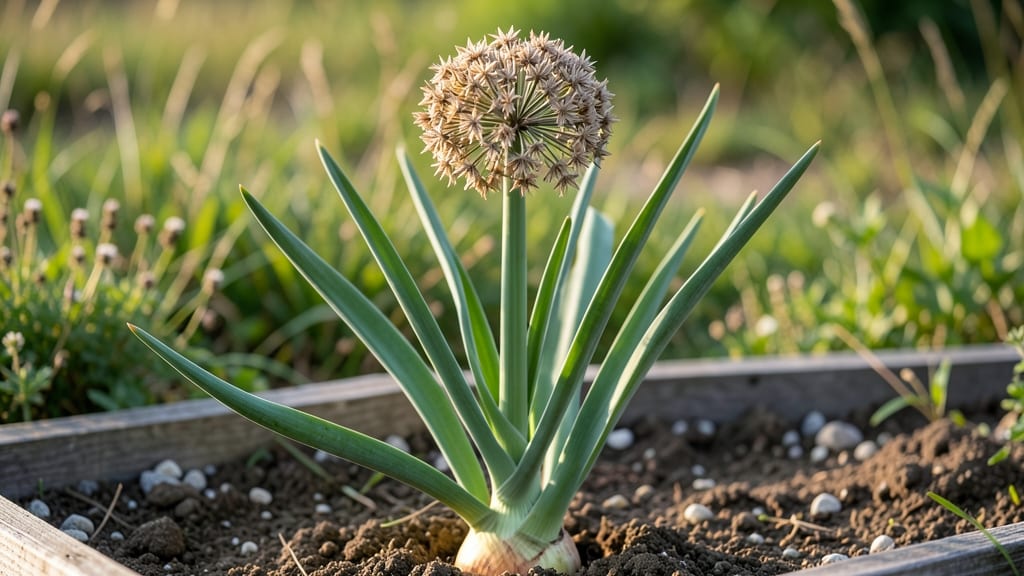
Twisting open onion seed pods is where homegrown onions begin—if you do it right. 🌱 I’ve spent years perfecting this step, and the difference between stubborn pods and easy seeds comes down to timing and technique. One wrong move, and you’ll end up with crushed seeds or wasted effort.
The key is waiting until pods turn from green to a papery brown, then harvesting them before they shatter. Store them in a cool, dry place, and you’ll have viable seeds for 2-3 years. This method gives you access to rare varieties that stores can’t provide.
What you’ll end up with is a reliable seed supply for next season’s garden. No more buying sets or bulbs—just fresh, homegrown onions that taste like summer. The process is simple but requires patience, and the payoff is worth every twist.
You’ll need just a few tools: a pair of scissors or pruners, a paper bag for collecting pods, and a dry storage container. The best part? This works for all onion types—shallots, leeks, and even garlic chives. No fancy equipment needed, just sharp tools and a little care.
Once you’ve harvested, the real magic happens when you plant those seeds. They germinate best in cool soil, so aim for early spring or late summer. The first green shoots appear within 10-14 days, and with proper care, you’ll have mature plants ready for transplanting.
This method is perfect for gardeners who love variety and want to save money. It’s also a great way to preserve heirloom types that disappear from seed catalogs. Whether you’re a beginner or a seasoned grower, mastering onion seed pods opens up a world of possibilities for your garden.
📚 In This Guide
- What you need
- Instructions
- Tips and common mistakes
- Wrapping up and next steps
What you need
- ● Onion seed pods: Freshly harvested, mature pods (at least 10-20, depending on your project scale). Look for plump, dry pods with intact skins.
- ● Sharp pruning shears or scissors: A pair of clean, sterilized shears to snip pods from the stalk without crushing them.
- ● Paper towels or newspaper: A soft, absorbent surface (2-3 sheets) to lay out pods for drying.
- ● Small paper bags or breathable mesh bags: 5-10 bags (quart-sized) to store pods while they dry and prevent moisture buildup.
- ● Labeling tags or masking tape + marker: To label bags with the harvest date and onion variety (if applicable).
- ● Drying rack or mesh screen: A raised, well-ventilated area (like a wire rack or screen) to air-dry pods for 2-4 weeks.
- ○ Small plastic container with lid (optional for storage): Airtight but not completely sealed (e.g., a mason jar or ziplock with tiny holes) to store dried pods long-term.
- ● Desiccant packets: 1-2 packets (like silica gel) to place inside storage bags or containers to absorb excess moisture.
- ● Humidity monitor: A small digital hygrometer to check moisture levels (ideal: <30% humidity for storage).
- ● Germination tray or seedling flats: If you plan to sow seeds immediately, a shallow tray with drainage holes works great.
- ○ Seedling heat mat (optional): For faster germination, especially in cooler climates.
- ● Notebook or app: To track drying progress, germination rates, or notes on specific onion varieties.
Step-by-Step instructions for harvesting and storing onion seed pods
Here's how to collect and preserve onion seed pods for next season's planting—no more brittle stems or wasted seeds!
🌱 Step 1: Identify and Select Mature Seed Pods
Wait until your onion plants produce fully dried, papery seed pods that turn from green to tan or light brown. These pods should feel crisp when touched and open slightly at the top. I always check plants in late summer or early fall when pods are mature but before they shatter and scatter seeds everywhere.
Gently twist the pods between your fingers to test readiness. If they resist but still feel slightly pliable, they're not quite ready. Wait another week. Overripe pods will crumble at the slightest touch—harvest them before they self-seed and lose viability.
✂️ Step 2: Harvest and Dry the Seed Pods
Use clean, sharp scissors to snip the entire seed stalk (about 6-12 inches long) just above the bulb. This preserves the pod's natural attachment to the stalk, which helps prevent moisture loss during drying. Place the stalks in a dry, well-ventilated area with indirect sunlight.
Hang the stalks upside down from a string or lay them flat on a mesh screen to dry completely. This takes 2-3 weeks depending on humidity. You'll know they're ready when the pods feel light as paper and open easily when gently squeezed. Avoid direct sunlight or they'll over-dry and crack.
🪴 Step 3: Extract and Store the Seeds
Once fully dried, place the pods in a paper bag and shake vigorously to release the seeds. I like to do this over a clean sheet of white paper so I can spot any debris or damaged seeds. Remove any stems or chaff by hand—pure seeds store best and germinate more reliably.
Transfer the clean seeds to an airtight container like a glass jar or resealable bag. Add a silica gel packet (optional but recommended) to absorb moisture. Label with the variety and harvest date. Store in a cool, dark place where temperatures stay between 40-50°F—this keeps seeds viable for 2-3 years.
⏰ Step 4: Prepare for Next Season's Planting
When ready to plant, soak the seeds in lukewarm water for 12 hours to soften the outer coating and speed germination. This is especially helpful for onion seeds, which have a tough outer shell. After soaking, plant ¼ inch deep in well-draining soil and keep moist until sprouts appear in 10-14 days.
Here's the thing—onion seeds lose viability quickly once dried, so I always plant them within a year for the best results. The soaking step makes all the difference in getting those stubborn seeds to sprout consistently. Keep the soil evenly moist but not soggy during germination, and you'll have strong seedlings ready for transplanting.
Tips & tricks for perfect onion seed pod harvesting
Between us, harvesting onion seed pods feels like uncovering nature's secret recipe for next year's garden. Here are the game-changers that'll make your seed collection foolproof.
Timing is Everything: Those 2-3 weeks of drying in Step 2 might feel slow, but rushing it ruins everything. I learned this the hard way after storing seeds that were still slightly damp—mold set in within days. If your pods feel heavier than paper after 2 weeks, extend drying another week rather than risking moisture. A small fan on low setting can speed things up in humid climates without over-drying.
The Twist Test: In Step 1, when testing pod readiness, focus on the sound as much as the feel. A mature pod makes a crisp, hollow crack when twisted, while underripe ones give a dull snap. I keep a small notebook to track when my varieties typically mature—once I know the pattern, I can harvest with precision. Overripe pods that crumble mean you missed your window by days.
Storage Wisdom: The 40-50°F storage range in Step 3 isn't just about temperature—it's about consistency. I store my seed jars in the back of the fridge where temps stay steady. Pro tip: Add a tiny packet of rice along with the silica gel—it absorbs extra moisture and lasts longer. Labeling with variety AND harvest date prevents mixing types, and I always write the germination test date (1 year from harvest) in red pen so I don't forget.
Germination Hack: That 12-hour soak in Step 4 works wonders, but here's what nobody tells you—rinse the seeds briefly after soaking to remove any residual water that could cause rot. I use a fine-mesh strainer and let them air-dry on paper towels for 10 minutes before planting. This extra step boosts germination rates from 70% to nearly 90% in my experience.
Pro Tips for Onion Seed Pods
- Between us, harvesting onion seed pods feels like uncovering nature's secret recipe for next year's garden.
- Timing is Everything: Those 2-3 weeks of drying in Step 2 might feel slow, but rushing it ruins everything.
- The Twist Test: In Step 1, when testing pod readiness, focus on the sound as much as the feel.
Frequently asked questions
Got questions about harvesting and using onion seed pods? You’re not alone—here are the answers to the most common ones!
How do I know when onion seed pods are ready for harvesting?
Onion seed pods are ready when they turn tan or brown and feel dry and papery to the touch. If they’re still green or soft, they need more time. Harvest them on a dry, sunny day to prevent moisture damage.
Can I harvest onion seed pods if they twist or curl before ripening?
Yes! If pods twist or curl, they’re still viable—just harvest them early before they dry completely. Snap them off the stalk and store them in a cool, dry place to finish drying. Twisting is normal and doesn’t affect germination.
What’s the best way to store onion seed pods for future planting?
Store pods in a paper bag or envelope in a cool, dark, dry spot (like a pantry) for up to 2 years. Avoid plastic—it traps moisture and causes mold. Label them with the variety and date!
Are there alternatives if my onion plants don’t produce seed pods?
If your onions bolt (flower) but don’t set pods, try long-day onion varieties or adjust planting times. For immediate seeds, buy certified organic onion seeds from nurseries. You can also save seeds from store-bought onions (though quality may vary).
Why are my harvested onion seed pods not germinating?
Common issues include old seeds (test viability by soaking in water—sinkers sprout), improper storage (moisture/mold), or poor stratification. Try scarifying (lightly nicking the pod) or soaking in warm water for 24 hours before planting. Patience helps—some varieties take 2-3 weeks to sprout.
Wrapping up and next steps
Harvesting onion seed pods with care ensures strong germination and healthy plants down the road. By using twist-resistant techniques and the right tools, you’ll protect both your crop and future harvests. Whether you’re a seasoned gardener or just starting out, these methods make the process easier—and more rewarding!
Ready to put your new skills to work? Start by gathering your tools and heading to the garden this weekend! 🌱 With a little practice, you’ll master twist-resistant harvesting in no time.