
Propagation
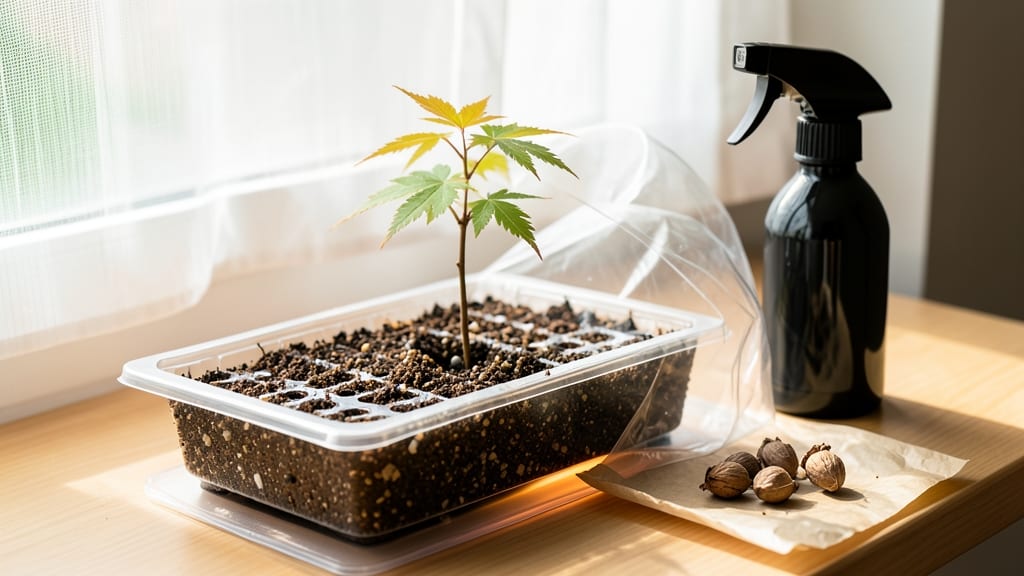
Japanese maple seed germination needs a little patience and the right trick to break their stubborn shells. 🌱 The key isn’t forcing them—it’s mimicking nature’s slow, cold preparation. I’ve learned that skipping this step means waiting months, if ever, for those first tiny leaves to appear. You’ll need three things: a mix of sandy loam and perlite to prevent rot, a sealed plastic bag for moisture, and a fridge for the cold treatment. The seeds themselves are tiny, but their wings help them float—just like the real thing. Plant them shallow, barely covered, and keep them damp but not soggy. After 8-12 weeks of cold stratification, those seeds will finally crack open. You’ll see the first green shoots in 4-6 weeks after planting, but don’t rush them—rushing is what kills them. The real magic happens when they get bright indirect light and 60-70°F temperatures. If germination stalls, don’t blame the seeds—try air-layering cuttings instead. Japanese maples are stubborn, but with this method, you’ll see results. Here’s how to make it work without the guesswork.
📚 In This Guide
- What you need
- Instructions
- Tips and common mistakes
- Wrapping up and next steps
What you need
- ● Japanese maple seeds: Fresh, viable seeds (preferably from a red or green variety like Acer palmatum or Acer japonicum). Aim for 5–10 seeds to increase success rates.
- ● Seed extraction tools: A sharp, sterilized knife or pruning shears for carefully slicing seed pods.
- ● Tweezers (fine-tipped, for handling delicate seeds).
- ● Growing medium: Well-draining potting mix (e.g., a blend of 50% peat moss, 30% perlite, and 20% vermiculite).
- ○ Optional: A seed-starting tray or small pots (3–4 inches deep) with drainage holes.
- ● Containers: Plastic bag or clear dome (to create a humidity tent).
- ● Spray bottle (for gentle watering).
- ● Environmental controls: Grow light or sunny windowsill (indirect light preferred).
- ○ Heating mat (optional, for maintaining 65–75°F (18–24°C) soil temps).
- ● Stratification supplies: A refrigerator (for cold stratification, if needed) or peat moss mix for outdoor burial.
- ● Fungicide (e.g., hydrogen peroxide (3%) or mycorrhizal inoculant to prevent rot).
- ● Labeling tags (to track seed varieties and planting dates).
- ● Humidity monitor (to keep levels between 70–80%).
Step-by-Step guide to germinating Japanese maple seeds
Here's the method I've used to coax these tricky seeds into sprouts—no fancy tools, just patience and the right technique.
🌱 Step 1: Extract Seeds Without Damaging the Wing
Japanese maple seeds arrive with their distinctive wings still attached. The key is removing the seed without tearing the delicate membrane—this protects the embryo inside. Hold the seed between your thumb and forefinger, then gently twist until the wing pops off cleanly. You'll hear a faint crack when it's ready.
If the wing resists, don't force it—you'll split the seed. Instead, use a clean pair of scissors to snip the wing at the base. Discard the wings immediately; they dry out quickly and won't regerminate. Once free, the seeds look like tiny, glossy brown beans. Store them in a paper envelope until you're ready to plant.
💧 Step 2: Stratify Seeds for 3 Months
This is the critical step Japanese maples won't skip. Place the seeds in a plastic bag with a damp paper towel—just enough moisture so the towel feels like a wrung-out sponge. Seal the bag loosely (a twist tie with a tiny gap works) and refrigerate for 90-120 days. Check monthly to ensure the towel stays damp; if it dries, mist lightly.
Stratification mimics winter conditions, breaking the seed's dormancy. You'll see nothing happen at first—that's normal. The real magic occurs when cold temperatures trigger internal chemical changes. After 3 months, remove the seeds from cold storage and let them sit at room temperature for 24 hours before planting.
☀️ Step 3: Plant in Light, Airy Soil Mix
Use a blend of 50% peat moss and 50% perlite for drainage and aeration—Japanese maples hate soggy roots. Fill small pots (2-3 inches deep) with the mix and press it down lightly. Plant seeds ¼ inch deep, spacing them 1 inch apart in the pot. Cover gently with additional mix, then mist until the surface feels damp but not wet.
Place the pots in a warm spot (65-75°F) with bright, indirect light. A sunny windowsill works, but avoid direct afternoon sun, which can overheat the soil. You'll need to wait 4-8 weeks for germination—patience is key here. Keep the soil consistently moist (not wet) by watering from the bottom when the top inch feels dry.
🌿 Step 4: Transplant Seedlings to Individual Pots
Once seedlings reach 2-3 inches tall and develop their first true leaves (not the initial seed leaves), it's time to separate them. Gently remove each seedling, keeping as much root intact as possible. Transfer to 4-inch pots filled with a mix of 50% potting soil and 50% compost. Plant each seedling at the same depth it grew in the original pot.
Water thoroughly after transplanting, then place the pots in a shaded area for 1 week to reduce stress. After that, gradually introduce them to brighter light. Japanese maple seedlings grow slowly—don't rush their development. You'll notice new leaves forming in 4-6 weeks, signaling healthy growth.
⏰ Step 5: Harden Off Before Outdoor Planting
After 6-8 months of indoor growth, your seedlings will be ready for outdoor life. Start hardening them off by placing the pots outside in a sheltered spot for 1-2 hours the first day. Gradually increase their outdoor time over 2 weeks, moving them to sunnier locations and exposing them to wind.
Japanese maples thrive in partial shade, so choose a spot with morning sun and afternoon shade. Plant them in well-draining soil in spring or fall, when temperatures are mild. Water deeply after planting to help roots establish. Remember, these trees grow slowly—give them time to mature before expecting dramatic growth.
Tips & tricks for perfect Japanese maple seed germination
Here's what I've learned after years of working with these finicky seeds—little tricks that make all the difference.
Seed Extraction Precision: In Step 1, the key is patience when twisting the wing off. I've found that working with seeds at room temperature makes the membrane more pliable. If you hear a popping sound, you're doing it right—the seed should come away cleanly without any membrane tears. For stubborn seeds, a quick dip in warm water for 10 seconds can help loosen the wing without damaging the seed.
Stratification Storage Hack: For Step 2, I recommend using a clear plastic bag with a tiny hole for ventilation. Place it in the crisper drawer of your fridge—it maintains more consistent humidity than the main fridge compartment. The 90-120 day range is critical; don't rush this process. I've seen seeds fail to germinate when cold stratification was shortened, even by just a few weeks.
Soil Mix Consistency: When preparing the 50% peat moss and 50% perlite mix in Step 3, I like to add a handful of vermiculite to improve moisture retention. This helps maintain that crucial "damp but not wet" consistency. Before planting, I always press the mix down gently to create a firm base—this prevents the tiny seeds from sinking too deep during watering.
Germination Timeline Reality: The 4-8 week germination window in Step 3 can feel like forever, but it's important to resist the urge to check constantly. I've found that placing pots under a grow light (12 hours on/12 hours off) can help speed up germination by about 1-2 weeks, especially if your natural light is weak. Just keep the light 6-12 inches above the soil to avoid overheating.
Pro Tips for Japanese Maple Seed Germination
- Here's what I've learned after years of working with these finicky seeds—little tricks that make all the difference.
- Seed Extraction Precision: In Step 1, the key is patience when twisting the wing off.
- Stratification Storage Hack: For Step 2, I recommend using a clear plastic bag with a tiny hole for ventilation.
Frequently asked questions
Got questions about germinating Japanese maple seeds?
You’re not alone—this process can be tricky! Below, we’ve answered the most common queries to help you troubleshoot and succeed.
How long does it take for Japanese maple seeds to germinate?
Patience is key! Japanese maple seeds can take anywhere from 4 weeks to 6 months to sprout, depending on temperature, moisture, and seed freshness. Cold stratification (chilling) speeds this up—aim for 60–90 days in the fridge before planting. If no sprouts appear after 6 months, the seeds may need re-stratification or could be non-viable.
Do I have to cold-stratify Japanese maple seeds?
Yes—cold stratification is critical! These seeds require a winter-like dormancy period to break their hard outer shell. Skip this step, and germination rates plummet. Place seeds in a moist paper towel in a sealed bag in your fridge (34–40°F) for 60–90 days before sowing. Think of it as a mini-winter for your seeds!
What’s the best soil mix for germinating Japanese maple seeds?
Use a light, well-draining mix like:
- 50% peat moss or coco coir (for moisture retention)
- 30% perlite or coarse sand (for aeration)
- 20% compost or worm castings (for nutrients)
My seeds sprouted, but the seedlings look weak or leggy. What went wrong?
Leggy or weak seedlings usually mean too little light or overcrowding. Move them to a bright, indirect light spot (a south-facing window or grow lights work best). If seedlings are touching each other, thin them to 2–3 inches apart to prevent competition. Yellow leaves? That’s often overwatering—let the top inch of soil dry out between waterings.
Can I grow Japanese maple from seed if I live in a warm climate?
Yes, but you’ll need to mimic seasonal changes artificially. After cold stratification, sow seeds in spring (when temps are 50–60°F at night). Use shade cloth in summer to protect young seedlings from heat stress. Alternatively, grow them in containers and move them indoors during extreme weather. Bonus tip: Some growers use a heat mat (70–75°F) to speed germination in warm climates!
Wrapping up and next steps
Growing a Japanese maple from seed is a rewarding journey that combines patience and precision—especially when mastering the twist-free extraction method for viable sprouts! 🌱 With the right tools, a clear understanding of seed stratification, and a touch of care, you’re well on your way to nurturing a stunning, slow-growing beauty.
Remember, consistency is key, and every tiny step—from scarification to transplanting—builds toward success.
Ready to take the next step? Once your seedlings are thriving, research container sizes or outdoor planting conditions to give them the best long-term home. Happy growing! 🌿