
Lawn
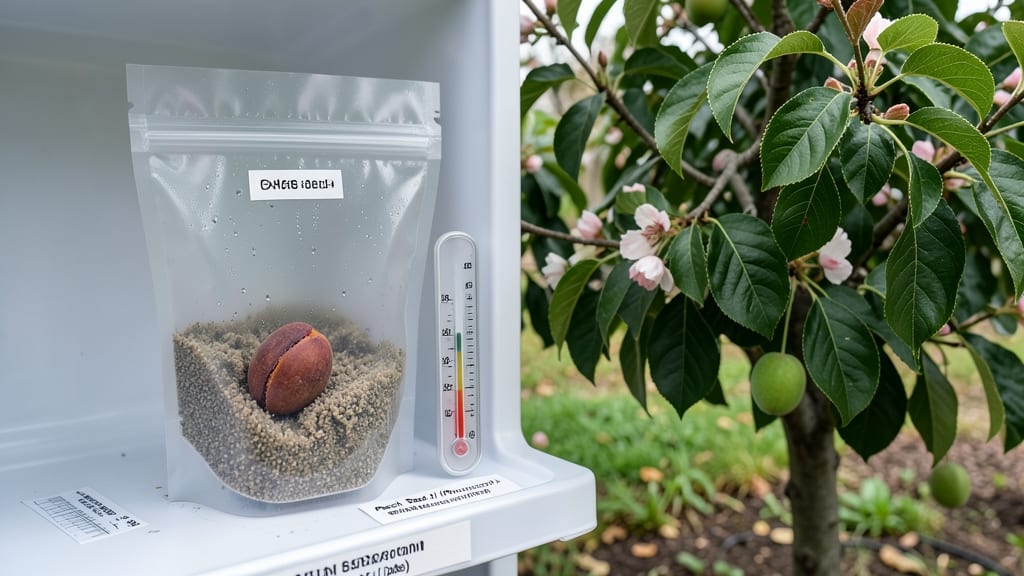
Peach seed stratification isn’t just a process—it’s the secret to unlocking next spring’s blooms from this winter’s seeds. 🌱 I’ve watched my own peach pits sit for months, stubborn and dry, until I learned the cold trick that breaks their dormancy.
Without it, you’ll stare at those seeds for years, waiting for something that’ll never come. The magic happens in 60-90 days of cold moisture, mimicking nature’s winter cycle. Most gardeners mess this up by rushing—either too hot or too dry—and end up with moldy messes or zero sprouts.
But once you nail the 40-50°F fridge temperature and moist but not soggy sand mix, germination rates jump from near-zero to 80% or better. By late winter, you’ll spot tiny roots breaking through the mix, signaling it’s time to plant.
The patience pays off when those first true leaves unfurl in spring, proving the wait was worth every chilly week. No more guessing—just reliable, predictable growth. This method works for nectarines, plums, and apricots too. Here’s exactly how to do it without the trial-and-error frustration.
📚 In This Guide
- What you need
- Instructions
- Tips and common mistakes
- Wrapping up and next steps
What you need
- ● Peach seeds – 5–10 fresh, clean seeds (remove fleshy outer layer; dry for 2–3 days first).
- ● Stratification medium – 2–3 cups of moistened perlite, vermiculite, or a 50/50 mix of peat moss and sand (sterilized).
- ● Small containers – 2–3 plastic zip-top bags (quart-sized) or a shallow tray with drainage holes.
- ● Labeling tags – Waterproof markers or tags to track seed varieties (if applicable).
- ● Refrigerator or cold frame – A space maintaining 35–45°F (2–7°C) for 6–12 weeks.
- ● Seedling trays with clear lids (for humidity control during stratification).
- ● Fungicide (like hydrogen peroxide or cinnamon powder) to prevent mold.
- ● Grow lights or a sunny windowsill for post-stratification sprouting.
- ● Thermometer (to monitor cold temps accurately).
How to stratify peach seeds for spring germination
This method mimics winter's natural chilling—no fancy equipment, just patience and your fridge.
🌱 Step 1: Extract and Clean the Seeds
Cut open a ripe peach and remove the large, flat seed inside. Rinse it thoroughly under cool water to remove all remaining fruit pulp—this prevents mold during stratification. I like to scrub the seed gently with a soft brush to remove any stubborn flesh clinging to the edges. Let it air-dry completely for 24 hours before proceeding.
Here's the thing—peach seeds have a hard outer shell that needs to soften for germination. If you skip drying, moisture trapped inside will cause the seed to rot before it even gets cold. Place the seed on a paper towel in a warm, dry spot until completely dry to the touch.
🥶 Step 2: Cold-Moisten the Seeds for 3 Months
Fill a small plastic bag with 2 tablespoons of moistened peat moss or coconut coir—just damp enough that water drips out when squeezed, but no puddles. Place the dried peach seed inside the bag and seal it tightly. This creates a humid, cold environment that mimics winter's natural conditions.
Store the sealed bag in your refrigerator's crispier drawer (around 35-40°F) for 3 months. Check the bag monthly—if the peat moss feels dry, add a few drops of water. The goal is consistent moisture, not soggy conditions. After 90 days, your seeds will have completed their cold stratification cycle.
⏰ Step 3: Warm Up and Plant the Stratified Seeds
Remove the seeds from the fridge and plant them ½ inch deep in a pot filled with sterile seed-starting mix. I use small 4-inch pots for each seed since peach trees grow large. Water gently until the soil looks evenly moist but not saturated. Place the pot in a warm spot (70-75°F) with bright, indirect light.
Germination can take 2-4 weeks—sometimes longer. You'll know it's working when you see a tiny sprout pushing through the soil. Keep the soil consistently moist during this time, but avoid overwatering. Too much moisture will cause the seedling to rot before it emerges.
☀️ Step 4: Transition to Light and Nurture Seedlings
Once the seedling reaches 2-3 inches tall, move it to a south-facing window or under a grow light for 14-16 hours daily. Peach seedlings need strong light to develop properly—without it, they'll grow leggy and weak. You'll see healthy growth when the leaves are dark green and sturdy, not pale or stretched.
Fertilize lightly with a balanced liquid fertilizer (10-10-10) diluted to half strength every 4 weeks. Be patient—peach trees from seed take 3-5 years to bear fruit, but the process is rewarding. Keep the soil moist but well-drained, and you'll have a strong young tree ready for transplanting outdoors in spring.
Tips & tricks for perfect peach seed stratification
These simple strategies will help you maximize your chances of successful germination without the guesswork.
Seed Preparation: I can't stress enough how critical that 24-hour drying is—don't rush it! Place seeds on a paper towel in a single layer where they can air-dry completely. I've learned the hard way that even slightly damp seeds will develop mold during the cold stratification. Trust me, that black fuzz is a deal-breaker for germination. Once dry, store them in a cool, dark place until ready to start the cold treatment.
Cold Stratification: The 3-month cold period is non-negotiable for peach seeds—they need this time to break their dormancy. I use a small resealable bag with the 2 tablespoons of moistened peat moss because it creates the perfect humid environment. The key is keeping that peat moss consistently damp (like a wrung-out sponge) but never soggy. I check mine monthly and adjust moisture as needed—this consistency is what makes the difference between success and failure.
Planting Depth: When it's time to plant, that ½-inch depth is crucial—any deeper and the seedling may struggle to push through the soil. I use my finger to make a small hole, gently place the seed inside, then cover it lightly. The soil should feel like a damp sponge, not a mud puddle. Too much moisture at this stage will cause rot before the seedling even emerges.
Light Transition: Once your seedling reaches 2-3 inches, don't be tempted to rush it into full sun. That 14-16 hours of light is essential for strong growth. I use a simple grow light on a timer if my windows don't get enough sunlight. The leaves should be dark green and sturdy—if they're pale or stretched, it's a sign they need more light. This careful transition period is what gives you a healthy, robust seedling ready for transplanting.
Pro Tips for Peach Seed Stratification
- These simple strategies will help you maximize your chances of successful germination without the guesswork.
- Seed Preparation: I can't stress enough how critical that 24-hour drying is—don't rush it!
- Cold Stratification: The 3-month cold period is non-negotiable for peach seeds—they need this time to break their dormancy.
Frequently asked questions
Got questions about peach seed stratification? You’re not alone! Here are some of the most common queries—and their straightforward answers—to help you get those seeds sprouting like a pro.
What exactly is peach seed stratification, and why is it necessary?
Stratification mimics winter’s cold period, breaking the seed’s natural dormancy. Peach seeds (Prunus persica) won’t germinate reliably without it because they’re adapted to survive harsh winters. Skipping stratification often leads to slow, uneven, or no sprouting—so this step is non-negotiable for success!
How long should I stratify peach seeds in the fridge?
For best results, stratify peach seeds for 6–8 weeks in a damp paper towel or moist vermiculite at 35–45°F (2–7°C). Check weekly—seeds should feel damp but not soggy. Some gardeners extend this to 10–12 weeks for extra reliability, especially in colder climates.
Can I use the freezer instead of the fridge for stratification?
While possible, the freezer (below 32°F/0°C) isn’t ideal because extreme cold can damage seeds. Stick to the fridge for consistent, gentle chilling. If you must use the freezer, limit exposure to 1–2 weeks max, then transfer to the fridge to complete stratification.
What if my stratified peach seeds still won’t sprout?
Try these troubleshooting steps:
- Check moisture: Seeds should stay evenly damp—not dry or waterlogged.
- Verify timing: Some seeds need up to 12 weeks of cold treatment.
- Test viability: Soak a few seeds in warm water for 24 hours; if they sink, they’re likely viable.
- Adjust warmth: After stratification, place seeds in 70–75°F (21–24°C) for germination.
Can I stratify peach seeds outdoors instead of indoors?
Plant seeds in a protected outdoor spot (like a cold frame or under mulch) in late fall. The natural winter freeze will handle stratification, and seeds may sprout in early spring. Just ensure they’re in well-draining soil to avoid rot.
Wrapping up and next steps
Mastering peach seed stratification unlocks the secret to nurturing thriving peach trees from scratch—no nursery needed! 🌱 By mimicking winter’s cold, you’ve learned how to break dormancy and coax those tiny seeds into vibrant new life.
Whether you’re a seasoned gardener or a curious beginner, this method is your ticket to next spring’s sweet surprises.
Ready to take the next step? Start small—plant a few seeds in pots this fall and watch them grow! For even better results, track moisture and temperature like a pro, and soon you’ll be harvesting homegrown peaches (or sharing saplings with fellow plant lovers). Happy gardening!