
Lawn
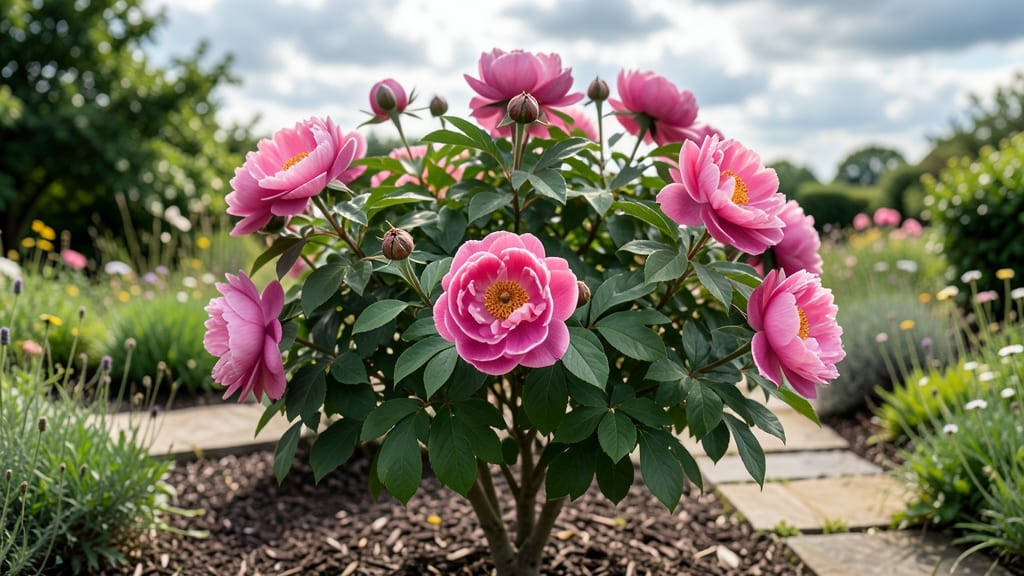
Those woody seed pods are your tree peony’s secret to next season’s blooms—if you harvest them right. 🌱 The moment they turn brown and papery, they’re ready to crack open and reveal the tiny treasures inside that’ll grow into your own peonies.
I’ve learned the hard way that timing matters: too early, and the seeds won’t germinate; too late, and they’ll scatter on their own. You’ll need just a few simple tools—a sharp knife, paper bags for drying, and a cold fridge for stratification (that’s the fancy term for mimicking winter).
The process takes patience, but the reward? A garden filled with peonies that carry your unique touch, year after year. No more waiting for nursery plants—you’ll be growing them from the ground up. Once you’ve dried and stratified the seeds, germination happens in spring, but don’t expect instant blooms.
These beauties take 3-5 years to flower, but every step—from pod to sprout—feels like magic. The first green shoots emerging from the soil? That’s when you’ll know it was worth the wait.
This method works for any tree peony variety, whether you’re dealing with a single bush or a whole grove. Just remember: consistency is key. Keep the soil moist, protect young plants from harsh winds, and soon, you’ll have peonies that feel like they’ve always belonged in your garden.
📚 In This Guide
- What you need
- Instructions
- Tips and common mistakes
- Wrapping up and next steps
What you need
- ● Mature tree peony seed pods: 5–10 fully ripened pods (brown, dry, and slightly papery). Aim for pods that have naturally opened or are close to splitting.
- ● Sharp pruning shears or scissors: Clean, sterilized tools to avoid damaging pods or introducing disease.
- ● Brown paper bags or breathable mesh bags: 1–2 bags (10x12 inches) to collect and transport seeds without crushing them.
- ● Drying tray or screen: A flat, elevated surface (like a wire rack or wooden board) to air-dry pods. Avoid plastic containers.
- ● Small paper envelopes or seed packets: Acid-free, labeled with the date and peony variety (if known).
- ● Plastic zip-top bags or moisture-proof containers: For long-term seed storage (after stratification).
- ● Refrigerator or cold frame: A space to maintain temps between 35–45°F (2–7°C) for stratification (typically 3–4 months).
- ● Hand lens or magnifying glass: To inspect seeds for viability or remove debris.
- ● Humidity pack (e.g., damp sphagnum moss): Place in storage bags to maintain 30–50% humidity if your climate is dry.
- ● Labeling tape and marker: For extra-organized seed tracking.
- ● Garden journal: To log pod collection dates, drying conditions, and stratification progress.
Step-by-Step guide to harvesting and preparing tree peony seed pods
Here's how to turn those dried seed pods into next year's stunning blooms—without losing a single step.
🌿 Step 1: Identify and Harvest Mature Seed Pods
Wait until the seed pods turn brown and papery—this usually happens in late fall after the foliage yellows. Gently twist the pods off the stems; they should detach easily when fully mature. If they resist, leave them for another week. Harvest on a dry day to prevent moisture from encouraging mold during drying.
I always wear gloves for this step—tree peony foliage can irritate sensitive skin. Place harvested pods in a paper bag (not plastic) and store them in a cool, dry place for 1-2 weeks to ensure any lingering moisture evaporates before processing.
🪴 Step 2: Clean and Dry the Seed Pods Thoroughly
Spread the pods in a single layer on a screen or mesh tray in a well-ventilated area (like a garage or shed) for 2-3 weeks. Turn them occasionally to expose all sides to airflow. The pods are ready when they feel lightweight and brittle—they should crumble slightly when squeezed gently.
Real talk: Don't rush this step. If pods feel damp or sticky, they'll rot during stratification. A dehumidifier helps speed up drying in humid climates. Once fully dry, store them in a paper envelope labeled with the harvest year—tree peony seeds lose viability quickly if stored improperly.
⏰ Step 3: Stratify Seeds to Break Dormancy
Open the dried pods and scoop out the flat, dark seeds inside. Mix them with a moistened (not soggy) sand or perlite in a sealed container—this mimics winter's cold period. Place the container in your refrigerator for 3-4 months (or until late winter). Check monthly to ensure the mix stays evenly damp but not wet.
This cold treatment tricks the seeds into thinking winter has passed, so they'll germinate reliably in spring. I mark my calendar 12 weeks before my last frost date to start this process—it ensures seeds are ready to plant as soon as soil temperatures rise to 60°F.
🌱 Step 4: Plant Stratified Seeds in Spring
After stratification, sow seeds ½ inch deep in well-draining soil (tree peonies hate soggy roots). Space them 6 inches apart in a sunny location with 6+ hours of light daily. Water gently but deeply—1 inch per week—to keep soil moist but not waterlogged. Germination takes 4-8 weeks, so patience is key.
Here's the thing—tree peony seedlings grow slowly in their first year. Don’t be tempted to transplant them until they’ve developed 3-4 sets of true leaves and a strong root system. Young plants need time to establish before they’ll reward you with those lush blooms.
Tips & tricks for perfect tree peony seed pod Preparation
These little-known tricks will ensure your tree peony seeds germinate reliably and grow into healthy plants.
Harvesting Tip: In Step 1, check for fully mature pods by giving them a gentle twist—if they come off easily, they're ready. If they resist, wait another week. I've learned the hard way that harvesting too early leads to poor germination rates. Also, harvest on a dry day to prevent mold during the 1-2 week drying period in a cool, dry place.
Drying Strategy: During Step 2's 2-3 week drying process, place pods on a screen or mesh tray in a well-ventilated area like a garage or shed. Turn them occasionally to expose all sides to airflow. If you're in a humid climate, consider using a dehumidifier to speed up the process. The pods are ready when they feel lightweight and brittle—this ensures they won't rot during stratification.
Stratification Insight: When mixing seeds with moistened sand or perlite in Step 3, aim for dampness similar to a wrung-out sponge. Too much moisture causes mold, while too little prevents proper dormancy breaking. I place my containers in the crisper drawer of my refrigerator for more consistent cold temperatures during the 3-4 month stratification period.
Planting Preparation: Before planting in Step 4, prepare your soil by amending it with compost to ensure good drainage—tree peonies absolutely hate soggy roots. Mark your calendar 12 weeks before your last frost date to start stratification, ensuring seeds are ready when soil temperatures reach 60°F in spring.
Pro Tips for Tree Peony Seed Pods
- These little-known tricks will ensure your tree peony seeds germinate reliably and grow into healthy plants.
- Harvesting Tip: In Step 1, check for fully mature pods by giving them a gentle twist—if they come off easily, they're ready.
- Drying Strategy: During Step 2's 2-3 week drying process, place pods on a screen or mesh tray in a well-ventilated area like a garage or shed.
Frequently asked questions
Got questions about tree peony seed pods?
You’re not alone! Here are answers to the most common queries to help you navigate harvesting, drying, and stratifying these delicate seeds like a pro.
When is the best time to harvest tree peony seed pods?
Harvest seed pods when they turn light brown and begin to split open naturally—usually late summer to early fall (August–September). Wait too long, and the seeds may scatter or lose viability. If pods are still green, they’re not ready yet!
How long does it take to dry tree peony seeds before stratifying?
Dry seeds in a cool, dark, well-ventilated space (like a paper bag with holes) for 2–4 weeks. They’re ready when the pods crumble easily and seeds inside are dry and papery. Rush this step, and mold or poor germination may result.
What’s the best way to stratify tree peony seeds?
Mix seeds with moist peat moss or perlite in a sealed bag, then refrigerate for 3–4 months (cold stratification mimics winter). Check monthly to ensure the mix stays slightly damp—not soggy! This breaks dormancy for higher germination rates.
Can I grow tree peonies from seed pods without stratifying?
Stratification is critical for tree peony seeds—skipping it often leads to little to no germination. However, if you’re impatient, try a warm-cold cycle: 4 weeks at 70°F (21°C), then 4 weeks cold. Success isn’t guaranteed, but it’s worth a shot!
Why aren’t my tree peony seeds germinating after planting?
Common culprits include improper drying (moldy seeds), incomplete stratification (too short/warm), or poor soil conditions (seeds need well-draining, slightly acidic soil). Test viability by cutting open a few seeds—if they’re hard and shriveled, they’re likely dead.
Wrapping up and next steps
Harvesting, drying, and stratifying tree peony seed pods is a rewarding way to nurture next year’s vibrant blooms—just like the pros! 🌱 With the right tools, patience, and a little know-how, you’ll be well on your way to growing stunning peonies from seed. Don’t wait—start your project today and watch your garden transform!
Ready to dive in? Gather your supplies, follow the steps, and get those seeds ready for planting! Happy gardening! 🌸