
Propagation
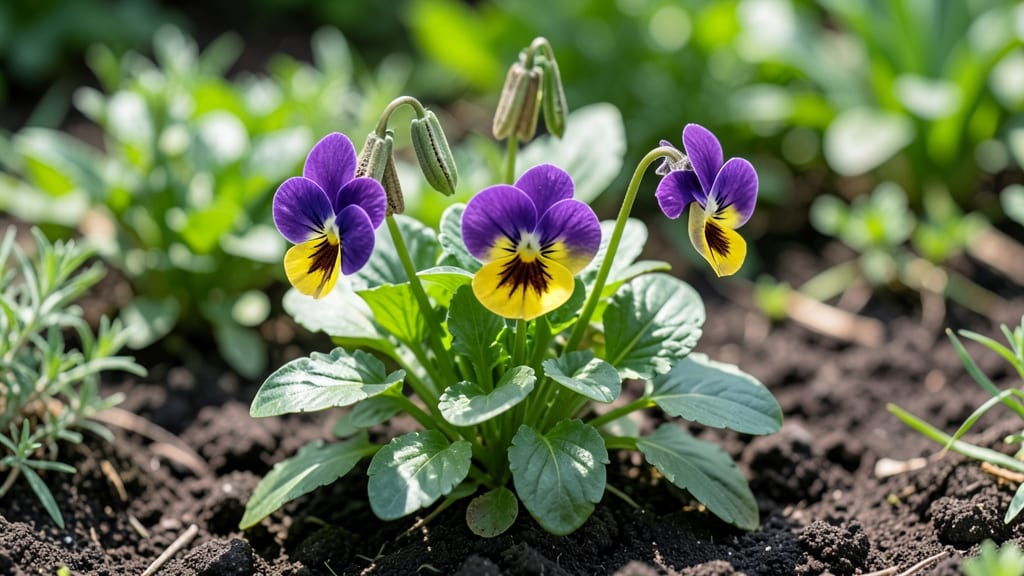
Viola seed pods are nature’s way of extending your garden’s charm—turning last year’s blooms into next season’s cheerful faces. 🌿 I’ve learned that letting those little seed pods dry on the plant (or in a paper bag) preserves their viability for months, sometimes even years, while keeping them ready for a fresh start whenever you want.
The key is timing: harvest when the pods turn from green to brown but before they burst open, usually in late summer or early fall. You’ll need just a few simple supplies: sharp scissors, a paper bag for drying, and an airtight container for storage.
Viola seeds are tiny but tough—no fancy stratification required. Once dried, they’ll stay good for 1-2 years if kept in a cool, dark place, so you’re never stuck without plants for spring or fall color.
Sowing is effortless: scatter seeds on top of soil, barely cover them, and keep the surface moist. In just 2-4 weeks, you’ll see those familiar round leaves pushing through, ready to bloom in their own time. The best part?
You can direct-sow in fall for spring blooms or start indoors in early spring for summer color. This method works for all violas—pansies, Johnny jump-ups, and even those tiny wild violets.
No matter your climate, dried seed pods give you a foolproof way to keep your garden bursting with color year after year.
📚 In This Guide
- What you need
- Instructions
- Tips and common mistakes
- Wrapping up and next steps
What you need
- ● Fresh viola plants (with seed pods)—Choose healthy, mature plants with fully formed pods (typically after blooming). Quantity: 3–5 plants for a small batch.
- ● Scissors or pruning shears—Sharp, clean tools to harvest pods without damaging the plant.
- ● Paper bags or breathable mesh bags—For drying pods (avoid plastic to prevent moisture buildup). Size: Large enough to hold pods loosely.
- ● Drying rack or tray—Elevated and well-ventilated (e.g., a wire rack or cardboard box with holes).
- ● Twine or rubber bands—To secure pods in bundles if air-drying.
- ● Small containers or jars—For storing dried pods or seeds (e.g., glass jars with lids or airtight containers).
- ● Labeling tags & marker—To track varieties (e.g., "Viola ‘Moonlight’ – 2024").
- ● Desiccant packets—For long-term seed storage (keeps moisture out).
- ● Seed packet envelopes—If you plan to sell or share seeds.
- ● Humidity monitor—Ensures ideal drying conditions (aim for <40% humidity).
- ○ Glove—Optional, to protect hands from prickly pods.
Step-by-step guide to growing violas from dried seed pods
Here’s how to coax those delicate violets back into bloom using last season’s dried pods.
🌱 Step 1: Harvest and Dry the Seed Pods
Wait until the seed pods on your violas turn brown and papery—this means they’re fully mature and ready to collect. On a dry day, carefully snip the pods with clean scissors and place them in a single layer on a paper towel. Let them dry completely in a warm, dry spot for 3-5 days. You’ll know they’re ready when the pods split open on their own, revealing tiny black seeds inside.
If you miss the natural drying window, you can still use the pods by gently crushing them to release the seeds. Just don’t let them sit in moisture—dampness will cause mold, and you’ll lose your seeds before they even sprout.
🌿 Step 2: Prepare the Soil and Planting Containers
Violas thrive in well-draining soil, so mix 2 parts potting mix with 1 part perlite to create a light, airy medium. Fill small pots or seed trays with this blend, leaving about ½ inch of space at the top. Moisten the soil lightly with water until it’s damp but not soggy—you want it to hold moisture without pooling.
Sow the tiny viola seeds directly onto the soil surface, as they need light to germinate. Sprinkle them evenly, spacing them about ¼ inch apart. A light misting with a spray bottle ensures they stay in place without being buried too deep.
💧 Step 3: Create Ideal Germination Conditions
Cover the trays with clear plastic wrap or a humidity dome to trap warmth and moisture. Place them in a spot with room temperature (65-70°F)—a sunny windowsill or under a grow light works well. Keep the soil consistently moist, but avoid letting it sit in water. Check daily and mist as needed to maintain humidity.
Germination can take 2-4 weeks, so patience is key. Once the first tiny green shoots appear, remove the cover immediately to prevent fungal issues. Thin seedlings to 1 inch apart once they develop their first true leaves to give them room to grow.
☀️ Step 4: Provide Light and Care for Young Plants
Violas need bright, indirect light to grow strong. If using a grow light, keep it 4-6 inches above the seedlings and provide 12-14 hours of light daily. Rotate the trays occasionally so the plants don’t lean toward the light source.
Water gently from the bottom by placing the trays in a shallow dish of water for 10 minutes, then drain excess. This method prevents disturbing the delicate roots and keeps the soil evenly moist. Fertilize lightly with a diluted balanced liquid fertilizer (10-10-10) every 2 weeks once the seedlings are 2 inches tall.
⏰ Step 5: Transplant and Encourage Year-Round Blooms
After 6-8 weeks, when seedlings have 3-4 sets of leaves, transplant them into 4-inch pots or directly into garden beds. Choose a spot with partial shade to light shade—violas appreciate protection from harsh afternoon sun, especially in hot climates.
Pinch back the first blooms to encourage bushier growth. Mulch around the plants with 1 inch of organic mulch to retain moisture and suppress weeds. With consistent care, your violas will reward you with continuous blooms for months, proving that last season’s seed pods hold the key to next year’s beauty.
Tips & tricks for perfect viola seed pod growth
Transforming dried viola seed pods into thriving plants takes patience and precision—here’s how to give your violets the best start.
Timing for Harvest: The 3-5 day drying period is crucial for seed viability. Place pods in a warm, dry spot away from direct sunlight to prevent overheating. If your kitchen feels humid, consider using a small fan on low to improve airflow—this helps prevent mold before the pods even split open.
Seed Spacing Secret: Those tiny viola seeds need precise spacing—don’t crowd them! Use a toothpick to gently separate seeds when sowing, maintaining that ¼ inch gap. Overcrowding leads to weak seedlings that compete for nutrients, while proper spacing gives each plant room to develop strong roots.
Germination Environment: Maintaining consistent room temperature (65-70°F) is key during germination. If your home runs cooler, place trays on top of the fridge or near a sunny window. The 2-4 week germination window can feel long, but keeping conditions stable prevents false starts and wasted seeds.
Lighting Strategy: For the 12-14 hours of daily light violas need, position grow lights 4-6 inches above seedlings. Use a timer to automate light cycles—this consistency prevents leggy growth. Rotate trays every 2-3 days so all seedlings receive even exposure, preventing them from leaning toward one light source.
Pro Tips for Viola Seed Pods
- Transforming dried viola seed pods into thriving plants takes patience and precision—here’s how to give your violets ...
- Timing for Harvest: The 3-5 day drying period is crucial for seed viability. Place pods in a warm, dry spot away from...
- Seed Spacing Secret: Those tiny viola seeds need precise spacing—don’t crowd them! Use a toothpick to gently separate...
Frequently asked questions
Got questions about viola seed pods?
You’re not alone! Whether you’re a gardening newbie or a seasoned grower, these common queries can help you navigate the process like a pro.
How do I harvest viola seed pods?
Once the seed pods turn brown and dry (usually 4–6 weeks after blooming), gently twist or snip them off the stem. Avoid crushing the pods—they’re delicate! Store them in a cool, dry place until ready to plant. Pro tip: Label your pods if you’re saving seeds from different varieties!
When is the best time to plant viola seeds?
Viola seeds thrive in cool weather. For spring blooms, sow seeds indoors 6–8 weeks before your last frost or directly outdoors in early fall. They germinate best at 60–70°F (15–21°C). If you’re impatient, try a heat mat to speed up germination!
Can I grow violas from store-bought dried pods?
Many garden centers sell dried viola seed pods (often labeled as "viola wittrockiana" or "pansy"). Just follow the same planting steps as fresh pods. Watch out: Some pods may be treated to prevent premature opening—soak them in warm water for 24 hours to encourage germination.
Why aren’t my viola seeds germinating?
Common culprits include too-warm soil, dampness, or old seeds. Try these fixes:
- Chill seeds in the fridge for 2 weeks before planting (mimics winter).
- Use a seed-starting mix (not regular potting soil).
- Keep soil moist but not soggy—a spray bottle works best.
How long until I see viola flowers from seed?
Be patient! Seed-grown violas typically bloom 8–12 weeks after planting, but some varieties (like Viola cornuta) may take longer. For faster results, opt for transplants—they’ll flower in 4–6 weeks. Bonus: Deadhead spent blooms to encourage non-stop flowers!
Wrapping up and next steps
Viola seed pods are a gardener’s secret weapon for year-round beauty—easy to grow, drought-tolerant, and packed with charm! Whether you’re drying them for winter displays or propagating new plants, these little pods deliver big rewards with minimal effort. 🌱
Ready to turn your garden into a nonstop floral show? Start small—try a few pods this season, experiment with colors, and watch your space transform! Grab your supplies and get growing today! 🌸