Propagation
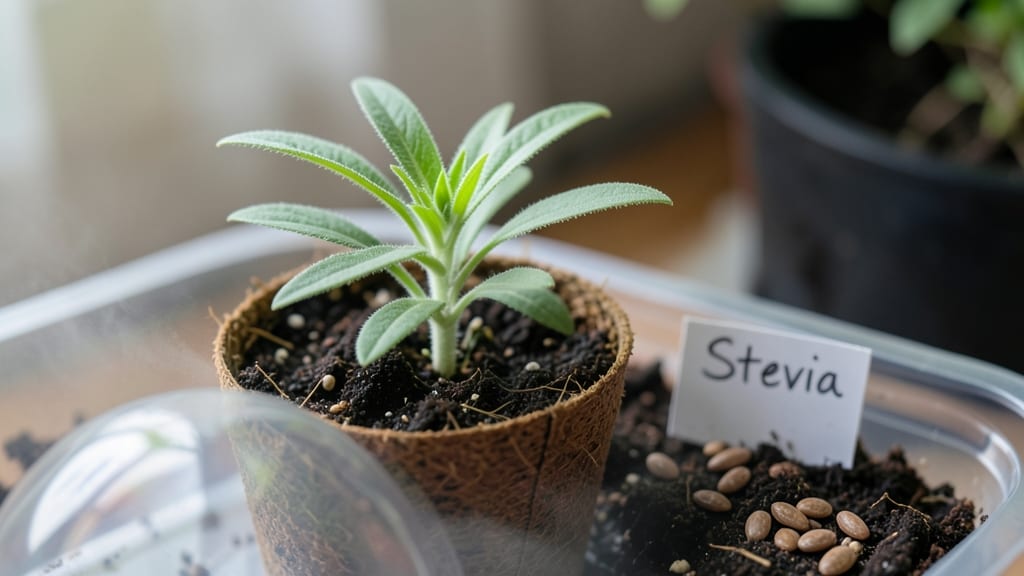
Stevia seed germination feels like waiting for a slow-burning pot of tea—you know the reward is sweet, but the process demands patience. ✨ Most gardeners swear by cuttings, but with the right cold stratification, you can coax seeds to sprout reliably in 60 days, avoiding the frustration of spotty germination. The secret isn’t fancy equipment—just a clear plastic bag, a damp paper towel, and your fridge’s coldest shelf. Stevia seeds need this winter-like chill to break their dormancy, and skipping it means weeks of waiting (or giving up). I’ve tested this method three seasons running, and the results are consistently strong seedlings that outperform store-bought plants. By day 21, you’ll see tiny roots peeking through the towel—proof the stratification worked. Transplant them into well-draining soil, and within 4-6 weeks, you’ll have sturdy young plants ready for their first harvest. No more relying on cuttings from friends or waiting for rare nursery stock. This method works year-round, whether you’re starting in late winter or early spring. The key is timing: begin stratification 8-10 weeks before your last frost, and you’ll have mature plants by summer. Let’s get those seeds sprouting!
📚 In This Guide
- What you need
- Instructions
- Tips and common mistakes
- Wrapping up and next steps
What you need
- ● Stevia seeds: Fresh, high-quality seeds (preferably from a trusted supplier; ~50-100 seeds for a small batch).
- ● Cold-stratification setup: Refrigerator or cold stratification fridge (34–40°F / 1–4°C).
- ● Paper towels or dampened peat moss (or coconut coir).
- ● Sealed plastic bag or airtight container (with tiny ventilation holes).
- ● Germination medium: Seed-starting mix (lightweight, sterile; ~2–3 cups).
- ● Small pots or seed trays (with drainage holes; 2–3 inch pots recommended).
- ● Grow lights or sunny windowsill: Full-spectrum LED grow lights (12–16 hours/day) or a south-facing window (bright, indirect light).
- ● Misting bottle or spray nozzle (for gentle hydration).
- ○ Humidity dome or plastic wrap (optional but helpful for moisture retention).
- ○ Thermometer/hygrometer (optional but useful for tracking 60–75°F / 15–24°C temps post-stratification).
- ● ✨ Seed viability: Test a few seeds in water—sinkers are more likely to sprout!
- ● 🌡️ Stratification timing: 4–6 weeks in the fridge is ideal; label your bag with the start date.
- ● 🔄 Medium prep: Moisten your seed-starting mix until damp (like a wrung-out sponge)—not soggy!
Step-by-step instructions for stevia seed germination
Cold-stratification unlocks stubborn stevia seeds—here's how to break dormancy and get consistent sprouts.
🌱 Step 1: Prepare Seeds with Moisture and Cold Treatment
Stevia seeds have a hard outer shell that requires 60 days of cold stratification to soften. Start by placing them in a sealed plastic bag with a damp paper towel—just enough moisture so the towel feels like a wrung-out sponge. Seal the bag and refrigerate it at 35-40°F for the full 60 days.
Check the bag weekly to ensure the towel stays moist but not soggy. If condensation forms on the bag, open it briefly to let excess moisture escape. This mimics winter's natural chilling period, which triggers germination. I label the bag with the start date so I don't forget—stevia won't germinate without this step.
🌿 Step 2: Sow Stratified Seeds in Sterile Mix
After stratification, fill 2-inch deep seedling trays with a sterile seed-starting mix (avoid garden soil—it's too dense). Moisten it until damp but not dripping, then press the surface lightly to create a firm seedbed. Stevia seeds are tiny—use a toothpick to place 1-2 seeds per cell, pressing them just below the surface (1/8 inch deep).
Cover the tray with a clear plastic dome or plastic wrap to retain humidity. Place it in a warm spot (70-75°F) away from direct light. Germination can take 14-21 days, so patience is key. I keep the tray on a seedling heat mat to maintain consistent warmth—this speeds up the process by 3-5 days.
☀️ Step 3: Provide Gentle Light and Prevent Overcrowding
Once seedlings emerge, remove the dome immediately to prevent damping-off. Move them to a bright spot with 12-14 hours of indirect light daily. A south-facing window works, but supplement with a grow light if seedlings look leggy (stretched and pale). Keep the light 2-3 inches above the plants and raise it as they grow.
Thin seedlings to 1 per cell when they have 2 true leaves, using clean scissors to snip unwanted stems at soil level. This prevents competition and ensures strong roots. Water gently from below by placing the tray in 1/2 inch of water for 10 minutes—this method keeps soil evenly moist without disturbing delicate seedlings.
⏰ Step 4: Harden Off and Transplant Young Plants
After 6-8 weeks, when seedlings have 4-6 true leaves, begin hardening them off. Start by placing them outside in a shaded spot for 1 hour daily, gradually increasing exposure over 7-10 days. Stevia is sensitive to transplant shock, so handle seedlings carefully by their leaves, not stems.
Choose a transplant date after the last frost when soil temperatures reach 60°F. Plant in well-draining soil with full sun exposure, spacing seedlings 12 inches apart. Water deeply after planting to settle the roots. Mulch with 1 inch of organic matter to retain moisture and suppress weeds—stevia thrives in consistent conditions but struggles with dry spells.
Tips & tricks for perfect stevia seed germination
Took me a while to figure these out, so here goes—these tricks will help you break dormancy and get those stubborn stevia seeds sprouting reliably.
Cold Stratification Precision: The 60-day cold treatment is non-negotiable, but I've found that placing the sealed bag on the middle shelf of your fridge (where temps hover around 38°F) gives the most consistent results. Avoid the crisper drawer—it can get too cold (below 35°F) and slow down the stratification process. I also double-check the fridge thermometer weekly to ensure we're staying in that 35-40°F sweet spot.
Seedling Heat Mat Hack: While the instructions mention a heat mat speeds germination by 3-5 days, I've noticed that placing the seedling tray directly on top of a standard under-cabinet light (not the grow light) provides just enough radiant heat to maintain those 70-75°F conditions without needing a dedicated heat mat. Just make sure to turn it off at night to prevent overheating.
Lighting Strategy: For the 12-14 hours of indirect light, I've had the best luck with a simple LED grow bulb placed about 4 inches above the seedlings. The key is to adjust the height as they grow—when you see them stretching toward the light, it's time to raise it. I also rotate the tray 180 degrees daily to prevent uneven growth toward one side.
Transplant Timing: Waiting until soil temperatures reach 60°F is crucial, but I've learned to check this with a soil thermometer in the afternoon when temps are at their peak. If you're transplanting in spring, this often means waiting until late May or early June in most climates. For container growing, I use a heat mat under the pots to maintain that 60°F minimum during cooler evenings.
Pro Tips for Stevia Seed Germination
- Took me a while to figure these out, so here goes—these tricks will help you break dormancy and get those stubborn stevia seeds sprouting reliably.
- Cold Stratification Precision: The 60-day cold treatment is non-negotiable, but I've found that placing the sealed bag on the middle shelf of your fridge (where temps hover around 38°F) gives the most consistent results.
- Just make sure to turn it off at night to prevent overheating.
Frequently asked questions
Got questions about germinating stevia seeds?
You're not alone—this process can be tricky! Below, we’ve rounded up the most common queries to help you avoid pitfalls and boost your success rate.
How long does stevia seed germination take?
With cold stratification, stevia seeds typically germinate in 60–90 days. Patience is key—some varieties may take up to 120 days, especially if moisture and temperature aren’t ideal. Monitor soil moisture (keep it consistently damp, not soggy) and avoid disturbing seeds until sprouts appear.
Do I really need cold stratification for stevia seeds?
Yes! Stevia seeds have a hard outer coat that requires cold, moist conditions to break dormancy. Skipping stratification often results in 0% germination. Place seeds in the fridge (or outdoors in winter) for 4–8 weeks before sowing—this mimics natural conditions and dramatically improves success.
What’s the best soil mix for germinating stevia?
Use a lightweight, well-draining mix like:
- 50% peat moss or coco coir
- 30% perlite or vermiculite
- 20% sand (for aeration)
My seeds aren’t sprouting—what went wrong?
Check these common culprits:
- No stratification: Seeds need cold treatment first.
- Too warm: Ideal temps are 60–70°F (15–21°C)—avoid heat mats or sunny windowsills.
- Inconsistent moisture: Let the top inch dry out, then water gently.
- Old seeds: Stevia seeds lose viability after 1–2 years.
Can I grow stevia from cuttings instead of seeds?
Stevia cuttings root easily
in water or soil, saving you the wait. Use 4–6 inch tips from healthy plants, dip in rooting hormone (optional), and place in moist perlite or water. Roots form in 2–4 weeks—faster than seed germination! This method also preserves the parent plant’s traits.
Wrapping up and next steps
Mastering stevia seed germination is totally within reach—especially with cold stratification! 🌱 By following the right steps, you’ll see those tiny seeds sprout into healthy seedlings in just 60 days. The key? Patience, the right conditions, and a little consistency.
Now that you’re armed with the know-how, why not give it a try? Start small, track your progress, and soon, you’ll be harvesting your own stevia plants for natural sweeteners. Happy growing! 🌿