
Lawn
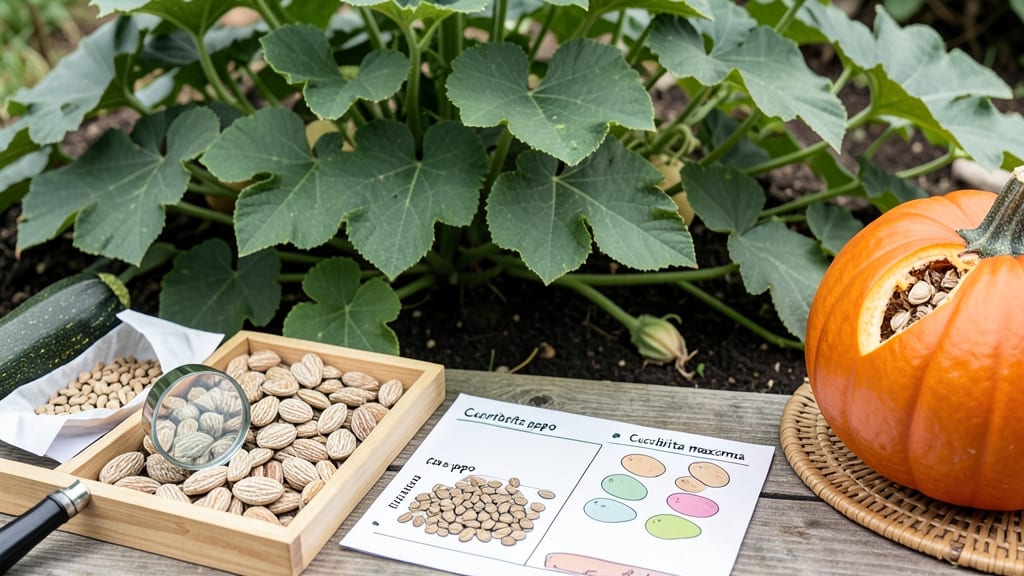
Mastering squash seed identification saves you from planting the wrong variety in your garden. 🌱 I’ve learned the hard way—last year, I accidentally planted winter squash as if it were summer squash, and ended up with a yard full of vines and no edible harvest by August.
The difference between summer squash, winter squash, and pumpkins starts with the seed shape, size, and what’s written on the packet.
Summer squash seeds are usually small and flat, often with a light tan or beige color, while winter squash seeds tend to be larger, darker, and sometimes ridged or textured.
Pumpkin seeds are the biggest of the bunch, often with a distinctive white or cream color and a more elongated shape. Always check the seed packet for keywords like "bush" (compact vines) or "vining" (long runners), as that tells you how much space you’ll need to give them.
Once you’ve got the right seeds, proper spacing makes all the difference. Summer squash like zucchini need 3-4 feet between plants, while winter squash and pumpkins can sprawl out to 6 feet or more.
Misidentifying seeds can lead to overcrowding, poor pollination, and a harvest that’s either too small or never comes at all.
Store your seeds in a cool, dry place—a sealed container with silica gel packets works best—to keep them viable for up to 5 years.
If you’re sourcing seeds, heirlooms often have more distinct traits, while hybrids might be labeled with terms like "F1," which means they won’t produce true seeds from their fruit. Knowing these details now means fewer surprises—and more squash—come harvest time.
📚 In This Guide
- What you need
- Instructions
- Tips and common mistakes
- Wrapping up and next steps
What you need
- ● Magnifying glass or hand lens (10x magnification recommended) – Helps examine fine details like seed texture and markings.
- ● Measuring tape or ruler (6-inch minimum) – For assessing seed size and spacing.
- ● White or light-colored tray or plate – Provides a neutral background for better color contrast.
- ● Soft-bristle paintbrush or cotton swabs – Gently removes debris or dust from seeds for clearer inspection.
- ● Seed identification guide or app (e.g., Seed Savers Exchange or Burpee Seed Guide) – Digital or printed references for cross-checking traits.
- ● Notebook and pen – To record observations like color, shape, and size.
- ● Digital microscope or macro camera – Captures high-resolution images for detailed analysis.
- ● Moisture meter or spray bottle with water – Checks seed viability by testing for firmness or germination readiness.
- ● Seed catalogs or grower’s manuals – Offers variety-specific details (e.g., Butternut vs. Acorn traits).
- ● Gloves (nitrile or latex) – Protects hands from oils in seeds (especially useful for large batches).
How to identify squash seeds before planting
Here's how I distinguish between summer, winter, and ornamental varieties just by looking at the seeds.
🌱 Step 1: Examine Seed Shape and Size
Squash seeds vary dramatically in shape—this is your first clue. Summer squash seeds are typically flat and oval, about ½ inch long, with a smooth, slightly glossy surface. Winter squash seeds tend to be rounder and thicker, often with a more pronounced ridge down the middle. Ornamental gourd seeds are usually the largest, sometimes ¾ inch or more, with intricate patterns or textures.
Hold the seed between your thumb and forefinger—summer squash seeds feel lighter and more delicate, while winter varieties have a denser, heavier feel. I always compare them side by side when I'm unsure which packet I'm holding. The weight difference is surprising once you notice it.
🌿 Step 2: Check Seed Color Patterns
Color reveals the most about squash varieties. Summer squash seeds often have cream, tan, or light brown hues, sometimes with faint stripes or speckles. Winter squash seeds lean toward deep brown, black, or even white, with more pronounced markings. Ornamental gourd seeds frequently feature bold stripes, swirls, or mottled patterns—think of a tiny work of art.
Shine a bright light on the seeds to see subtle patterns. I keep a small magnifying glass handy for this step—it reveals details you'd miss otherwise. For example, butternut squash seeds often have a distinctive white stripe down the center, while acorn squash seeds might show darker speckles.
☀️ Step 3: Look for Seed Coat Texture
The surface texture gives away whether you're dealing with a bush or vining variety. Summer squash seeds from bush types tend to have a smoother, almost silky finish, while vining varieties often have a slightly rougher or more ridged texture. Winter squash seeds frequently have a shiny, almost waxy coating, which helps them resist moisture during storage.
Run your fingertip lightly over the seeds—you'll notice the difference immediately. Rougher seeds often belong to varieties that need more space to sprawl, while smooth seeds typically come from compact plants. This texture clue helps me predict how much garden space each variety will need before I even plant.
⏰ Step 4: Verify with Seed Packet Labels
Once you've narrowed it down visually, check the seed packet for specific variety names and descriptions. Look for keywords like "summer squash," "winter squash," or "ornamental gourd." Some packets include small photos of mature plants or fruits, which can confirm your visual assessment. I always cross-reference my observations with the packet details to avoid mistakes.
Pay attention to the days to maturity listed on the packet—this often correlates with seed characteristics. Summer squash varieties mature in 45-60 days and have smaller, flatter seeds, while winter squash varieties take 80-120 days and have larger, rounder seeds. This extra step ensures I'm planting the right variety for my growing season.
✂️ Step 5: Test Seed Viability
Before planting, confirm your seeds are viable by doing a simple float test. Fill a glass with water and drop 5-10 seeds inside. After 10-15 minutes, remove any seeds that float—they're likely non-viable. Good seeds will sink to the bottom. This step saves time and prevents disappointment when nothing sprouts.
I also check for firmness—press a seed between your fingers. It should feel solid, not mushy or crumbly. Soft seeds often indicate old or stored improperly. If you're unsure about seed age, this quick test gives you confidence before you invest time in planting.
Tips & tricks for perfect squash seed identification
These little details make all the difference when you're trying to match seeds to their perfect growing conditions.
Lighting is Everything: Natural daylight or a bright LED desk lamp works best for examining seed details. I've made the mistake of relying on dim kitchen lighting and missed subtle patterns that would've helped me identify varieties correctly. Place your seeds on a white surface—it makes colors pop and patterns stand out more clearly than dark backgrounds.
Texture Tells a Growth Story: In Step 3, when you're checking seed coat texture, pay extra attention to how the seeds feel between your fingers. Rougher seeds often indicate vining varieties that need more space, while smoother seeds suggest bush types perfect for smaller gardens. I learned this the hard way after planting a sprawling variety in a confined space—now I always check texture first.
Packet Labels Are Your Best Friend: Don't skip Step 4! Many seed packets include tiny photos of mature plants or fruits that can confirm your visual assessment. I keep a magnifying glass handy to read the fine print on packets, especially when dealing with heirloom or specialty varieties. This extra step has saved me from planting the wrong seeds more times than I can count.
Viability Test Shortcut: For the float test in Step 5, use room-temperature water—not cold water from the tap. Cold water can make seeds sink even if they're not viable, giving you a false sense of security. I also recommend testing just 5 seeds at a time—it's quicker and just as effective for checking viability.
Pro Tips for Squash Seed Identification
- These little details make all the difference when you're trying to match seeds to their perfect growing conditions.
- Lighting is Everything: Natural daylight or a bright LED desk lamp works best for examining seed details.
- Texture Tells a Growth Story: In Step 3, when you're checking seed coat texture, pay extra attention to how the seeds feel between your fingers.
Frequently asked questions
Got questions about squash seed identification? You’re not alone! Here are some of the most common concerns—plus quick answers to help you navigate seed selection like a pro.
How do I tell if a squash seed is viable before planting?
Test viability by filling a glass with water, adding your seeds, and waiting 15–20 minutes. Viable seeds sink (good to plant), while floaters are likely dead. For extra certainty, try the paper towel method: dampen a paper towel, place seeds between two, and check for sprouts in 3–5 days. Pro tip: Store seeds in a cool, dry place to extend their lifespan!
Can I save seeds from store-bought squash for next year?
Generally, no—most grocery-store squash (like butternut or zucchini) are hybrids and won’t produce true-to-type seeds. However, heirloom or open-pollinated varieties (often sold at seed swap events or specialty stores) are safe to save. If you’re unsure, ask the seller or check the seed packet label for "O.P." or "heirloom."
What’s the best way to identify squash seeds by variety without labels?
Compare seed traits:
- Shape: Flat and oval (zucchini), round and bumpy (pumpkin), or teardrop (acorn).
- Size: Tiny (pepitas) vs. large (hubbard).
- Color: White (most common), black (some winter squash), or striped (like some gourds).
Cross-reference with a squash seed guide or take a photo to compare online. For tricky cases, germinate a few seeds—seedlings often reveal variety clues (e.g., leaf shape or growth speed).
Why did my squash seeds sprout but the plants died early?
Common culprits include:
- Fungal diseases (like damping-off) from overwatering or poor drainage. Solution: Use sterile soil and space seedlings for airflow.
- Pests (squash bugs or cucumber beetles). Solution: Inspect leaves daily and use row covers early.
- Temperature stress (too cold or hot). Solution: Plant after the last frost and use shade cloth in hot climates.
If this happens repeatedly, test soil pH (squash prefer 6.0–7.0) or try a different seed source.
Are there non-edible squash seeds I should avoid planting?
Yes! Some ornamental or wild squash (like Cucurbita pepo varieties labeled "decorative") produce seeds that won’t grow into edible squash. Check the species:
- Cucurbita pepo (zucchini, pumpkins, acorn).
- Cucurbita moschata (butternut, hubbard).
- Cucurbita maxima (giant pumpkins, some winter squash).
If you’re unsure, plant a few seeds in a test patch—just don’t compost them if they’re from a non-edible source (some can be toxic to pets).
Wrapping up and next steps
Mastering squash seed identification is your first step to a thriving garden! By focusing on seed shape, color, texture, and size—plus a little help from labels and catalogs—you’ll confidently pick the perfect varieties for your space and goals. 🌱
Now that you’re equipped with the know-how, grab those seeds and start planting! Keep a seed journal to track what grows best in your climate, and don’t hesitate to experiment with heirloom or hybrid varieties. Happy gardening—your future harvests will thank you! 🍉✨