Picking
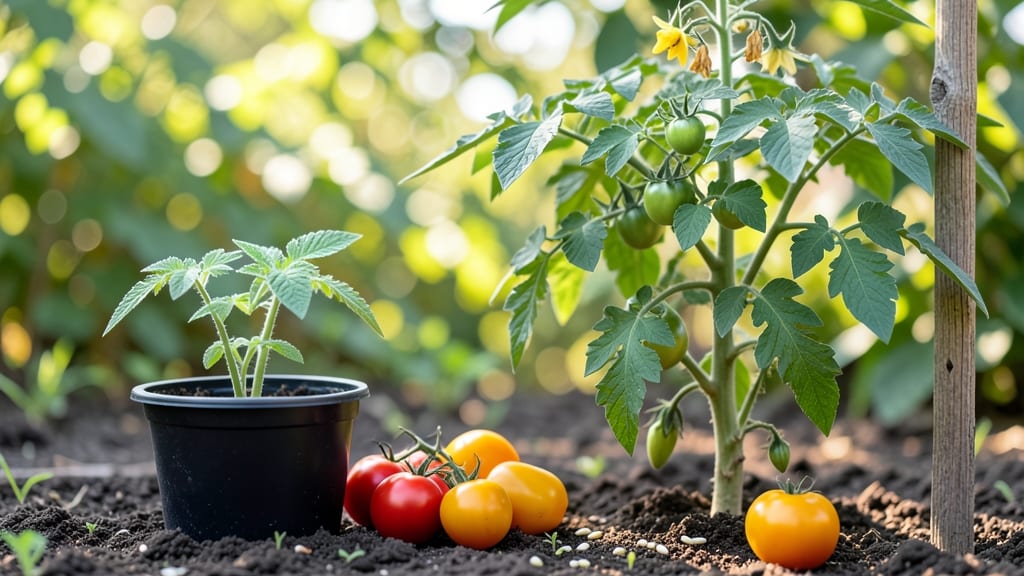
Transforming a seed into a thriving harvest starts with this zero-waste method that saves seeds year after year. 🌱 The key isn't just growing plants—it's creating a closed-loop system where every seed you save becomes next season's foundation.
I've perfected this approach after wasting seeds for years, and now my garden produces reliable heirlooms without store-bought purchases.
You'll need just five essentials: quality seeds, well-draining soil, containers or garden space, a consistent watering routine, and patience. The process begins with selecting seeds that thrive in your climate, then nurturing them through germination, transplanting, and growth.
What makes this method special is the focus on seed viability—each plant you harvest can become tomorrow's seed, reducing waste entirely.
By following these steps, you'll harvest vibrant, healthy produce while building a seed bank for future seasons. The first batch might take 60-90 days depending on the crop, but the payoff is plants that adapt perfectly to your microclimate. No more guessing which seeds will perform—your garden becomes self-sustaining.
This works for vegetables, herbs, and flowers alike, whether you're growing in containers or garden beds. The zero-waste principle means every seed you plant has purpose, and every harvest contributes to next year's success. Let's get those seeds growing!
📚 In This Guide
- What you need
- Instructions
- Tips and common mistakes
- Wrapping up and next steps
What you need
- ● Seeds: Organic, non-GMO, and heirloom varieties (start with 5–10 types, e.g., tomatoes, beans, or herbs). Aim for 100–200 seeds per plant for experimentation.
- ● Growing Containers: Seed trays or biodegradable pots (10–20 units).
- ● Garden beds or raised planters (minimum 12" deep, 4' x 8' for efficiency).
- ● Growing Medium: Potting soil (sterilized, peat-free if possible). 1–2 cubic feet per tray.
- ● Compost (homemade or store-bought, 20–30% of soil mix for nutrients).
- ● Watering Supplies: Watering can with a fine rose nozzle.
- ● Spray bottle (for seedling misting).
- ● Lighting: Grow lights (LED, full-spectrum, 12–16 hours/day) or a sunny windowsill.
- ● Harvesting Tools: Pruners or sharp scissors.
- ● Clean baskets or mesh bags (for drying seeds).
- ● Seed Storage: Airtight containers (mason jars, silica gel packets) to preserve viability.
- ● Soil Test Kit: To monitor pH/nutrients (ideal range: 6.0–7.0).
- ● Compost Thermometer: Ensures compost heats to 130–160°F for sterilization.
- ● Labeling System: Plant markers or a digital app (e.g., Gardenate) to track varieties.
- ● Solar-Powered Tools: For off-grid sustainability (e.g., solar water pumps).
- ● Basic gardening knowledge (or willingness to learn!).
- ● Access to water and sunlight (6+ hours/day for outdoor gardens).
- ● Patience—seed saving takes 3–6 months from sowing to harvest!
Step-by-Step instructions for zero-waste seed harvesting
Here's how to transform spent plants into next year's garden—no waste, just renewal.
🌿 Step 1: Select and Prepare Mature Plants
Choose healthy plants that have completed their natural cycle—flowers have fully wilted, pods have dried on the vine, or seed heads have turned brown. Avoid diseased or insect-damaged specimens; these traits often carry over to saved seeds. I always pick the strongest, most vigorous plants from each variety to ensure the best genetic traits pass forward.
Harvest when seed pods begin to crack open naturally or when the seed head turns completely papery and dry. For tomatoes, wait until the fruit is fully ripe and begins to soften. Snap the stem cleanly just above the fruit or head. This ensures minimal damage to the plant and maximum seed viability. Store harvested pods or heads in a cool, dry place for 2-3 days to complete drying if they're not fully mature yet.
🌱 Step 2: Extract and Clean the Seeds
For pods like peas or beans, open them carefully and scoop out the seeds. Place them in a bowl of lukewarm water for 24 hours—this helps separate viable seeds from chaff and debris. Viable seeds will sink to the bottom, while empty or damaged ones float. Drain the water and discard the floating seeds.
For fleshy fruits like tomatoes or peppers, mash the pulp in a bowl and add 1 cup of water. Let it ferment for 2-3 days in a warm spot. Stir daily to prevent mold growth. After fermentation, pour the mixture through a fine-mesh strainer, rinsing with water until only clean seeds remain. Spread them on a paper towel to dry completely—this takes 3-5 days in a dry, shaded area.
⏰ Step 3: Test Seed Viability Before Storage
Before storing seeds, test their viability to avoid wasting space on seeds that won’t grow. Place 10 seeds between two damp paper towels in a sealed plastic bag. Keep them in a warm spot (70-75°F) and check daily. Viable seeds should sprout in 3-7 days. If fewer than 80% sprout, store fewer seeds or consider sourcing replacements.
This test also helps you gauge germination speed—faster-sprouting seeds are ideal for early planting. Once you’ve confirmed viability, label each seed packet with the plant name, harvest date, and variety. I use small envelopes or glass jars with airtight lids for long-term storage. Store them in a cool, dark place like a pantry or refrigerator, where they’ll stay viable for 1-5 years, depending on the species.
🪴 Step 4: Store Seeds for Long-Term Viability
Place dried seeds in airtight containers—glass jars with rubber seals or vacuum-sealed bags work best. Add a silica gel packet to absorb excess moisture, which is the enemy of seed longevity. Label each container with the plant name, harvest year, and any special notes like "needs stratification" or "slow germination."
For humidity-sensitive seeds like those from tropical plants, include a desiccant packet to prevent mold. Store containers in a cool, dark environment—a refrigerator’s crisper drawer is ideal for most seeds. Check them annually and discard any that smell musty or show signs of mold. Properly stored seeds can last years, making this method truly zero-waste.
☀️ Step 5: Plan for Next Season’s Planting
As you organize seeds, note which varieties performed best in your garden. Adjust planting times based on last year’s growth patterns—early bloomers may need a head start indoors, while heat-loving plants should wait until soil warms to 65°F. I keep a small notebook with notes on each seed packet, including germination times, spacing needs, and sunlight preferences.
When it’s time to plant, use a seedling heat mat for slow starters and keep seedlings under grow lights for 14-16 hours daily until they’re strong enough for transplanting. This ensures your homegrown seeds thrive just like their parents did. By saving seeds, you’re not just reducing waste—you’re building a self-sustaining garden that improves with each generation.
Tips & tricks for perfect seed harvesting
These insider strategies will help you maximize seed viability and save the best genetic traits from your garden.
Selection Matters: In Step 1, focus on the healthiest, most vigorous plants—look for those with the most robust growth and no signs of disease or pest damage. The strongest plants will produce the most viable seeds. I've learned the hard way that skipping this step can lead to weaker offspring, so always prioritize quality over quantity when selecting parent plants.
Fermentation Precision: When fermenting seeds from fleshy fruits in Step 2, maintain a consistent temperature between 70-75°F for those 2-3 days. Too cold and fermentation slows; too warm and mold risks increase. Stir daily to keep the mixture aerobic—this prevents bacterial growth while allowing natural separation of seeds from pulp. The fermentation process is what breaks down the fruit's flesh, making seed cleaning effortless.
Viability Testing: The 10-seed viability test in Step 3 is your quality control measure. If fewer than 80% sprout within 3-7 days, consider reducing your storage quantity or sourcing fresh seeds. I've found that seeds from plants with slower germination often produce weaker starts, so this test helps me make informed decisions about which varieties to prioritize for next season.
Storage Environment: For long-term viability in Step 4, aim for 35-40% relative humidity in your storage containers. Too much moisture causes mold; too little can reduce germination rates. I use small silica gel packets in my seed jars and check them annually—discarding any seeds that develop musty odors or show signs of mold. Proper storage can extend seed life dramatically, from just a few years to a decade or more for some varieties.
Pro Tips for Seed To Harvest
- These insider strategies will help you maximize seed viability and save the best genetic traits from your garden.
- Selection Matters: In Step 1, focus on the healthiest, most vigorous plants—look for those with the most robust growth and no signs of disease or pest damage.
- Fermentation Precision: When fermenting seeds from fleshy fruits in Step 2, maintain a consistent temperature between 70-75°F for those 2-3 days.
Frequently asked questions
Got questions about turning seeds into a thriving harvest? You’re not alone! Here are answers to the most common queries about zero-waste seed-to-harvest methods—so you can grow confidently, season after season.
How long does it take to go from seed to harvest?
The timeline depends on the plant! Fast growers like radishes or green onions take 3–4 weeks, while tomatoes or peppers may need 60–90 days. Always check the seed packet for days-to-maturity estimates. Pro tip: Start seeds indoors (if needed) to extend your growing season!
What’s the easiest zero-waste way to save seeds from my harvest?
Skip the fancy kits—just let a few plants mature fully, then dry the seeds indoors (paper bag + patience). For veggies like tomatoes or peppers, scoop seeds from the flesh, ferment in water for 2–3 days to separate viable seeds, then dry on a screen. Bonus: Label everything with the harvest year!
Can I use seeds from store-bought produce?
Sometimes! Heirloom or organic produce (like tomatoes, peppers, or cucumbers) often yields viable seeds. Avoid hybrid varieties (they won’t grow true). Save seeds from unsprayed produce, clean them thoroughly, and store in a cool, dry place. Warning: Seeds from conventionally grown crops may carry pesticides.
What if my seeds don’t germinate? Troubleshooting tips!
Check these first:
- Freshness: Seeds lose viability over time (most last 1–5 years). Test with a paper towel germination test.
- Moisture/Temp: Too dry or too cold? Use a heat mat (70–85°F ideal) and keep soil damp, not soggy.
- Depth: Plant seeds too deep? Follow packet guidelines—most need only 1/4 inch of soil.
How do I store saved seeds for next season?
Keep seeds dry, cool (32–40°F), and dark in airtight containers (glass jars or envelopes work). Add a desiccant packet to prevent moisture. Label with the plant name and harvest year—seeds last longer when stored properly!
Wrapping up and next steps
From seed to harvest, embracing a zero-waste approach isn’t just eco-friendly—it’s empowering! 🌱 Whether you’re saving seeds from your garden or repurposing kitchen scraps, every small step reduces waste and connects you deeper to the cycle of growth.
The key? Start small, stay consistent, and let curiosity guide your experiments.
Ready to take the next leap? Pick a favorite plant this season, save its seeds, and watch your zero-waste journey bloom. 🌻 Share your harvest stories—your efforts inspire others to grow too!