
Lawn
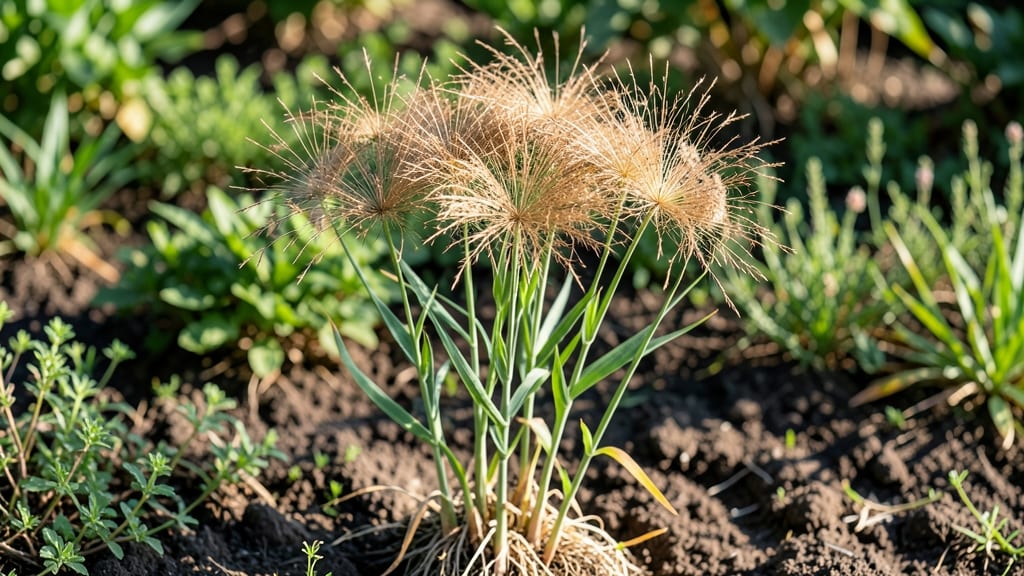
Growing millet seed heads that stay upright and twist-free means harvests packed with plump, viable seeds. 🌾 I’ve learned the hard way—my first attempt produced tangled, unproductive heads that scattered seeds everywhere.
The secret lies in the right timing, spacing, and a few simple care tricks that keep those feathery plumes standing tall.
Millet thrives in full sun and well-draining soil, but the real magic happens when you plant seeds ½ inch deep and 6-12 inches apart—this gives roots room to anchor while preventing overcrowding.
Water deeply once a week, letting the soil dry slightly between sessions, and watch those seed heads swell with potential. By late summer, you’ll spot the classic feathery plumes, but here’s the key: harvest before they twist.
Those seed heads are more than just pretty—they’re a bird magnet in winter, a drought-resistant groundcover, and even a gluten-free grain. Once mature, cut the stems at the base, bundle them, and hang upside down to dry.
Store seeds in a cool, dark place for up to a year, ready to replant or share. The twist-free trick isn’t just about looks—it’s about maximizing every seed you grow.
📚 In This Guide
- What you need
- Instructions
- Tips and common mistakes
- Wrapping up and next steps
What you need
- ● Millet seeds: 1 lb (organic, non-GMO preferred; e.g., foxtail, pearl, or proso millet)
- ● Well-draining soil: 10 sq ft of garden bed or 5-gallon pots (pH 6.0–7.5)
- ● Compost or organic fertilizer: 1 cup (balanced 10-10-10 or millet-specific blend)
- ● Watering can or hose: With a fine mist setting for gentle hydration
- ● String or twine: 20 ft (for trellising, if growing tall varieties like sorghum millet)
- ● Pruning shears: Sharp, sterilized (for harvesting)
- ● Harvesting bags: Breathable mesh or paper bags (to dry seeds)
- ● Sunlight: Full sun (6+ hours daily)
- ○ Spray bottle: For seedling misting (optional but helpful)
- ● Gloves: Gardening gloves (to protect hands from seed husks)
- ○ Thermometer (optional): To monitor soil temp (ideal: 70–85°F for germination)
- ● Label markers: For tracking millet varieties (if testing multiple types)
- ● 💡 Soil test: Check soil moisture before planting—millet hates soggy roots!
- ● 🌡️ Climate note: Plant after the last frost for warm-season millet (or start indoors 4–6 weeks early).
- ● ✨ Twist prevention: Space plants 6–12 inches apart to avoid overcrowding and seed head tangling.
Step-by-Step instructions for growing millet seed heads
Here’s how to grow millet with sturdy seed heads that stay intact for easy harvesting.
🌱 Step 1: Choose the Right Variety and Plant at the Correct Time
Select a millet variety suited to your climate—foxtail, pearl, or proso millet all produce seed heads. Plant in late spring after the last frost when soil temperatures reach at least 60°F. Millet thrives in full sun and tolerates poor soil, but it grows best in well-draining, slightly sandy loam. I like to test soil moisture by squeezing a handful—if it crumbles when dry, it’s ready.
Sow seeds ½ inch deep and 6 inches apart in rows spaced 12 inches apart. For a twist-free harvest, avoid overcrowding—taller varieties like foxtail millet need extra space to develop sturdy stalks. Thin seedlings to the strongest plant per spot once they reach 4 inches tall. You’ll see the first true leaves emerge within 7-10 days, signaling healthy growth.
☀️ Step 2: Provide Consistent Water and Monitor Growth
Water deeply once a week after germination, ensuring the top 4 inches of soil stay moist but not soggy. Millet is drought-tolerant, but consistent moisture during the first 6 weeks prevents weak stalks that may snap under seed head weight. You’ll know it’s time to reduce watering when the plants reach 2 feet tall—this encourages the plant to focus on seed development rather than leafy growth.
Watch for pale or yellowing leaves, which signal overwatering or nutrient deficiency. If you notice this, reduce watering and add a balanced fertilizer (like 10-10-10) at half strength. Millet grows quickly, so check plants weekly for pests like aphids or spider mites. A strong spray of water usually removes them before they cause damage.
✂️ Step 3: Harvest Seed Heads at Peak Maturity for Viable Seeds
The key to twist-free harvesting is timing—wait until the seed heads turn golden brown and the seeds rattle when shaken. This usually happens 8-12 weeks after planting, depending on the variety. Cut the stalks with clean shears about 6 inches below the seed head to avoid damaging the base. I like to harvest on a dry, sunny morning when the seed heads are fully dry but before they start shedding seeds.
Bundle the harvested seed heads upside down in a well-ventilated area (like a garage or barn) for 2-3 weeks to fully dry. Shake the heads gently every few days to release loose seeds. Once the seed heads are completely dry and brittle, you can either thresh them by hand (rubbing between your palms) or store them whole in a paper bag until ready for use.
🪴 Step 4: Store or Use Seed Heads for Long-Term Viability
For long-term storage, place dried seed heads in a cool, dry place (like a pantry or seed vault) where they’ll stay viable for 2-3 years. If you plan to use them for culinary or decorative purposes, store them in an airtight container with a silica gel packet to prevent moisture buildup. You’ll know they’re still good if the seeds inside remain firm and don’t crumble when pressed.
For immediate use, you can leave the seed heads intact for ornamental arrangements or grind them into flour. If you notice any mold, discoloration, or musty smells, discard them immediately—this means moisture got in and spoiled the seeds. Millet seed heads are versatile, so experiment with different uses once you’ve harvested them successfully!
Tips & tricks for perfect millet seed head growth
Here's what I learned after growing millet for years—these little details make all the difference between sturdy seed heads and floppy failures.
Soil Prep Secret: Before planting, loosen the top 6 inches of soil and mix in a handful of coarse sand if your soil feels heavy or clay-like. Millet roots need that drainage to develop strong stalks that won't snap under seed head weight. I also add a thin layer of compost just below the planting depth—this gives roots a nutrient boost without overfeeding the plants. The right soil texture is what prevents those frustrating twisty stalks we all hate.
Harvest Timing Hack: When checking for maturity in Step 3, don't just look at color—give the seed heads a gentle shake. They should rattle loudly when fully mature, but if they feel soft or the seeds don't rattle, wait another week. I've learned the hard way that harvesting too early means immature seeds that won't store well, while waiting too long risks seed loss from shedding. A dry morning is perfect for harvesting because any dew will slow the drying process in Step 3.
Drying Strategy: For the 2-3 week drying period, I use a large mesh laundry bag suspended from a clothesline in my garage. This creates airflow while keeping the seed heads contained. Every few days, I give them a gentle shake to release any loose seeds—this prevents mold from trapped moisture. If you're short on space, a cardboard box with holes punched in the sides works too, just make sure it's in a dry area away from direct sunlight.
Storage Wisdom: When storing seed heads long-term, I add a small packet of silica gel to my airtight containers—this prevents moisture buildup that can cause mold. For immediate use, I like to keep a small batch of seed heads in a paper bag on my kitchen counter. The paper allows for natural moisture exchange while keeping pests out, and it's perfect for grinding into flour when needed. Just remember to check for freshness by pressing a seed—it should feel firm, not powdery.
Pro Tips for Millet Seed Head
- Here's what I learned after growing millet for years—these little details make all the difference between sturdy seed...
- Soil Prep Secret: Before planting, loosen the top 6 inches of soil and mix in a handful of coarse sand if your soil f...
- Harvest Timing Hack: When checking for maturity in Step 3, don't just look at color—give the seed heads a gentle shak...
Frequently asked questions
Got questions about growing, harvesting, or using millet seed heads? You’re not alone! Here are some of the most common queries—plus straightforward answers to help you master the process.
When is the best time to harvest millet seed heads?
The ideal harvest window is when 50-70% of the seed heads turn brown or tan and the seeds rattle easily when shaken. For most varieties, this happens 8-12 weeks after planting, depending on climate. Harvest on a dry morning to avoid moisture issues.
How do I know if my millet seed heads are ready for twisting?
Ready seed heads will feel dry and papery when touched. Gently twist a small cluster—if the seeds pop off cleanly, they’re harvest-ready. Avoid twisting too early; immature seeds won’t germinate. Pro tip: Test a few clusters daily to catch the perfect moment!
What should I do if my millet seed heads won’t twist off?
If seed heads resist twisting, they may be too moist or immature. Try these fixes:
- Dry them further: Hang bundles upside down in a well-ventilated area for 1-2 days.
- Use pruning shears: Snip the stems just above the seed head for a clean break.
- Check humidity: High moisture can make stems tough—harvest on sunny days.
Can I save millet seeds from store-bought millet (like birdseed or grain)?
Yes, but with a catch! Store-bought millet is often hybridized or treated to prevent seed production. Try growing from organic, heirloom, or birdseed millet labeled for planting. If unsure, test a few seeds—some may still sprout!
How do I store harvested millet seed heads for long-term use?
Store seeds in a cool, dry place (50-60°F) in airtight containers (like glass jars or sealed bags). Add a silica gel packet to absorb moisture. Label with the harvest date—viable seeds last 1-2 years under ideal conditions.What if my millet seed heads attract pests?
Pests like birds or rodents can be a nuisance! Harvest promptly once seeds are ready, and store them indoors. For prevention, cover seed heads with fine netting if pests are a recurring issue. Avoid overcrowding plants to improve airflow.
Wrapping up and next steps
Growing millet with a twist-free seed head isn’t just rewarding—it’s a game-changer for sustainable harvesting! 🌾 With the right soil, spacing, and timing, you’ll enjoy plump, viable seeds that outperform store-bought options.
Whether you’re a backyard gardener or a homesteader, this guide gives you the confidence to grow, harvest, and store millet like a pro.
Ready to take the next step? Start small—plant a test row this season and experiment with varieties. Track your progress, share your wins, and soon, you’ll be feeling the pride of a bountiful, twist-free millet harvest! 🌱✨