
Lawn
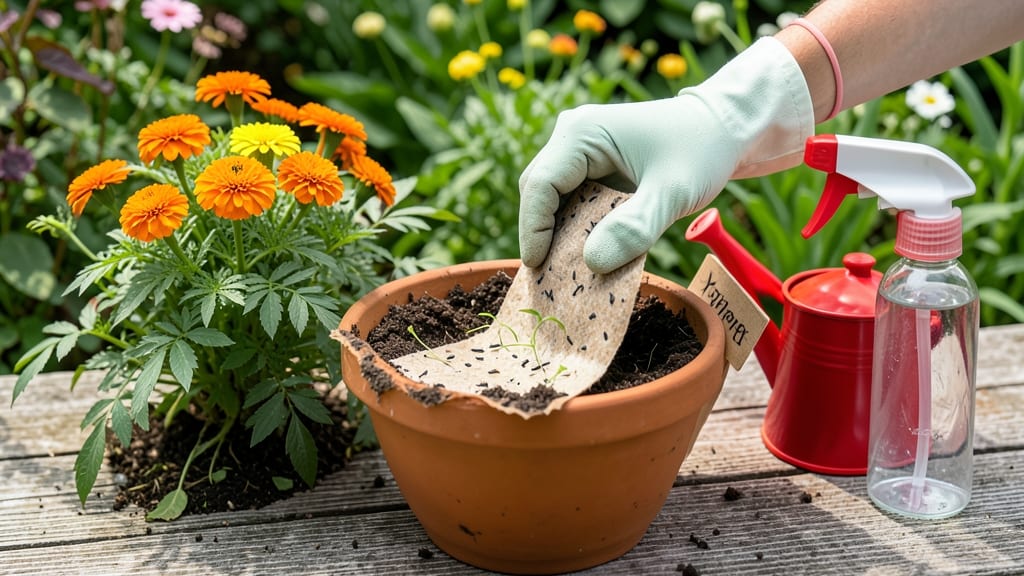
Seed paper planting instructions transform trash into blooming beauty—and you’ll see those first green sprouts in just 10 days. ✨ I’ve planted seed paper in everything from hanging baskets to wedding bouquets, and the secret to success lies in mimicking how seeds germinate in nature: consistent moisture, gentle warmth, and patience. The paper itself is biodegradable, so it dissolves as roots take hold, leaving nothing but happy plants behind.
Start with a tray or small pot filled with dampened potting mix—think of it as a cozy nest for your seeds. Press the seed paper gently into the soil, then mist it lightly with water until the surface stays moist but not soggy.
Cover the tray with plastic wrap or a humidity dome to trap warmth, which speeds up germination. Most seed paper blooms within 2-4 weeks, but the real magic happens when you see those first delicate leaves pushing through.
Once sprouts appear, uncover the tray and move it to a bright spot, avoiding direct midday sun. Water from the bottom to prevent washing away the fragile seedlings, and keep the soil evenly moist—like a damp sponge.
Within 10 days, you’ll have lush seedlings ready to transplant or gift, proving that even the smallest actions can grow something extraordinary.
For creative uses, try embedding seed paper in homemade cards, wrapping gifts, or crafting eco-friendly wedding invitations that guests can plant. The paper works with almost any flower seed, so experiment with wildflowers, pansies, or even herbs.
Just remember: seed paper thrives on kindness—gentle handling and consistent care make all the difference.
📚 In This Guide
- What you need
- Instructions
- Tips and common mistakes
- Wrapping up and next steps
What you need
- ● Seed paper – 1-2 sheets (check for flower/herb varieties like marigolds, basil, or sunflowers).
- ● Water – A spray bottle (4–8 oz) or small watering can with a fine rose nozzle.
- ● Container – A shallow tray, egg carton, or small pot (6–8 inches wide) with drainage holes.
- ● Potting soil – 1–2 cups of well-draining, seed-starting mix (or coco coir for sustainability).
- ● Plastic wrap or clear lid – To create a mini greenhouse effect.
- ● Scissors or craft knife – For cutting seed paper (if needed).
- ● Grow lights or sunny windowsill – 6+ hours of indirect light daily (south-facing is ideal).
- ● Plant labels – To track varieties (toothpicks + masking tape work too!).
- ● Fertilizer – Diluted liquid fertilizer (like fish emulsion) after sprouting.
- ● Tweezers – For delicate seed paper handling.
Step-by-step instructions for creating seed paper
Here's how to make your own seed paper—simple, satisfying, and ready for planting in just minutes.
🌱 Step 1: Blend the Base Materials
Start by mixing 1 cup of wildflower seeds with 2 cups of water in a blender. Add 1 cup of unbleached paper pulp (or shredded paper) and blend until you get a thick, smooth slurry. The consistency should be like heavy cream—thick enough to coat a spoon but still pourable. If it's too stiff, add a splash of water; if too thin, blend longer.
Here's the thing—don't worry if it looks messy at first. The key is patience. Let the mixture sit for 5 minutes to thicken slightly. This resting time helps the fibers bind better, making your seed paper stronger. I like to give it a quick stir before moving to the next step to redistribute any settled seeds.
💧 Step 2: Pour and Shape the Paper
Lay a sheet of parchment paper on a flat surface and pour about ¼ cup of the slurry onto it. Use a spoon or small spatula to spread the mixture evenly into a thin, even layer—about ⅛ inch thick. The thinner you spread it, the faster it'll dry and the easier it'll be to handle later. I tap the parchment gently on the counter to help remove air bubbles and ensure an even surface.
Watch for any uneven spots while spreading. If you see thicker areas, gently smooth them out with the back of your spoon. The goal is consistency—this ensures even water absorption when planting later. Let the paper sit undisturbed for 10-15 minutes to begin drying slightly on the surface before carefully peeling it off the parchment.
☀️ Step 3: Dry and Prepare for Planting
Place the seed paper on a wire rack or flat surface in a warm, dry spot away from direct sunlight. It should dry completely in 12-24 hours, becoming stiff and slightly brittle. You'll know it's ready when you can gently peel it off the parchment without tearing. If it sticks, let it dry a little longer—rushing this step leads to weak paper that falls apart when wet.
Once fully dry, cut the paper into 4-inch squares (or your preferred size). Store them in a cool, dry place until ready to plant. I like to keep mine in a small envelope with a silica packet to prevent moisture buildup. This step is where the magic happens—your seed paper is now a zero-waste planting medium, ready to bloom in just 10 days.
🌿 Step 4: Plant Your Seed Paper
When you're ready to plant, soak the seed paper in warm water for 5-10 minutes until it softens and becomes pliable. This reactivates the seeds and prepares the paper to decompose naturally in the soil. Place the softened paper in a shallow tray or directly into a prepared garden bed, pressing lightly to ensure good soil contact.
Keep the soil consistently moist but not soggy for the first 7-10 days. You'll see tiny sprouts emerging within 3-5 days—that's your reward for the effort! The paper will break down completely as the plants grow, leaving you with beautiful blooms and no waste. Real talk: This method is perfect for wildflower meadows, hanging baskets, or even as biodegradable plant markers.
Tips & tricks for perfect seed paper planting
Common pitfalls—and how to sidestep every one—when crafting your eco-friendly seed paper.
Slurry Consistency: The 5-minute resting time in Step 1 is non-negotiable for binding strength. If your slurry still looks too thin after blending, add just 1 tablespoon of water at a time—too much liquid makes the paper flimsy and prone to tearing when wet. Think of it like pancake batter: you want it to hold its shape when poured but still spread smoothly.
Even Spreading Technique: When spreading your slurry in Step 2, use a ruler or straight edge to guide your spoon for perfectly even layers. The ⅛-inch thickness is critical—any thicker and drying takes forever, any thinner and the seeds may not get proper soil contact. I like to make two passes: first to spread, then a second lighter pass to smooth any ridges.
Drying Time Troubleshooting: Humidity can extend the 12-24 hour drying window dramatically. If your kitchen feels damp, prop open a window or use a small fan on low speed to create gentle airflow. The paper is ready when it peels cleanly from parchment—if it sticks, let it dry another hour. Pro tip: Place a small bowl of rice near your drying rack to absorb excess moisture.
Seed Viability: Store your dried seed paper in a sealed container with a silica packet to prevent moisture buildup that could compromise seed viability. I've kept mine for up to 6 months this way, though planting within 3 months gives the best germination rates. The silica packets are worth the investment—they're the secret to maintaining that crisp, plantable quality.
Pro Tips for Seed Paper Planting Instructions
- Common pitfalls—and how to sidestep every one—when crafting your eco-friendly seed paper.
- Slurry Consistency: The 5-minute resting time in Step 1 is non-negotiable for binding strength.
- Even Spreading Technique: When spreading your slurry in Step 2, use a ruler or straight edge to guide your spoon for perfectly even layers.
Frequently asked questions
Got questions about seed paper?
You’re not alone! Here are answers to the most common queries—from planting tips to troubleshooting—so you can grow your zero-waste garden with confidence.
How do I know if my seed paper is still viable?
Check for freshness by looking for tiny seeds embedded in the paper (they’ll appear as small dots). If the paper feels dry or brittle, it’s still likely good—just plant it as soon as possible! Seed paper can last 1–2 years if stored in a cool, dry place (like a sealed bag). For best results, use it within 6 months of purchase.
Can I plant seed paper in winter or extreme weather?
Seed paper thrives in moderate temperatures (50–75°F), so avoid planting during frost or heatwaves. If you must plant in cooler months, choose cold-hardy varieties like wheatgrass or microgreens, and keep the soil warm with a mini greenhouse or row cover. Never plant when rain is forecasted—wait for dry conditions to prevent mold.
What if my seed paper doesn’t sprout after 10 days?
Don’t panic! First, check for even moisture—seed paper needs consistent dampness (like a wrung-out sponge). If no sprouts appear, gently peel back a corner to inspect for seeds. If they’re missing, your paper may have degraded. Try a new sheet or test a small patch in a different spot with full sunlight (6+ hours/day).
What are some creative ways to use seed paper?
Beyond traditional planting, get inventive! Use it to:
- Decorate: Embed in homemade greeting cards or framed art.
- Educate: Plant with kids as a fun science project.
- Compost: Tear into soil once seeds sprout (if you’re done with the blooms).
- Gift: Roll into a scroll with planting instructions for eco-conscious friends.
Are there alternatives to seed paper for zero-waste gardening?
Try these eco-friendly swaps:
Option
How It Works
Biodegradable pots
Made from coconut coir or peat; plant directly into soil once roots emerge.
Seed bombs
DIY clay/soil balls with wildflower seeds—toss into empty lots or community gardens.
Reusable seed starter kits
Plastic-free trays (like bamboo or recycled plastic) for transplanting seedlings.
Wrapping up and next steps
Seed paper is a simple yet powerful way to turn waste into wildflowers—and you’re now ready to grow your own! 🌱 With just a little water and patience, you’ll watch vibrant blooms emerge in as few as 10 days.
Whether you’re brightening up a balcony, healing soil, or teaching kids about sustainability, every sheet of seed paper is a tiny step toward a greener planet.
Ready to share your green thumb success? Snap a photo of your sprouts and tag us—we’d love to see your zero-waste blooms in action! Then, explore more eco-friendly projects to keep the momentum going. 🌿