
Lawn
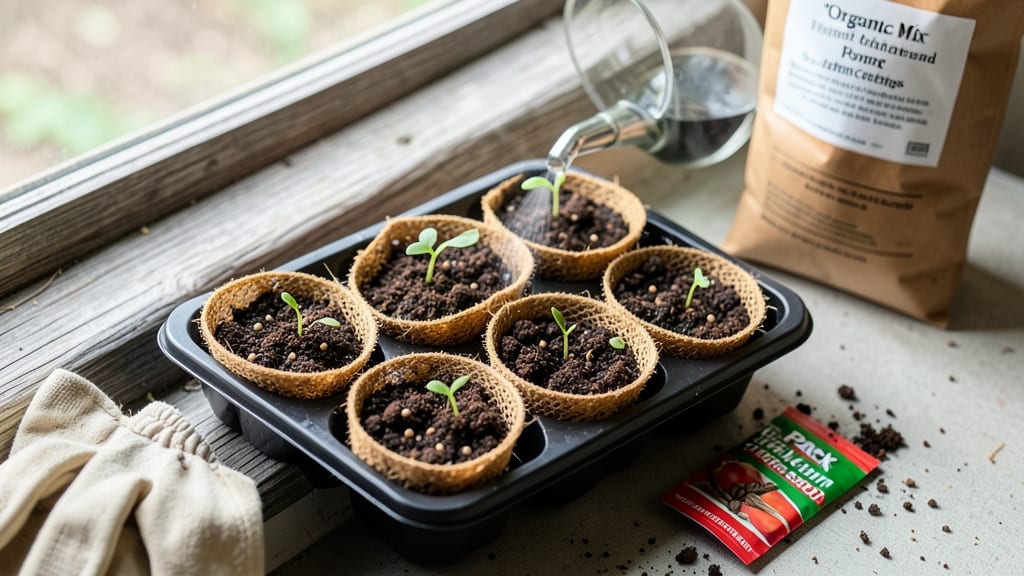
Biodegradable seed starters dissolve into the soil, eliminating transplant shock and plastic waste. 🌱 I ditched plastic trays years ago after watching my seedlings struggle when I moved them—until I discovered these game-changers that make the whole process smoother and greener.
They come in forms like peat pots, coconut coir pellets, or even repurposed egg cartons, all designed to break down naturally. The roots grow through the material instead of circling around plastic edges, meaning stronger plants ready for the garden in just 4 weeks.
No more digging out fragile seedlings or dealing with waste. You’ll see faster establishment, fewer lost plants, and soil that benefits from the added organic matter. The best part? You can skip the messy transplanting entirely—just pop the whole starter into the ground and let nature take over.
Works for everything from delicate herbs to hearty tomatoes, and cuts your gardening waste by 80%. Here’s how to use them right from day one—no green thumb required.
📚 In This Guide
- What you need
- Instructions
- Tips and common mistakes
- Wrapping up and next steps
What you need
- ● Biodegradable seed starter pots: 10–20 pots (made from coconut coir, peat-free compost, or recycled newspaper). Look for pots labeled "compostable" or "seedling-friendly."
- ● Potting soil: 1–2 gallons of high-quality, peat-free seed starting mix (e.g., coconut coir-based or compost blends). Avoid garden soil—it’s too dense for seedlings!
- ● Seeds: Choose fast-growing varieties like radishes, lettuce, or basil (perfect for 4-week sprouts!). Check seed packets for germination times.
- ● Watering can or spray bottle: A gentle spray works best to avoid disturbing delicate seedlings.
- ● Tray or container: A shallow tray (e.g., a plastic seedling flat or repurposed food container) to hold the pots and catch excess water.
- ● Plant labels: Toilette paper rolls or biodegradable tags to mark seed varieties.
- ○ Heat mat (optional): For cooler climates, a seedling heat mat (set to 70–75°F) can speed up germination.
- ● Grow lights: If natural light is limited, a small LED grow light (12–16 hours/day) keeps seedlings strong.
- ○ Fertilizer (optional): A diluted liquid seaweed fertilizer or compost tea for a nutrient boost after sprouting.
- ● A sunny spot (or grow light) with at least 6–8 hours of indirect sunlight daily.
- ● Patience! Biodegradable pots may take 4–6 weeks to fully break down in soil.
- ● Access to water (room-temperature is ideal—avoid cold tap water).
Step-by-Step instructions for creating biodegradable seed starters
Here’s how to grow sturdy seedlings in eco-friendly starters that dissolve right into the soil.
🌱 Step 1: Gather Materials and Prepare the Mix
Start with 4 biodegradable seed starter pots (like peat or coconut fiber) and 2 cups of seed-starting mix—never garden soil, as it’s too dense. I like to add 1 tablespoon of compost to the mix for extra nutrients, but skip this if your starter mix is pre-fertilized. Moisten the mix with warm water until it’s damp like a wrung-out sponge, but not soggy.
Fill each pot almost to the top, leaving just ¼ inch of space at the rim. Tap the pots gently on the counter to settle the soil without compacting it. This ensures roots have room to grow downward while the pot’s structure holds the mix in place.
💧 Step 2: Plant Seeds at the Right Depth
Check the seed packet for depth—most small seeds (like lettuce or basil) go ½ inch deep, while larger ones (tomato or pepper) need ¾ inch. I use a toothpick to poke a hole just deep enough for the seed, then drop it in and cover lightly with extra mix. Plant 1 seed per pot unless the packet says otherwise—crowding weakens seedlings.
After planting, mist the soil surface with a spray bottle until evenly damp. Avoid overwatering now; the pots will retain moisture better than open trays. Place them in a warm spot (70-75°F)—a sunny windowsill or under a heat mat speeds up germination.
☀️ Step 3: Provide Light and Monitor Growth
Once seeds sprout (usually 5-10 days), move the pots to a bright location with 12-14 hours of light daily. A south-facing window works, but if seedlings stretch toward the light (leggy growth), they need grow lights within 4 inches of the tops. Strong seedlings have thick stems and dark green leaves—if yours look pale or wobbly, they’re not getting enough light.
Water when the top inch of soil feels dry, using the bottom-watering method: Place pots in ½ inch of water for 10 minutes, then drain. This prevents fungal diseases that thrive in damp soil surfaces. After 2 weeks, when seedlings have 2-3 true leaves, it’s time to transplant.
🪴 Step 4: Transplant Directly Into the Garden
Pop the biodegradable pots into the soil undisturbed—they’ll break down in 4-6 weeks, so no need to remove them. Plant at the same depth the pots were filled, and water deeply to help roots establish. The pots’ structure keeps soil loose around roots, reducing transplant shock.
If you’re worried about the pots dissolving too fast, bury them 1 inch deeper than their rim. This ensures they last through the critical root-establishment phase while still breaking down naturally. Mulch around the base to retain moisture and speed up the process.
⏰ Step 5: Maintain and Harvest
After transplanting, water deeply every 2-3 days until plants are established (about 2 weeks). You’ll know they’re thriving when new leaves emerge without wilting after watering. For herbs like basil or lettuce, harvest outer leaves first to encourage bushier growth.
Here’s the thing—these biodegradable pots eliminate the "root-bound" stress of plastic starters. Your plants will grow stronger and faster, and you’ll skip the messy transplanting step entirely. Plus, no waste! It’s gardening at its simplest and most sustainable.
Tips & tricks for perfect biodegradable seed starters
These simple strategies will help you grow the healthiest seedlings—without the hassle of plastic waste.
Soil Moisture Matters: In Step 1, when you're preparing the seed-starting mix, aim for moisture that feels like a wrung-out sponge—not too wet, not too dry. I've learned this the hard way: soggy soil leads to rot, while dry soil prevents germination. After filling the pots, give them a gentle tap on the counter to settle the mix without compacting it too much. This creates the perfect air pockets for root development.
Lighting Secret: For Step 3, if you don't have grow lights, place your seedlings on a sunny windowsill facing south. The 12-14 hours of light is crucial—if your seedlings start stretching toward the light (a sign of legginess), they're not getting enough. I've found that rotating the pots daily ensures even growth all around.
Transplanting Hack: When you're ready to transplant in Step 4, bury the biodegradable pots just slightly deeper than their rims. This gives you extra time for the pots to dissolve naturally while protecting young roots. I've seen pots last up to 6 weeks this way, giving your plants the time they need to establish strong root systems.
Watering Wisdom: The bottom-watering method in Step 3 is a game-changer. Place your pots in ½ inch of water for exactly 10 minutes, then drain. This technique prevents fungal diseases that often plague seedlings grown in damp soil surfaces. I've noticed my seedlings stay healthier and grow stronger when I stick to this method consistently.
Pro Tips for Biodegradable Seed Starters
- These simple strategies will help you grow the healthiest seedlings—without the hassle of plastic waste.
- Soil Moisture Matters: In Step 1, when you're preparing the seed-starting mix, aim for moisture that feels like a wrung-out sponge—not too wet, not too dry.
- Lighting Secret: For Step 3, if you don't have grow lights, place your seedlings on a sunny windowsill facing south.
Frequently asked questions
Got questions about biodegradable seed starters? You’re not alone! Here are some of the most common queries—and straightforward answers—to help you grow with confidence.
How long does it take for biodegradable seed starters to break down?
Most biodegradable seed starters dissolve in 4–8 weeks, depending on soil moisture, temperature, and material composition. Peat pots or coconut coir break down faster (4–6 weeks), while cornstarch-based options may take slightly longer. Always check the product label for specifics!
Can I plant biodegradable seed starters directly in the ground?
That’s the whole point! These starters are designed to dissolve into the soil as your seedlings grow, eliminating transplant shock. Just ensure they’re fully submerged in soil—no need to remove them. For extra security, water the area well after planting to speed up decomposition.
What if my seedlings outgrow the starter before it breaks down?
No worries! If roots or stems start poking through, gently tease them apart from the starter and bury the exposed sections in soil. If the starter is still intact, you can also cut it open to free the roots. Overwatering can slow decomposition, so keep soil moist but not soggy.
Are there alternatives if I don’t have biodegradable starters?
Yes! Try these eco-friendly options:
- Eggshells: Rinse, dry, and cut in half to plant seeds—nature’s free compost!
- Newspaper pots: Roll damp newspaper into tubes and plant directly.
- Toilet paper rolls: Flatten and bury them as they decompose.
- Mushroom compost: Forms natural pots when moistened.
Will pests or mold affect biodegradable seed starters?
While rare, excess moisture or poor airflow can attract mold or pests. To prevent this:
- Use sterilized soil or a seed-starting mix.
- Avoid overwatering—keep soil damp, not wet.
- Place starters in a well-ventilated area (like a seed tray with drainage holes).
Wrapping up and next steps
Biodegradable seed starters are a game-changer for eco-conscious gardeners, offering a sustainable, cost-effective, and efficient way to grow strong seedlings without waste.
By using simple materials like newspaper, egg cartons, or coconut coir, you’re not only reducing plastic use but also giving your plants a head start—literally! 🌱 With just a few weeks of care, you’ll be transplanting thriving sprouts into your lawn or garden, ready to flourish.
Ready to greenify your gardening routine? Start small—try one batch of biodegradable seed starters this season and watch your confidence (and plants!) grow. Next up: Share your success with fellow gardeners or experiment with different materials to find your perfect match!