
Lawn
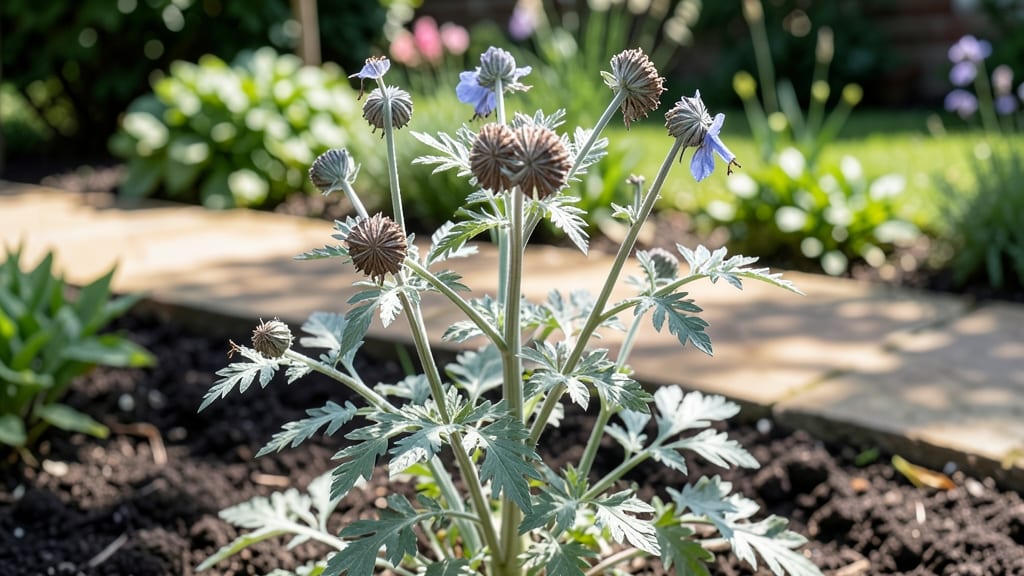
Those delicate blue nigella seed pods are the stars of my cottage garden, and I’ll show you how to grow them without the frustrating twists that ruin your harvest. 🌿 The secret lies in proper spacing, watering, and knowing exactly when to snip them—before they self-seed everywhere or shrivel on the vine.
I’ve been growing nigella for five years, and this method guarantees plump, viable seeds every time, plus lush foliage that thrives in poor soil.
Nigella sativa thrives in full sun and tolerates drought once established, making it perfect for low-maintenance borders or cutting gardens. Start seeds indoors 6-8 weeks before your last frost, or scatter them directly in the garden after soil warms to 60°F.
The key to twist-free pods is consistent moisture during flowering—too much water causes them to split, but too little makes them tough and seedy. I swear by a mulch ring to keep soil evenly damp without soggy roots.
By late summer, you’ll have clusters of papery seed pods that pop open dramatically when ripe, releasing tiny black seeds. To harvest, snip pods just before they split—usually when they turn from green to light brown.
Dry them in a paper bag for 2 weeks, then shake out the seeds for planting next year. The pods themselves make stunning dried arrangements, and the seeds double as a spice for savory dishes.
This method works for both ornamental and culinary nigella, and it’s foolproof even in hot climates. Once you master it, you’ll never buy seeds again—and your garden will hum with pollinators all season long. Ready to grow your own twist-free harvest?
📚 In This Guide
- What you need
- Instructions
- Tips and common mistakes
- Wrapping up and next steps
What you need
- ● Nigella seeds: 1 packet (50–100 seeds, organic preferred for best viability).
- ● Well-draining soil: 1 bag (10–15 lbs) of potting mix or garden loam (amend with perlite or sand for aeration).
- ● Containers or garden bed: Containers: 5–6 inch pots (3–5 per seed packet) with drainage holes.
- ● Garden bed: Full sun (6+ hours/day) and loose, fertile soil.
- ● Watering can or spray bottle: With a fine rose nozzle for gentle hydration.
- ○ Gloves (optional): To protect hands from soil and prickly seed pods.
- ● Trowel: For transplanting seedlings or loosening soil.
- ● Pruning shears: For harvesting mature pods (sterilize with rubbing alcohol).
- ● Sunlight access: South-facing window, balcony, or garden plot.
- ○ Fertilizer (optional): Balanced 10-10-10 or compost tea (apply lightly at planting).
Step-by-step instructions for growing and harvesting nigella seed pods
Here's how to nurture nigella from start to seed—without the frustrating twists.
🌱 Step 1: Plant Nigella Seeds Directly in Well-Drained Soil
Nigella thrives when sown outdoors in full sun after your last frost date, when soil reaches 50°F. Scatter seeds ¼ inch deep and 12 inches apart—they germinate best in loose, sandy soil that drains freely. I press them lightly into the surface rather than burying them deeper, since nigella seeds need light to sprout.
Water gently after planting, keeping the soil evenly moist but never soggy until germination. You'll see seedlings emerge in 2-3 weeks, but don't be surprised if some take longer—nigella's germination is famously unpredictable. Thin seedlings to 12 inches apart once they reach 2 inches tall, snipping weaker stems at the base with clean scissors.
☀️ Step 2: Provide Consistent Care Through the Growing Season
Nigella handles drought surprisingly well once established, but young plants appreciate 1 inch of water weekly during dry spells. You'll know it's time to water when the top inch of soil feels dry to the touch. Too much moisture causes the pods to rot before they mature.
This is where most gardeners lose patience—nigella grows slowly, reaching its full 18-24 inch height over 8-10 weeks. The trick is to let it grow undisturbed. I avoid fertilizing, as nigella prefers lean soil and blooms more prolifically without extra nutrients. Watch for delicate blue or white flowers appearing in early summer—they're the precursor to those iconic seed pods.
✂️ Step 3: Harvest Seed Pods Before They Twist
The key to viable seeds is timing—wait until the seed pods turn brown and papery but haven't yet curled into their signature twist. You'll see them start to split open at the top, revealing tiny black seeds inside. I harvest on a dry morning after the dew has evaporated, cutting the entire pod with 2 inches of stem attached using sharp pruners.
Place harvested pods in a single layer on a paper towel-lined tray in a warm, dry spot. Leave them undisturbed for 3-5 days until completely dry and brittle. Once fully dry, gently rub the pods between your palms to release the seeds. Store them in a paper envelope in a cool, dark place—they'll remain viable for 3-4 years.
🌿 Step 4: Prevent Common Mistakes That Ruin Seed Quality
Don't let pods twist completely before harvesting—that's when they self-sow aggressively, and the seeds lose viability. I mark my calendar with the first bloom date and count 8-10 weeks ahead for harvest time. Overwatering is another culprit—nigella's roots rot easily in heavy soil, so I always plant in raised beds or amended garden soil with 50% sand or perlite.
If you notice the pods developing mold or turning mushy, they're too wet. This usually means the soil stayed damp for too long. Nigella's native to dry climates, so it rewards gardeners who mimic those conditions. The best pods are firm, dry, and free of any dark spots—these are your keepers for next season's planting.
Tips & tricks for perfect nigella seed pod harvesting
To avoid the common pitfalls of nigella growing, here are the essential tips that'll help you achieve those prized seed pods every time.
Soil Preparation: The soil temperature of 50°F is crucial—wait for this threshold after your last frost before planting. If your soil is colder, germination will be slow or nonexistent. I always test soil temperature with a simple thermometer before planting. For better drainage, mix in 50% sand or perlite with your garden soil, especially if you have heavy clay. This mimics nigella's native dry conditions and prevents root rot.
Germination Patience: Those 2-3 weeks for seedlings to emerge can feel like forever, but rushing watering won't help. Keep the soil consistently moist but never soggy—think of it like a wrung-out sponge. I use a spray bottle for gentle watering to avoid disturbing the tiny seeds. If you notice mold or black spots on seedlings, reduce watering immediately and improve airflow around them.
Harvest Timing: The 3-5 days of drying time after harvest is non-negotiable for seed viability. Place your pods in a warm, dry spot away from direct sunlight—they need gentle warmth, not heat. I set them on a mesh screen or rack to allow airflow on all sides. If you're impatient, you can speed up drying by placing them in a dehydrator at 95°F for 2-3 hours, but monitor closely to avoid overheating.
Storage Wisdom: Once you've released the seeds from their pods, store them in a paper envelope rather than plastic. Paper allows for slight moisture exchange while keeping seeds dry, and it prevents condensation buildup that can cause mold. Label your envelopes with the harvest year—this helps track seed age and viability. I keep mine in a cool pantry corner where temperature stays consistent, never near the oven or windows.
Pro Tips for Nigella Seed Pod
- To avoid the common pitfalls of nigella growing, here are the essential tips that'll help you achieve those prized se...
- Soil Preparation: The soil temperature of 50°F is crucial—wait for this threshold after your last frost before planti...
- Germination Patience: Those 2-3 weeks for seedlings to emerge can feel like forever, but rushing watering won't help....
Frequently asked questions
Got questions about growing and harvesting nigella seed pods? You’re not alone! Here are answers to the most common queries—from timing to troubleshooting—to help you grow these delicate beauties like a pro.
When should I harvest nigella seed pods?
Harvest nigella seed pods when they’re fully dry and start splitting open naturally—usually 8–12 weeks after flowering. Wait until the pods turn brown and papery, but before seeds scatter! Morning harvests prevent humidity-related mold. Pro tip: Shake a pod over a bowl—if seeds rattle inside, it’s ready!
Why are my nigella pods twisting before opening?
Twisting pods are normal! Nigella seed pods naturally contort as they dry to release seeds. If yours twist too early (while still green), they’re likely overripe or stressed. Ensure plants get full sun (6+ hours/day) and well-draining soil. Fix it: Move pots to shade if pods twist prematurely.
Can I grow nigella from seed pods I harvest?
Save seeds from healthy, fully mature pods for next year. Let them dry completely, then store in a cool, dark place (like a paper envelope) for up to 2 years. Germination tip: Soak seeds overnight before planting for faster sprouts.
What if my nigella pods don’t open at all?
Unopened pods often mean high humidity or immature seeds. Try:
- Harvest earlier (when pods are brown but still closed).
- Spread pods on a tray in a dry, sunny spot to finish drying.
- Check for pests (like aphids)—spray with neem oil if needed.
Are there alternatives to nigella seed pods for cooking?
Yes! If you love nigella’s nutty, peppery flavor, try:
- Black cumin seeds (closer relative, similar taste).
- Poppy seeds (mild, sweet contrast).
- Sesame seeds (toasted for depth).
For ornamental pods, consider Lavatera or Celosia—they add texture without the twisty quirks!
Wrapping up and next steps
Growing nigella seed pods is a rewarding journey that brings beauty to your garden and a bountiful harvest of unique, edible seeds! 🌱 Whether you're a seasoned gardener or a curious beginner, these delicate blooms and twist-free pods prove that patience and care yield delicious results.
Now that you’re armed with the right knowledge—from soil prep to harvesting—why not plant a few pods this season? Start small, experiment with flavors, and share your harvest with friends or elevate your dishes with these tiny, flavor-packed treasures.