
Lawn
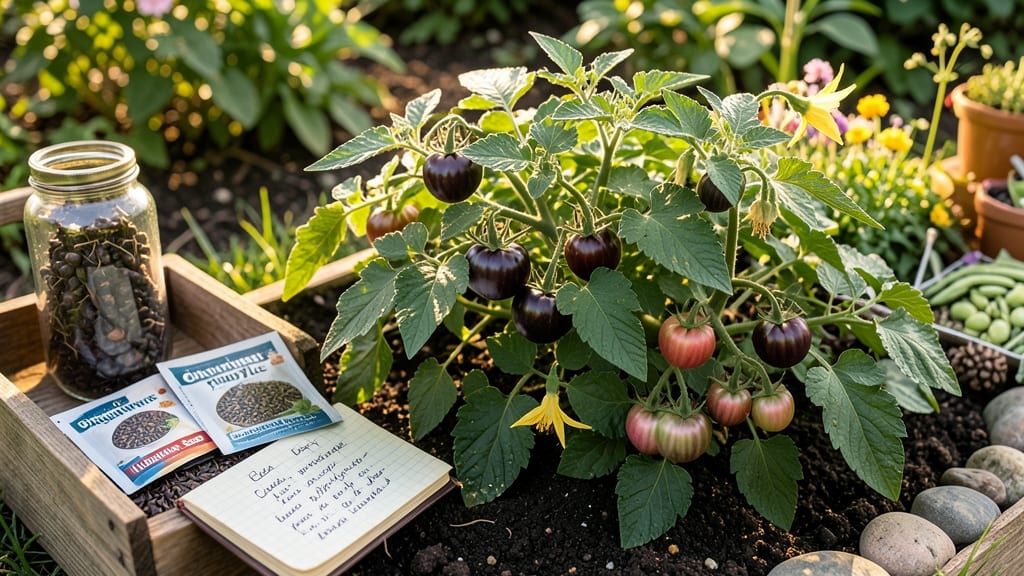
Joining the Seed Savers Exchange lets you grow heirloom seeds that tell a story—each variety carries generations of flavor, resilience, and history. 🌱 I still remember the first time I tasted a tomato from a 1920s heirloom seed; it wasn’t just food, it was a connection to the past and a promise for the future.
These seeds aren’t just for gardeners—they’re for stewards of biodiversity, offering plants that adapt to your local climate better than hybrids ever could.
Participating is simpler than you’d think: browse their catalog, request seeds, and grow out a few varieties. The real magic happens when you save seeds from your best plants—passing them along to other gardeners through the exchange.
You’ll end up with tomatoes that burst with flavor, beans that thrive in your soil, and flowers that attract pollinators like nothing else. Plus, every seed you save or share helps preserve genetic diversity that commercial agriculture often overlooks.
The benefits go beyond taste—heirloom seeds often outperform hybrids in your specific growing conditions. They’re open-pollinated, meaning you can save them year after year, and they’re perfect for organic gardens since they haven’t been bred for chemical dependency.
Imagine a garden where every plant has a purpose, every harvest feels like a victory, and every seed carries a piece of history.
Whether you’re a seasoned gardener or just starting, this is your chance to grow something meaningful. The exchange provides everything you need to begin—just bring your curiosity and a little space. Let’s grow seeds that last longer than a season.
📚 In This Guide
- What you need
- Instructions
- Tips and common mistakes
- Wrapping up and next steps
What you need
- ● Heirloom seeds: Purchase from Seed Savers Exchange or other reputable sources. Start with 1–2 varieties (e.g., tomatoes, beans, or lettuce) to practice.
- ● Garden space: A small plot (4’x4’ minimum) with full sun (6+ hours/day) for most vegetables.
- ● Growing medium: High-quality potting soil or compost-enriched garden beds (avoid synthetic fertilizers for seed-saving purity).
- ● Watering can or hose: With a gentle spray nozzle to avoid disturbing seedlings.
- ● Pruning shears or scissors: For harvesting and trimming plants.
- ● Paper bags or envelopes: Kraft paper or breathable fabric bags (1–2 per seed type) to store seeds.
- ● Labels & markers: Waterproof tags or a permanent marker to label varieties and harvest dates.
- ○ Drying rack or screen: A mesh tray or clean screen to air-dry seeds (optional but helpful for bulk saving).
- ● Grow lights: For indoor seed starting (especially in cool climates).
- ● Seed catalog or journal: To track varieties, growth notes, and seed-saving progress.
- ● Humidity dome or plastic wrap: To create a mini greenhouse for seedlings.
- ● Freezer or desiccant packs: For long-term seed storage (below 30% humidity).
- ● Community resources: Join local seed-saving groups or forums for tips and trades!
How to participate in seed Savers Exchange for heirloom seed preservation
Here's how I've successfully joined the Seed Savers Exchange community to grow and share rare, open-pollinated varieties.
🌱 Step 1: Research and Select Your First Heirloom Varieties
Start by browsing Seed Savers Exchange's catalog to choose varieties that suit your growing conditions. I recommend beginning with easy-to-grow plants like heirloom tomatoes, beans, or lettuces—these are perfect for first-time seed savers. Look for varieties labeled "open-pollinated" or "heirloom," which means you can save seeds from them year after year.
Check the plant's maturity date to ensure it will thrive in your hardiness zone. For example, if you live in zone 5, avoid tropical varieties that need a long growing season. Seed Savers Exchange provides growing guides for each variety, so use those to compare with your local climate. I always make notes about which varieties perform best in my garden each year.
📝 Step 2: Join the Seed Savers Exchange Community
Sign up for free membership at Seed Savers Exchange's website to access their extensive seed library. Once registered, you'll gain access to seed requests, growing tips, and community forums where experienced seed savers share advice. I joined their Facebook group first—it’s where I learned the most about isolation distances and seed-saving techniques.
Complete your profile with details about your location and growing experience. This helps the community match you with suitable seeds and offers. For example, if you're in a short growing season area, they’ll prioritize sending you cold-hardy varieties. Don’t forget to specify any dietary preferences or garden goals, like organic growing or heirloom preservation.
🌿 Step 3: Request and Receive Your Seeds
Browse the seed library and request varieties that interest you. Seed Savers Exchange operates on a "seed share" system, so you’ll need to offer seeds in return. Start small—request just 1-2 packets to avoid overwhelming your garden. I always request a mix of vegetables and flowers to ensure pollination success in my garden.
Once approved, you’ll receive seeds by mail. Keep them in a cool, dry place until planting time. Seed Savers Exchange provides planting instructions with each packet, so follow those closely. Pay attention to spacing requirements—crowded plants can cross-pollinate, which might affect seed purity in future generations. I label each seed packet with the variety name and planting date to stay organized.
✂️ Step 4: Grow and Save Seeds Properly
Follow best practices for growing and saving seeds from your heirloom plants. For example, tomatoes need to be grown in isolated locations to prevent cross-pollination with other varieties. Use row covers or plant them far from other tomato types if space allows. Harvest seeds only from the healthiest, most productive plants to maintain genetic quality.
Once plants mature, save seeds according to the variety’s specific instructions. For tomatoes, let fruit fully ripen on the vine, then ferment the seeds in water for 2-3 days to remove gelatinous coatings. Dry seeds thoroughly on paper towels before storing. I store my saved seeds in labeled envelopes inside a sealed container in the freezer to preserve viability for years.
🌱 Step 5: Share Your Saved Seeds with the Community
After successfully saving seeds, share them with other Seed Savers Exchange members. Fill out a seed offering form on their website, detailing the variety, quantity, and any special notes about growing conditions. I always include photos of my plants and describe any unique traits, like disease resistance or flavor profiles. This helps others decide whether to request your seeds.
Seed Savers Exchange encourages members to document their growing experiences. Share photos, yield reports, and challenges in their forums or social media groups. The more you contribute, the more you’ll receive in return. I’ve learned so much from other gardeners’ trials and successes—it’s a collaborative way to preserve genetic diversity together.
Tips & tricks for participating in seed Savers Exchange
These insider tips will help you navigate Seed Savers Exchange like a seasoned seed saver.
Variety Selection: When choosing your first heirloom varieties in Step 1, prioritize plants with clear growing guides on the Seed Savers Exchange website. For example, 'Brandywine' tomatoes and 'Black Krim' eggplants are excellent choices for beginners—they're well-documented and produce abundantly. I always cross-reference the maturity dates with my local frost dates to avoid disappointment. This careful selection prevents the frustration of watching plants fail due to mismatched growing conditions.
Community Engagement: In Step 2, don't just complete your profile—actively participate in the forums and Facebook groups. I learned about isolation distances for tomatoes the hard way when my first batch of seeds produced unexpected colors. The community often shares regional growing tips that aren't in the official guides. For instance, gardeners in zone 6 might recommend specific tomato varieties that thrive in short seasons, while those in zone 9 suggest heat-tolerant alternatives.
Seed Organization: For Step 3, implement a labeling system beyond just the variety name. I use colored stickers to indicate seed maturity dates, germination tests, and whether they're suitable for my climate. This visual system helps me quickly identify which seeds to request next season. I also keep a separate notebook where I record which varieties performed best in my garden each year—this becomes invaluable when making future requests.
Seed Saving: When following Step 4's seed saving instructions, pay special attention to the fermentation process for tomatoes. The 2-3 days recommendation is crucial—under-fermenting leaves gelatinous coatings on seeds, while over-fermenting can reduce viability. I use small jars with lids to contain any fermentation mess, and I always label them with the date. After drying, I test a few seeds by planting them in small pots to verify germination before storing the rest. This quality check gives me confidence that my saved seeds will grow true to type.
Pro Tips for Seed Savers Exchange Heirloom Seeds
- These insider tips will help you navigate Seed Savers Exchange like a seasoned seed saver.
- Variety Selection: When choosing your first heirloom varieties in Step 1, prioritize plants with clear growing guides...
- Community Engagement: In Step 2, don't just complete your profile—actively participate in the forums and Facebook gro...
Frequently asked questions
What exactly are heirloom seeds, and how do they differ from hybrid or GMO seeds?
Heirloom seeds are open-pollinated varieties passed down through generations, often over 50 years old. Unlike hybrids (which require replanting from seed packets yearly) or GMOs (genetically modified), heirloom seeds produce plants that yield true-to-type seeds. This means you can save and replant them season after season—no need to repurchase!
When is the best time to join the Seed Savers Exchange and order heirloom seeds?
The Seed Savers Exchange typically opens for orders in late winter or early spring (around February–March), with seeds arriving in summer. Plan ahead—popular varieties sell out fast! For year-round access, check their online catalog or local seed swaps. Pro tip: Mark your calendar for early-bird deadlines!
Are heirloom seeds more expensive than conventional seeds, and is it worth the cost?
Yes, heirloom seeds from Seed Savers Exchange often cost more upfront ($3–$6 per packet vs. $1–$2 for hybrids). However, the long-term savings are huge—you’ll never need to repurchase! Plus, you’re supporting biodiversity, rare varieties, and small-scale farmers. Think of it as an investment in flavor, nutrition, and sustainability.
Can I save seeds from my own garden to trade or sell through Seed Savers Exchange?
Seed Savers Exchange encourages seed saving and trading. Just ensure your seeds are open-pollinated, non-GMO, and disease-free. Follow their guidelines for proper isolation and labeling. Many gardeners start small with easy crops like tomatoes or beans—perfect for beginners!
What if my heirloom plants don’t grow as expected? Can I troubleshoot or get help?
Seed Savers Exchange offers resources like growing guides and forums for troubleshooting. Common issues (like poor germination) often stem from improper storage or soil conditions. Reach out to their experienced members—they’re a goldmine of tips! For persistent problems, contact their support team for personalized advice.
Wrapping up and next steps
Joining the Seed Savers Exchange isn’t just about growing plants—it’s about preserving stories, resilience, and biodiversity for future generations. 🌱 Whether you’re a seasoned gardener or a curious beginner, every seed you save or share helps protect heirloom varieties from disappearing.
Start small: try saving seeds from one of your favorite plants this season, then take the next step by connecting with the community to swap, learn, and grow together.
🌟 Your Next Step:
- Visit Seed Savers Exchange to explore seed offerings and join their mission.
- Share your own heirloom seeds or stories—every contribution matters!