
Lawn
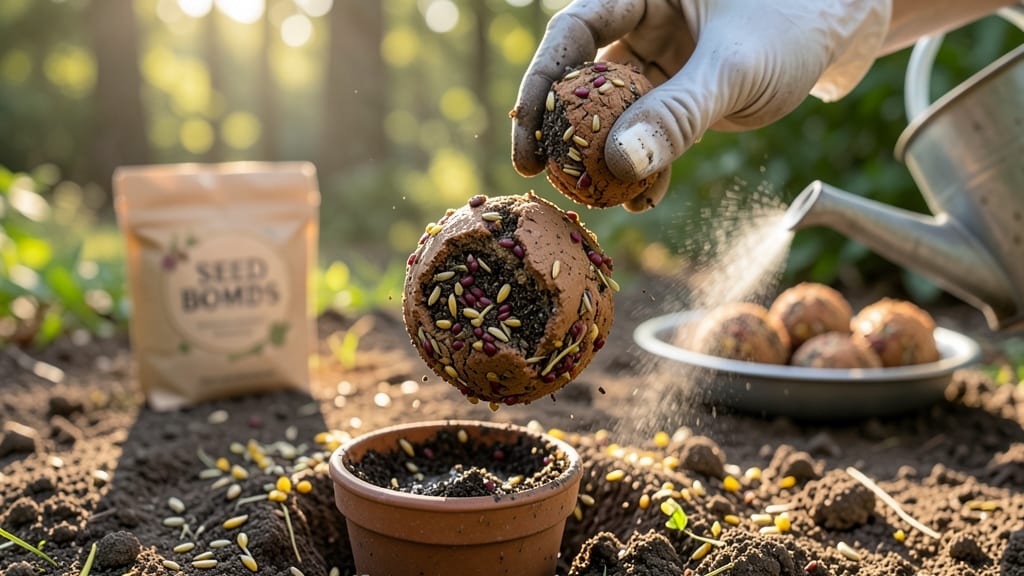
Creating modern sprout seed bombs transforms bare soil into thriving pollinator gardens with just a handful of ingredients. 🌱 These eco-friendly grow kits skip the messy clay of traditional seed bombs, using biodegradable materials that break down cleanly while nurturing native wildflowers and herbs.
The secret lies in balancing two parts compost, one part coconut coir, and one part native seeds—all mixed with a touch of seaweed extract for germination boost. Unlike old-school seed bombs that can smother soil, these dissolve into the earth, feeding roots as they grow.
Perfect for guerrilla gardeners or urban spaces where traditional planting isn’t possible. You’ll see first sprouts in 7-14 days, with blooms arriving in just 6-8 weeks—turning cracked pavement or neglected corners into buzzing havens for bees and butterflies.
The process takes less than 30 minutes, and the results outlast anything you’d buy in a packet. Best of all, these seed bombs work year-round in mild climates, adapting to rain or dry spells. Here’s how to make yours—no stress, just growth.
📚 In This Guide
- What you need
- Instructions
- Tips and common mistakes
- Wrapping up and next steps
What you need
- ● Organic clay – 1 cup (found in craft stores or online; look for "air-dry clay" or "pottery clay").
- ● Compost – 1 cup (well-aged, nutrient-rich compost works best).
- ● Sprouting seeds – 2-3 tablespoons (choose fast-growing, pollinator-friendly varieties like clover, sunflower, or alyssum).
- ● Water – Just enough to bind the mixture (start with ¼ cup and adjust as needed).
- ● A large mixing bowl (for combining ingredients).
- ● A spoon or spatula (for mixing—wooden or silicone works best).
- ● Gloves (to keep hands clean while handling clay).
- ○ Mold or silicone cupcake liners (for shaping seed bombs; optional but makes them uniform!).
- ● Drying tray or parchment paper (to let seed bombs harden).
- ● Labeling tags (to mark seed types and planting dates).
Step-by-Step instructions for crafting pollinator-friendly seed bombs
Here’s how to make these low-stress, high-impact seed bombs that’ll have bees buzzing in no time.
🌱 Step 1: Mix the Clay and Compost Base
Start by combining 2 cups of air-dry clay with 1 cup of compost in a large bowl. The clay acts as the binder, while the compost provides nutrients for your sprouts. I like to break up any clumps in the clay first—it mixes smoother without lumps. Add 1 tablespoon of clay powder (if using) to help the mix hold together better, especially if your clay feels too sandy.
Moisten the mixture gradually with warm water, about ¼ cup at a time, while stirring with a fork. You want it to hold its shape when squeezed but not be sticky enough to cling to your hands. Think of it like damp playdough—if it crumbles when you poke it, add a little more water. If it sticks, let it dry out slightly before proceeding. This balance ensures your seed bombs won’t fall apart when you toss them.
🌿 Step 2: Fold in Seeds and Pollinator Draws
Once your base is the right consistency, gently fold in 1 tablespoon of wildflower seeds and 1 teaspoon of native pollinator-friendly herbs (like borage or chamomile). I like to sprinkle the seeds evenly over the mix first, then use a fork to turn everything together. This prevents clumping and ensures seeds are distributed throughout. Add 1 teaspoon of honey or 1 tablespoon of molasses for an extra sugar boost—pollinators can’t resist it!
For a modern twist, I sometimes add ½ teaspoon of crushed eggshell or 1 teaspoon of activated charcoal to deter pests and improve soil structure. Mix everything thoroughly, but avoid overworking the clay—you don’t want to crush the seeds. If the mix feels too dry, add a few drops of water to keep it pliable.
🪴 Step 3: Shape and Size Your Seed Bombs
Wet your hands slightly to prevent sticking, then roll the mixture into 2-inch diameter balls—about the size of a golf ball. Press gently but firmly to ensure the seeds are evenly embedded. If the mix feels too crumbly, dampen your hands or the surface slightly. I like to make 4 seed bombs with this batch, so I keep them uniform for consistency.
Place your seed bombs on a tray lined with parchment paper and let them dry completely for 24-48 hours in a warm, dry place. Avoid direct sunlight, which can cause cracking. Once fully dry, they’ll be firm enough to handle and toss into your garden. Store any extras in a cool, dry place—they’ll last for months if kept sealed in a breathable container.
☀️ Step 4: Deploy and Monitor for Sprouts
When you’re ready to plant, simply toss your seed bombs into bare soil, disturbed ground, or even cracks in pavement (if using non-invasive species). Water lightly after placement to help them settle. Within 7-14 days, you’ll start seeing tiny green shoots—that’s your signal to water again, but lightly. Overwatering can cause the clay to disperse too quickly, so let the soil dry slightly between waterings.
Watch for first true leaves (not the initial seed leaves) to appear, which means your pollinators will have fresh forage in no time. The clay dissolves naturally, enriching the soil as your plants grow. For best results, place seed bombs in sunny to partially shaded areas where pollinators already visit. You’ll know it’s working when you see bees and butterflies lingering longer than usual!
Tips & tricks for perfect pollinator-friendly seed bombs
Between us, these seed bombs are a game-changer for eco-friendly gardening—but a few small tweaks make all the difference. Here's what I've learned after testing batches in every kind of soil.
Clay Consistency is Everything: In Step 1, aim for a texture that holds together when squeezed but doesn't stick to your fingers. I've ruined batches by either over-moistening (they fall apart when tossed) or under-moistening (they crumble when planted). Think of it like kneading bread dough—it should be cohesive but not gluey. If your mix feels too sandy, add an extra tablespoon of clay powder (if using) or a splash of water to bind it properly.
Seed Distribution Matters: When folding in seeds during Step 2, don't just dump them all at once. Sprinkle them evenly over the mix first, then gently fold with a fork to distribute them throughout. I've seen seed bombs where all the seeds end up in one spot—this creates uneven growth. For extra insurance, I like to break up any seed clusters with my fingers before rolling the balls. This ensures every bite of seed bomb has a chance to sprout.
Drying Strategy: The 24-48 hour drying time in Step 3 is crucial, but how you dry them makes a difference. Place seed bombs on a tray with space between them to allow air circulation. I've found that stacking them causes uneven drying and can lead to cracking. If you're in a humid climate, you might need the full 48 hours—watch for firmness rather than relying strictly on the time. Once fully dry, they should feel solid enough to handle without crumbling. Store extras in a breathable container to prevent moisture buildup that could cause mold.
Planting Placement: In Step 4, don't just toss seed bombs randomly. Look for areas where pollinators already visit—near existing flowers or along fence lines. I've had the best success planting them in disturbed soil where sunlight reaches for at least 6 hours a day. For urban areas, cracks in pavement (using non-invasive species) work surprisingly well. Water lightly after planting, but resist the urge to overwater—the clay needs time to dissolve naturally as the seeds germinate.
Pro Tips for Modern Sprout Seed Bomb
- Between us, these seed bombs are a game-changer for eco-friendly gardening—but a few small tweaks make all the differ...
- Clay Consistency is Everything: In Step 1, aim for a texture that holds together when squeezed but doesn't stick to y...
- Seed Distribution Matters: When folding in seeds during Step 2, don't just dump them all at once. Sprinkle them evenl...
Frequently asked questions
Got questions about modern sprout seed bombs?
Here’s what you need to know before diving in—we’ve got you covered with quick, practical answers!
What’s the best time of year to plant seed bombs?
Seed bombs thrive in spring or early fall when soil is moist but not waterlogged. Avoid extreme heat or frost—aim for 50–75°F (10–24°C). In mild climates, you can plant year-round, but timing matters most for germination success!
How often should I water seed bombs after planting?
Keep soil consistently moist (not soggy!) for the first 2–3 weeks. Water gently daily if rain is scarce, then taper to every other day once sprouts appear. Overwatering can wash away the clay shell—let nature help after that!
Are seed bombs safe for pollinators like bees and butterflies?
These bombs pack native wildflowers and herbs (e.g., clover, yarrow, or borage) that attract pollinators. Avoid non-native or invasive species—stick to local, bee-friendly seeds for maximum impact.
Can I reuse or repurpose leftover seed bomb mix?
Yes! Store unused mix in a cool, dry place (like an airtight jar) for up to 6 months. For repurposing, skip the clay shell and scatter seeds directly into garden beds. Just add water and let nature do the work!
What if my seed bombs don’t sprout?
Don’t panic! Check for moisture, sunlight, and soil contact. If planted in hardpan or dry areas, gently scratch the surface to expose seeds. Try again with a fresh batch—sometimes timing or weather plays a role. Patience is key!
Wrapping up and next steps
Creating your own modern sprout seed bomb is a rewarding way to boost your pollinator garden with minimal effort! These easy-to-make grow kits are perfect for beginners and eco-conscious gardeners alike, offering a fun, sustainable way to support local wildlife. 🌱
Now that you’re armed with the knowledge, take the next step—grab your supplies and start crafting! Whether you’re reviving a patch of soil or adding a pop of color to your yard, your seed bombs will bring life and joy to your outdoor space. Happy growing! 🌸