
Lawn
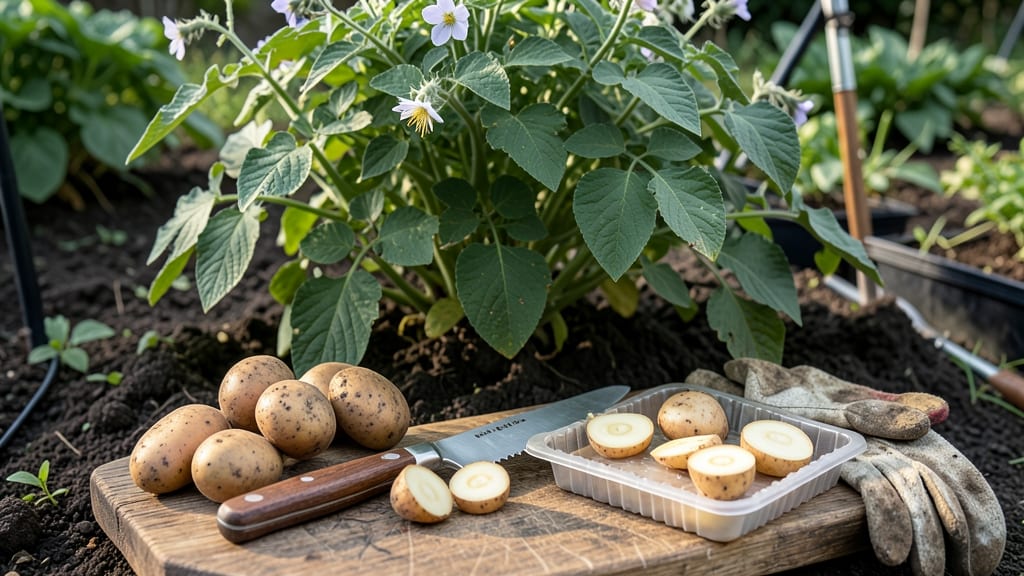
Cutting seed potatoes the right way turns one potato into three strong plants. ✂️ I've learned that proper slices—with the right tools, healing time, and storage—make all the difference between scraggly sprouts and vigorous vines.
The secret isn't just cutting; it's preparing those slices so they're ready to grow when planting season arrives.
You'll need sharp pruners or a clean knife, a cutting board, and a cool, dark spot for curing. Most people rush this step, but letting the slices heal for 24-48 hours prevents rot and encourages faster growth.
My first attempt failed because I planted too soon—now I never skip this critical step.
After cutting, you'll end up with perfect slices, each with at least one eye and 1-2 inches of potato. These pieces will sprout faster and produce stronger plants than whole potatoes because they establish roots sooner. The result? A garden filled with bushier, healthier potato plants that yield more tubers.
This method works for any variety—russets, reds, or fingerlings—and saves money by letting you grow more plants from fewer potatoes. Just avoid cutting too close to the eyes or using dull tools, and you'll be on your way to a perfect harvest. Let's get those slices ready!
📚 In This Guide
- What you need
- Instructions
- Tips and common mistakes
- Wrapping up and next steps
What you need
- ● Seed potatoes: Choose certified disease-free, organic seed potatoes (about 1-2 pounds per 10 sq ft of garden space). Look for varieties like Yukon Gold, Red Pontiac, or Fingerlings for best results.
- ● Sharp knife or pruning shears: A clean, sterilized knife (like a serrated or utility knife) or pruning shears to make precise cuts. Avoid dull blades—they crush the potato instead of cutting it!
- ● Cutting board or clean surface: A disinfectant-wiped wooden or plastic board (or even a clean newspaper) to protect your counter and keep cuts hygienic.
- ● Hydrogen peroxide (3%) or rubbing alcohol: For sterilizing your knife and cutting board between cuts to prevent disease spread.
- ○ Chalk or marker (optional but helpful): To label potato varieties if you’re planting multiple types.
- ● Garden gloves: A pair of nitrile or cotton gloves to protect your hands from dirt and potential irritants.
- ● Seed potato tray or egg cartons: For organizing and storing cut potatoes before planting (great for small spaces!).
- ● Planting chart or notebook: To track varieties, cutting dates, and planting locations.
- ● Compost or soil mix: If you’re prepping a seed-starting container before planting.
- ● Heating mat (for indoor starts): Speeds up sprouting if you’re starting potatoes early indoors.
Step-by-step instructions for cutting seed potatoes
Here's how to slice your seed potatoes for maximum sprouting success—no guesswork, just perfect slices every time.
🪴 Step 1: Choose and Prep Your Seed Potatoes
Start with certified seed potatoes (never grocery store potatoes—they're treated to prevent sprouting). Look for firm, disease-free tubers with 1-2 inch diameter pieces. Smaller potatoes often produce fewer sprouts, while larger ones can be cut into multiple pieces.
Wash the potatoes gently to remove dirt, then let them dry completely. This prevents rot when you cut them. I like to set them out on a paper towel for 10-15 minutes while I gather my tools. The goal is clean, dry potatoes ready for slicing.
✂️ Step 2: Cut the Potatoes Correctly
Use a sharp knife (a ceramic or glass cutter works best) to slice each potato into 1-2 ounce pieces. Each piece must have at least one "eye" (sprout bud)—this is where new growth starts. I cut just below the eye, leaving a small amount of potato attached to the sprout.
Here's the thing—avoid cutting through eyes unless absolutely necessary. Each eye represents a potential stem, so you want to preserve as many as possible. If a potato has multiple eyes, divide it so each piece has its own sprout. Keep your knife clean between cuts to prevent spreading disease.
💧 Step 3: Let the Cuts Heal Before Planting
Place the cut pieces in a cool, dark spot (like a 60-65°F basement or pantry) and let them sit for 24-48 hours. This allows the cut surfaces to form a protective callus, which prevents rot when planted. You'll see the edges dry out slightly and toughen up—this is your signal they're ready.
Don't skip this step. Fresh cuts are like open wounds on the potato—they'll rot in damp soil. I like to arrange them on a wire rack or paper towels with the cut sides up. This airflow speeds up the healing process while keeping them safe from moisture.
☀️ Step 4: Plant the Sliced Potatoes Properly
When the cut edges have healed, plant them with the eyes facing up, about 4-6 inches deep in loose, well-draining soil. Space them 12 inches apart in rows, or 18 inches apart in a hill system. The deeper you plant, the more stable the plant will be against wind and disease.
Water lightly after planting to settle the soil but avoid soaking the cuts. You'll see new growth emerge within 2-3 weeks if conditions are right. Keep the soil consistently moist but not soggy—potatoes hate wet feet. Mulch around the plants to retain moisture and regulate soil temperature.
🌱 Step 5: Monitor for Strong Growth
Once sprouts reach 4-6 inches tall, they're ready for transplanting into the garden (if you started them early indoors). Watch for uniform green growth—this means your cuts were perfect and the potatoes are thriving. If you notice yellowing or wilting, it might mean the cuts didn't heal properly or the soil is too wet.
Here's where it gets fun—watch the tubers form along the underground stems. By midsummer, you'll have a bountiful harvest if you've followed these steps. The key is patience and precision. Perfect slices lead to perfect plants, and that's what we're after!
Tips & tricks for perfect seed potato slices
A few game-changing tricks that'll transform your seed potatoes from ordinary to extraordinary sprouting powerhouses. Here's what nobody tells you about getting those perfect slices that lead to strong, healthy plants.
Potato Selection Wisdom: When choosing your 1-2 inch diameter certified seed potatoes, look for ones with firm, bumpy skin and multiple eyes—these are your goldmines for growth. I've learned the hard way that potatoes with smooth skin or few eyes often produce weaker sprouts. Also, avoid any with soft spots or green patches, as these can indicate disease or exposure to light, which makes them less viable for planting.
The Knife Game-Changer: While a sharp chef's knife works, I swear by a ceramic or glass cutter for this job—it stays sharper longer and gives you cleaner cuts that heal faster. Here's the thing: always cut just below the eye, leaving a small amount of potato attached. This tiny piece of potato acts like a natural bandage, helping the cut heal more quickly. And for heaven's sake, keep your knife clean between cuts to prevent spreading any potential diseases from one potato to another.
Healing Hack: During that critical 24-48 hour healing period at 60-65°F, I've found that arranging the cut pieces on a wire rack with the cut sides up makes all the difference. This airflow creates the perfect conditions for callus formation while preventing moisture buildup that could lead to rot. You'll know they're ready when the edges look slightly dry and papery to the touch—this is your signal that the healing process is complete and they're ready for planting.
Planting Depth Secret: That 4-6 inch planting depth recommendation isn't just arbitrary—it's about finding the perfect balance. Planting too shallow means the potatoes might be exposed to temperature fluctuations and pests, while planting too deep can slow down sprouting. I like to use my hand as a guide: when I make a fist, that's about 4 inches deep, and when I spread my fingers wide, that's about 6 inches. This visual cue helps me get consistent results every time.
Pro Tips for Cut Seed Potatoes
- A few game-changing tricks that'll transform your seed potatoes from ordinary to extraordinary sprouting powerhouses.
- Potato Selection Wisdom: When choosing your 1-2 inch diameter certified seed potatoes, look for ones with firm, bumpy skin and multiple eyes—these are your goldmines for growth.
- The Knife Game-Changer: While a sharp chef's knife works, I swear by a ceramic or glass cutter for this job—it stays sharper longer and gives you cleaner cuts that heal faster.
Frequently asked questions
about cutting seed potatoes—here’s what you need to know before you start!Can I cut seed potatoes too early before planting?
No, wait until just before planting—ideally 1–2 weeks out. Cutting too early causes the cut edges to dry out or rot. Store them in a cool, dark place with the cut sides up until planting day to encourage faster sprouting.
How long do cut seed potatoes need to heal before planting?
Let the cut edges dry and callus over for 24–48 hours. This prevents rot and helps them establish roots faster. Place them in a warm, dry spot (like a sunny windowsill) until the cuts look slightly toughened.
What’s the best way to cut seed potatoes for maximum sprouts?
Use a sharp, clean knife and cut each potato into pieces with at least one or two eyes (sprouts) per section. Avoid cutting through the eyes—this ensures each piece grows into a healthy plant. Smaller pieces = more plants!
Can I use store-bought potatoes as seed potatoes?
Yes, but only certified disease-free seed potatoes are ideal. Store-bought potatoes may carry diseases or have been treated to prevent sprouting. If you use grocery-store potatoes, chit them (pre-sprout) first for better success.
What if my cut potatoes rot before planting?
Rot is usually caused by moisture or bacteria. To prevent it:
- Cut potatoes just before planting (not days ahead).
- Use a sterilized knife (wipe with rubbing alcohol).
- Let cuts dry completely before storing.
- Avoid overcrowding in storage containers.
Wrapping up and next steps
Cutting seed potatoes is a simple yet powerful way to boost your garden’s yield—just a few precise slices can lead to healthier sprouts and a bountiful harvest! 🌱 Whether you're a seasoned gardener or just starting out, mastering this technique will give you confidence in the garden.
Now that you’re ready, grab those potatoes and get planting! Your next step? Mark your calendar for transplanting in 2–4 weeks and watch your garden thrive.