
Lawn
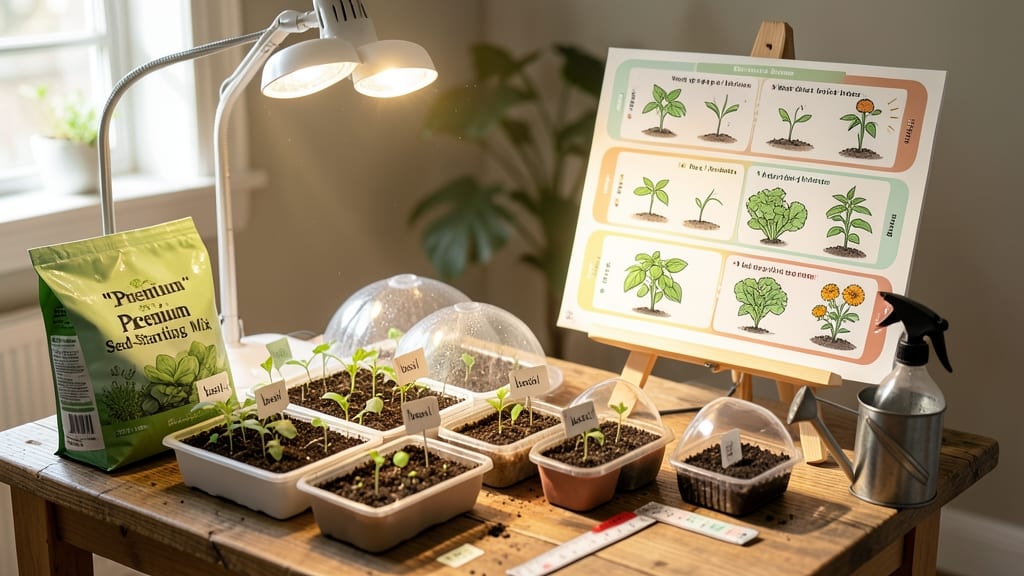
Your indoor seed planting chart starts with knowing exactly when to begin—because timing makes all the difference. 🌱 I learned the hard way that planting too early means leggy, weak seedlings, while starting too late cuts your growing season short.
The chart I use now breaks down zone-specific deadlines so you never guess again, whether you're growing herbs in a sunny kitchen or microgreens under lights.
This isn't just about dates—it's about matching seeds to your space. You'll see light requirements (yes, that south-facing window might not cut it), ideal soil mixes for containers, and how to stretch short seasons with grow lights.
My favorite easy starts? Basil, lettuce, and radishes—fast germinators that give instant gratification when you're learning.
By following the chart, you'll avoid the three biggest mistakes: overwatering (drowning seeds is silent but deadly), insufficient light (those sad, stretched seedlings), and planting too crowded (root-bound misery). The payoff? Stocky, dark-green seedlings ready to transplant outdoors when the time comes.
Works for any indoor setup—from a single windowsill to a dedicated grow room. The chart even includes troubleshooting for common issues like mold or slow germination. Let's get those seeds started right!
📚 In This Guide
- What you need
- Instructions
- Tips and common mistakes
- Wrapping up and next steps
What you need
- ● Seeds: Choose fast-growing varieties like basil, lettuce, or radishes for early starts. Buy seeds labeled for indoor germination or transplanting.
- ● Seed trays or pots: 2–4" deep containers with drainage holes (6–12 trays, depending on seed quantity). Plastic or biodegradable options work best.
- ● Seed-starting mix: Lightweight, sterile potting soil (avoid garden soil—it’s too dense!). A 10–15 lb bag covers most starts.
- ● Grow lights or sunny windowsill: A LED grow light (12–24W) or a south-facing window (6+ hours of sunlight daily).
- ● Spray bottle: For gentle watering (avoid over-saturating seeds!).
- ○ Heat mat (optional but helpful): Keeps soil warm (70–80°F) for faster germination. A 12"x24" mat works for most setups.
- ● Humidity dome: Retains moisture for delicate seeds (e.g., peppers or tomatoes).
- ● pH testing kit: Ensures soil pH is ideal (most veggies prefer 6.0–7.0).
- ● Fertilizer (low-dose): Use a balanced 10-10-10 or fish emulsion once seedlings sprout.
- ● Label markers + sticks: Track seed types and planting dates (trust us, you’ll forget!).
- ● Fan (gentle breeze): Strengthens stems by simulating wind (run on low setting).
How to use an indoor seed planting chart for Zone-specific success
Here's the straightforward method I use to align seed starting with your local frost dates—no guesswork, just reliable timing.
📅 Step 1: Determine Your Planting Zone and Last Frost Date
First, find your USDA Plant Hardiness Zone (check the USDA map or use your zip code). Then locate your average last frost date for spring—this is your critical deadline. I always double-check with my local cooperative extension office because microclimates can shift frost dates by 1-2 weeks.
For example, Zone 5 typically has a last frost around April 15, while Zone 8 might be March 1. Write this date down—it's your anchor for all calculations. If you're unsure, err on the side of caution and use the later date.
📝 Step 2: Calculate Backward from Transplant Dates
Most vegetables need 4-8 weeks indoors before transplanting. Leafy greens like lettuce and spinach only need 3-4 weeks, while tomatoes and peppers require the full 8 weeks. Start by marking your last frost date on a calendar, then count backward.
Here's my trick: Use a highlighter for each crop type. For instance, if your last frost is May 10, highlight April 10 for tomatoes (8 weeks) and April 20 for basil (4 weeks). This visual system prevents overlapping and helps me plan my seed order.
⏰ Step 3: Adjust for Seed Germination Time
Not all seeds germinate at the same speed. Fast growers like radishes sprout in 3-5 days, while slow starters like parsley can take 2-3 weeks. Add the germination time to your backward count—this tells you when to start seeds.
For example, if parsley takes 14 days to germinate and needs 6 weeks total indoors, start it 7 weeks before your last frost. I keep a small chart with common germination times taped to my seed organizer for quick reference.
🌱 Step 4: Plan for Successive Plantings
Many crops benefit from staggered plantings—like lettuce every 2 weeks for continuous harvests. Use your chart to block out these intervals. For instance, if your last frost is April 15 and you want 3 lettuce plantings, schedule them for March 1, March 15, and April 1.
This is where the chart becomes a living document. I color-code each planting group and note which varieties perform best in my zone. For example, I know 'Black Seeded Simpson' lettuce bolts faster in my Zone 6 heat, so I plant it earlier than other varieties.
☀️ Step 5: Verify Light and Temperature Requirements
Your chart should also include light and temperature needs for each crop. Most seedlings need 14-16 hours of light daily, but some like cole crops prefer cooler 60-65°F soil temps. Note these alongside your planting dates.
I add a final column to my chart for light setup reminders. For example, "Tomatoes need grow lights by March 1" or "Peppers require heat mat until April 15." This prevents last-minute scrambling when seedlings outgrow their light source or when cool nights slow germination.
Tips & tricks for perfect Zone-specific seed starting
These practical strategies will help you turn your planting chart into a foolproof system for timing seed starts with precision.
Microclimate Reality Check: The 1-2 week variation in frost dates mentioned in Step 1 can make all the difference. I recommend checking your local weather station's 10-year average rather than relying solely on zone maps. For example, if you're in Zone 7 but live in a frost pocket, your last frost might align more with Zone 6. I've seen this shift planting windows by 10 days in some cases.
Visual Timing System: When calculating backward from your last frost date in Step 2, use actual calendar pages instead of mental math. The tactile experience of moving dates helps prevent calculation errors. I color-code different crop families (greens, roots, brassicas) with different highlighters to instantly see overlaps or gaps in my planting schedule.
Germination Time Hack: For the germination adjustments in Step 3, I create a master list of common seeds with their germination ranges. For example, I note that "carrots (14-21 days)" and "onions (7-14 days)" have wider ranges than radishes (3-5 days). This helps me account for potential delays when planning my starting dates, especially in cooler homes where germination can take longer.
Light Setup Reminders: The 14-16 hours of light requirement in Step 5 is non-negotiable for most seedlings. I set reminders on my phone for when to adjust my grow lights based on my chart. For example, if my chart shows tomatoes need lights by March 1, I'll have a reminder to test my setup on February 28. This prevents that last-minute panic when seedlings stretch toward the light source.
Pro Tips for Indoor Seed Planting Chart
- These practical strategies will help you turn your planting chart into a foolproof system for timing seed starts with...
- Microclimate Reality Check: The 1-2 week variation in frost dates mentioned in Step 1 can make all the difference. I ...
- Visual Timing System: When calculating backward from your last frost date in Step 2, use actual calendar pages instea...
Frequently asked questions
Got questions about indoor seed planting?
You’re not alone! Here are answers to the most common concerns—whether you’re a first-time gardener or a seasoned green thumb fine-tuning your timing.
When should I start planting seeds indoors based on my zone?
Check your USDA Plant Hardiness Zone and refer to our indoor seed planting chart for zone-specific deadlines. For example, Zone 5-6 gardeners should start cool-season crops (like lettuce or spinach) 6-8 weeks before the last frost, while warm-season crops (tomatoes, peppers) go in 8-10 weeks before. Pro tip: Mark your calendar with the average last frost date in your area—it’s your planting GPS!
What if I miss the recommended start date?
Don’t panic! Some seeds (like basil, radishes, or green onions) tolerate cooler temps and can be direct-sown later. For others, try slow-growth lighting (12-14 hours of light daily) to stretch your timeline. If all else fails, opt for transplant-friendly seedlings from a nursery—but be sure to harden them off (acclimate to outdoor conditions) for 7-10 days before moving them outside.
How do I adjust for unusual weather (early frost or heatwave)?
Unpredictable weather? Use row covers, cold frames, or grow lights to extend your season. For early frosts, prioritize fast-maturing varieties (check seed packets for “days to harvest”). Heatwaves? Move seedlings to cooler spots (like basements with grow lights) or switch to shade-tolerant crops like Swiss chard or bush beans. Keep a journal to track your microclimate’s quirks over time!
Can I use regular potting soil for indoor seed starting?
Not ideal! Seed-starting mix is lighter, sterile, and well-draining—critical for preventing damping-off (a fungal disease that kills seedlings). Mix it with perlite or vermiculite (20% ratio) for extra airflow. Skip the fertilizer at first; young roots are sensitive. Repurpose old soil? Sterilize it by baking at 200°F (93°C) for 30 minutes to kill pathogens.
My seedlings look leggy or weak—what went wrong?
Leggy seedlings usually mean too little light or overcrowding. Move them 2-3 inches closer to grow lights (or under a sunny south-facing window) and thin them so they’re 1-2 inches apart. Yellow leaves? Overwatering—let the top inch of soil dry out between waterings. Brown edges? Underwatering or low humidity—try a humidity dome or misting. Rotate trays daily for even growth!
Wrapping up and next steps
Mastering an indoor seed planting chart puts you in control of a thriving garden, no matter your climate zone! By following zone-specific deadlines and timing your starts indoors, you’ll enjoy healthier plants and a bountiful harvest. 🌱
Ready to dive in? Start by sketching your own planting schedule—grab a notebook, mark your zone, and map out your favorite veggies or herbs. Then, gather your supplies and begin sowing with confidence. Happy planting! 🌟