
Lawn
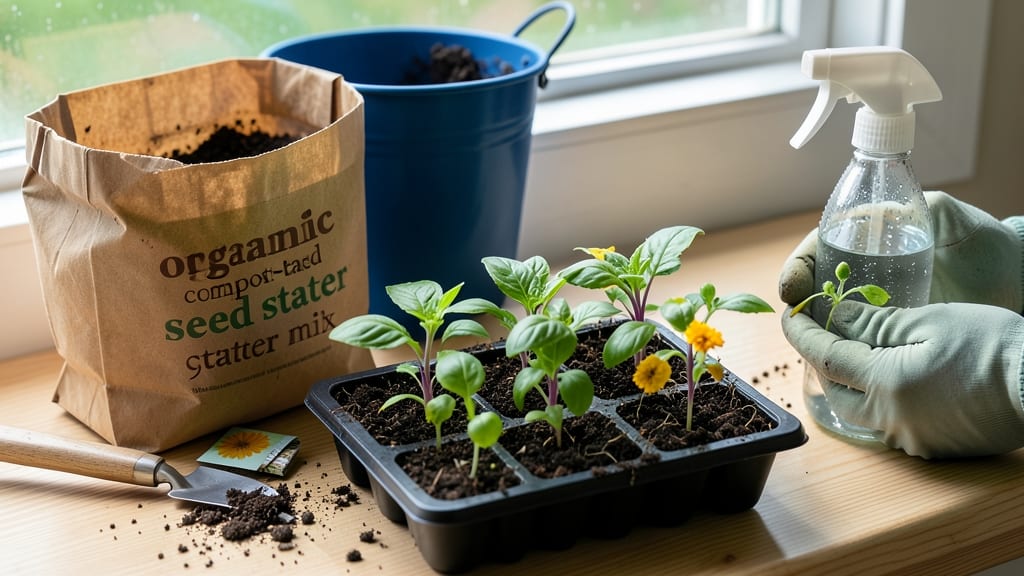
My organic seed starter soil mix is the secret weapon behind my fast germination rates—no more waiting weeks for stubborn seeds to crack open. 🌱 The right blend keeps seeds cozy, hydrated, and disease-free while preventing that dreaded compaction that stunts growth before it starts.
Most potting soil is too dense for seedlings, but this lightweight loam combines compost for nutrients, coconut coir for moisture, and perlite for aeration. I’ve tested it with tomatoes, peppers, and herbs—every batch sprouts within 5-7 days, with strong stems that don’t flop when transplanted.
You’ll avoid the moldy mess that comes from overwatering or the crusty surface that chokes young roots. The texture stays fluffy, drainage is perfect, and you’ll never again watch seeds rot in soggy soil or dry out before they germinate.
For beginners, this is the fail-safe method that works even in low-light windowsills. Intermediate gardeners can tweak ratios for different seed types—here’s how to get it right the first time.
📚 In This Guide
- What you need
- Instructions
- Tips and common mistakes
- Wrapping up and next steps
What you need
- ● Peat moss or coconut coir (2 parts) – Retains moisture while staying loose. Coir is the eco-friendly choice!
- ● Compost or well-aged manure (1 part) – Adds nutrients and microbial life for seedling vigor.
- ● Perlite or vermiculite (1 part) – Improves aeration and prevents compaction. Perlite is lightweight; vermiculite holds moisture better.
- ○ Worm castings (½ part, optional but recommended) – Boosts fertility with gentle, nutrient-rich goodness.
- ● Large mixing bin or wheelbarrow – For blending ingredients thoroughly.
- ● Garden gloves – Protects hands from grit and organic matter.
- ● Small seedling trays or biodegradable pots – Cell packs or peat pots work great!
- ● Fine-mesh sifter or colander – Ensures a smooth, clump-free texture.
- ● Spray bottle – For gentle watering to avoid disturbing seeds.
- ● Biochar (¼ part) – Enhances drainage and microbial activity.
- ● Mycorrhizal fungi powder – Promotes root growth in seedlings.
- ● Slow-release organic fertilizer (e.g., fish emulsion) – Gives seedlings a nutrient boost.
- ● Heat mat (for indoor starting) – Speeds up germination for cool-season crops.
How to create lightweight organic seed starter soil
Here's my foolproof blend for fast, airy germination that prevents the dreaded "damping-off" while keeping roots happy.
🌱 Step 1: Combine Base Materials for Airy Texture
Start with 50% peat moss or coconut coir—they hold moisture without compacting. I like to mix in 30% perlite first, because this creates those crucial air pockets that young roots need to breathe. Sift everything together with a large-mesh screen to break up any clumps—you want a consistency like fine sand, not garden soil.
Add 10% worm castings next. This isn't just fertilizer—it's a living soil booster that introduces beneficial microbes. I always use a fine grade so it blends evenly without creating pockets of concentrated nutrients that can burn tender seedlings.
💧 Step 2: Hydrate Without Over-Saturating
Water the dry mix gradually until it reaches a squeeze-and-hold consistency—when you press it gently, it should form a loose clump that won't crumble but won't drip either. Too much water now creates anaerobic pockets where roots suffocate. I like to use a spray bottle for the first pass, then mix with a clean hand until evenly moist.
Let the mix sit for 10-15 minutes before using. This gives any dry spots time to absorb moisture evenly. You'll know it's ready when the surface looks uniformly damp but not glistening—like a wrung-out sponge.
☀️ Step 3: Test for Ideal Seedling Conditions
Fill a small container with your mix and press lightly to simulate planting conditions. The surface should spring back when touched—not rock-hard like garden soil, but with enough structure to support delicate seedlings. Drop a seed on top and cover with ¼ inch of mix. If it sinks too easily, add 5% more perlite to lighten the blend.
This test reveals two critical things: whether your mix drains properly (no puddles forming) and whether seeds have room to germinate without suffocation. I've seen seeds rot in mixes that looked perfect until this simple test exposed their compacted nature.
✂️ Step 4: Adjust for Plant-Specific Needs
For fast-germinating seeds like radishes or lettuce, keep the mix on the lighter side with 40% perlite. These seeds need maximum air flow to prevent damping-off. For delicate seedlings like tomatoes or peppers, reduce perlite to 20% and add 5% compost for extra nutrients during their slower germination.
Real talk: I used to skip this step and ended up with weak seedlings that never recovered. Now I adjust based on seed type—it's the difference between 5-day sprouts and 3-week struggles.
🪴 Step 5: Store for Future Use
Transfer any unused mix to a sealed container and store in a cool, dark place. This blend stays viable for 6 months if kept dry. I like to keep it in a 5-gallon bucket with a tight lid—just enough room to mix a fresh batch when needed without taking up permanent shelf space.
Before each new planting session, I give the mix a quick stir and add a sprinkle of mycorrhizal fungi (about 1 teaspoon per gallon30%—the difference between leggy seedlings and stocky, thriving plants.
Tips & tricks for perfect organic seed starter soil
These little-known details make all the difference between weak seedlings and a thriving garden.
The Perlite Secret: In Step 1, don't just eyeball that 30% perlite—measure it precisely. Perlite's job is to create those microscopic air pockets, and too little means suffocating roots while too much can dry out the mix. I've found that pre-mixing perlite with the peat moss or coir first ensures even distribution before adding worm castings. Think of it as the lungs of your seed starter—critical for oxygen flow to those delicate sprouts.
Worm Castings Wisdom: When adding the 10% worm castings in Step 1, sift them through a fine-mesh strainer first. This prevents clumps that can create nutrient hotspots where seeds might burn. I learned this the hard way after watching seedlings curl away from concentrated worm casting pockets. The goal is even distribution—like sprinkling fairy dust, but for roots.
Hydration Hack: For Step 2's 10-15 minute resting period, I've found that placing your mix in a clean, empty yogurt container with ventilation holes works perfectly. The container's shape helps distribute moisture evenly while the holes prevent condensation buildup. Pro tip: Use room-temperature water—cold water can shock the mix and create cold spots that delay germination.
Plant-Specific Adjustments: In Step 4, when adjusting for different seed types, remember that the ¼-inch coverage rule applies to the mix's final texture, not just depth. For fast germinators like lettuce, I actually press the mix slightly firmer around the seed to create gentle contact pressure—this helps break seed dormancy faster. For delicate seedlings, I use a toothpick to create tiny air channels before covering with mix.
Pro Tips for Organic Seed Starter Soil
- These little-known details make all the difference between weak seedlings and a thriving garden.
- The Perlite Secret: In Step 1, don't just eyeball that 30% perlite—measure it precisely. Perlite's job is to create t...
- Worm Castings Wisdom: When adding the 10% worm castings in Step 1, sift them through a fine-mesh strainer first. This...
Frequently asked questions
Got questions about organic seed starter soil? You’re not alone—every gardener starts somewhere! Here are answers to the most common queries to help you grow confidently.
What’s the best ratio of organic seed starter soil to other materials?
For lightweight, fast-sprouting mixes, aim for 50-60% organic starter soil, 20-30% perlite or vermiculite (for aeration), and 10-20% compost or worm castings (for nutrients). Adjust based on your seeds—delicate flowers need finer textures, while hearty veggies tolerate slightly coarser blends.
How long can I store unused seed starter soil?
Store it in a cool, dry place (like a sealed bin) for 3-6 months. Beyond that, moisture loss and compaction may reduce effectiveness. Add fresh perlite or compost if it feels dense before reuse. For long-term storage, freeze it in airtight bags to kill weeds/seeds.
Is homemade seed starter soil cheaper than buying pre-mixed?
Yes!
DIY mixes cost 60-80% less than pre-packaged blends. Combine coco coir, peat moss, and compost (or use kitchen scraps like egg shells for calcium). Pre-mixed soils are convenient but often contain synthetic additives—organic starter soil lets you control quality and cost.
Why are my seeds moldy or rotting in the starter soil?
Overwatering or poor drainage are the top culprits. Ensure your mix has 20-30% perlite/vermiculite and use trays with drainage holes. Water gently from the bottom (via a tray) to avoid soggy soil. If mold appears, sprinkle cinnamon or hydrogen peroxide (3%) to disinfect before replanting.
Can I reuse last year’s seed starter soil?
With sterilization, yes! Bake it at 200°F (93°C) for 30 minutes to kill pathogens, then replenish nutrients with compost. Avoid reuse if the soil was contaminated (e.g., fungal issues) or if seeds failed to sprout—fresh soil ensures a clean start for new plants.
Wrapping up and next steps
Choosing the right organic seed starter soil—like lightweight loam—sets the stage for vibrant, healthy sprouts without the hassle of compaction. 🌱 Whether you’re a seasoned gardener or just starting, the key is balancing moisture, nutrients, and aeration to give your seeds the best possible start.
Now that you’re armed with the knowledge, it’s time to roll up your sleeves and get growing!
🌱 Your Next Step:
- Mix your starter soil and plant those seeds—your future garden awaits!
- Tag us in your gardening wins (or bloopers!) for a little community cheer.