
Lawn
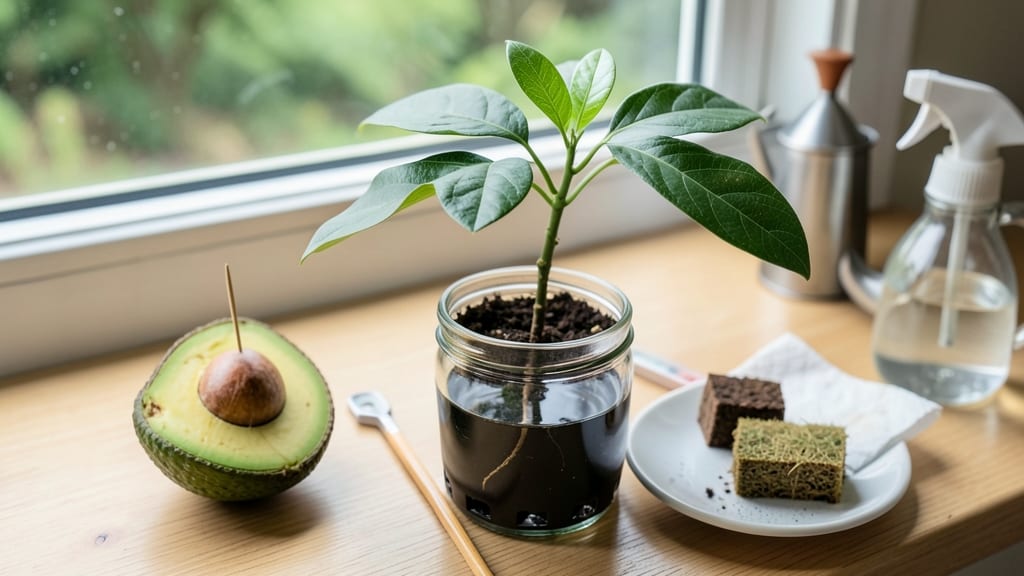
Getting an avocado seed to sprout starts with the right twist-free extraction—no more mushy failures. 🌱 I’ve sprouted dozens this way, and the secret is in the prep: cleaning the seed, piercing it just right, and keeping it hydrated without rot.
Most people rush the soaking step, but patience here means the difference between a seedling and a sad, brown pit. You’ll need just three supplies: a clean avocado seed, toothpicks or a chopstick, and a glass of water.
The toothpicks prop up the seed so only the bottom third sits in water—never fully submerged. Within 2-6 weeks, you’ll see roots and a tiny shoot emerge, but consistency is key.
Change the water every 2-3 days to prevent bacteria, and keep the glass in bright, indirect light (no direct sun yet). Once the stem reaches 4-6 inches, it’s ready for soil.
Plant it in a pot with well-draining mix, burying the root ball up to where the stem meets the seed. Keep the soil moist but not soggy, and expect slow growth at first—this isn’t a race.
The first true leaves signal success, and with proper care, your seedling could live for decades. Common mistakes? Over-soaking the seed or using dirty water. If mold appears, start fresh. And yes, it’s worth the wait—nothing beats the thrill of watching that first leaf unfurl. Let’s get growing!
📚 In This Guide
- What you need
- Instructions
- Tips and common mistakes
- Wrapping up and next steps
What you need
- ● 1 fresh, ripe avocado (pick one with a firm, unblemished seed for best results).
- ● 1 sharp knife (serrated or chef’s knife works best for clean cuts).
- ● Toothpicks (3-4) (or small wooden skewers if toothpicks are unavailable).
- ● 1 glass or jar (wide-mouth, 12-16 oz, with smooth sides for easy cleaning).
- ● Water (room temperature, enough to cover ~1 inch of the seed’s base).
- ● Potting soil (well-draining, organic mix—ideal for seedlings).
- ● Small pot (4-6 inches in diameter) (with drainage holes to prevent root rot).
- ● Spray bottle (for gentle watering once the seedling emerges).
- ● Hydroponic kit or mesh screen (for advanced growers who want to skip soil initially).
- ● Plant food or diluted fertilizer (once the plant is 6+ inches tall).
- ● Grow lights or sunny windowsill (if natural light is limited).
- ● Humidity dome or plastic wrap (to retain moisture during early growth).
- ● Ruler or measuring tape (to track seedling growth over time).
Step-by-Step instructions for growing an avocado seed
Here's my foolproof method for sprouting an avocado pit without damaging the seed or losing patience.
🌱 Step 1: Extract the Seed Without Harming It
Start with a ripe avocado—squeeze gently to feel for softness, not mushiness. Cut the fruit in half lengthwise and twist to separate the two halves. The seed will be nestled in one side, surrounded by flesh. Use a spoon to carefully scoop out the seed, leaving as much of the brown outer shell intact as possible.
Don't worry if a little brown skin tears—this is normal. The key is to keep the seed whole and undamaged. Rinse it under cool water to remove any remaining fruit residue, then pat dry with a paper towel. Here's the thing—you want the seed to stay clean but not soaked, so just a quick wipe is enough.
💧 Step 2: Prepare the Seed for Germination
Take three or four toothpicks and arrange them evenly around the middle of the seed, about ½ inch apart. This creates a little cradle where the seed can balance without touching the water. Place the seed over a glass or jar filled with 2-3 inches of water, ensuring the bottom ¼ inch of the seed is submerged but the top remains dry.
I know it seems weird to leave the seed exposed to air while the bottom sits in water, but this mimics natural conditions. The seed needs moisture at the base to start growing roots, but the top must stay dry to prevent rot. Change the water every 2-3 days to keep it fresh and prevent bacteria buildup.
☀️ Step 3: Position for Optimal Growth
Place your seed setup in a warm, bright spot—65-75°F is ideal. A kitchen windowsill or near a south-facing window works well, but avoid direct sunlight, which can overheat the water and dry out the seed. You'll see roots emerge from the bottom in 2-6 weeks, depending on temperature and humidity.
Watch for the first root to reach about 1-2 inches long before taking the next step. This ensures the root system is strong enough to support the growing sprout. Don't rush—if you see mold or the water turns cloudy, dump it and refill with fresh water immediately.
🌿 Step 4: Encourage Sprout Growth
Once the root reaches 2-3 inches, it's time to coax the sprout upward. Keep the seed in the same water setup, but now you'll notice a tiny bump forming at the top. This is the sprout pushing through the shell. Leave it be—it needs time to break through naturally.
When the sprout reaches 1-2 inches tall, carefully transfer the entire seed (with toothpicks and all) into a 6-inch pot filled with well-draining potting mix. Bury the seed halfway, leaving the sprout exposed. Water lightly until the soil is moist but not soggy. Place the pot in bright, indirect light to avoid shocking the young plant.
⏰ Step 5: Transition to Soil and Maintain Growth
After 4-6 weeks, when the sprout has grown another 2-3 inches and developed a few leaves, it's ready for a larger pot. Choose a 10-inch container with drainage holes and fill it with moist potting mix. Gently remove the seed from its toothpick cradle and plant it 1 inch deep, covering the roots and lower half of the seed.
Water thoroughly and place the pot in bright, indirect light for the first week. Gradually introduce it to morning sunlight to harden it off. Keep the soil consistently moist but never waterlogged—you'll know it's right when the top inch feels slightly dry to the touch. With patience, your avocado seedling will grow into a sturdy plant ready for repotting in a year or two.
Tips & tricks for growing avocado seeds successfully
Real talk: The difference between a thriving avocado seedling and a failed experiment often comes down to these small details.
Seed Extraction: When scooping out the seed in Step 1, work slowly to avoid cracking it. I learned this the hard way after ruining three seeds by being too aggressive. Use a spoon to gently pry the seed from its flesh, rotating it as you go. The goal is to keep that outer shell intact—it protects the seed during germination. If you do crack it, don't panic—just patch any small breaks with a bit of tape until you're ready to plant.
Water Level Precision: The instructions call for just the bottom ¼ inch of the seed submerged in Step 2, and this matters more than you'd think. Too much water drowns the seed, while too little prevents root growth. I use a ruler to measure the water level—aim for exactly 2-3 inches in your container. The toothpicks should hold the seed steady while keeping the top dry, which prevents mold. Change that water religiously every 2-3 days, even if it looks clean—bacteria builds up faster than you'd expect.
Light and Temperature Balance: That 65-75°F range in Step 3 is non-negotiable for consistent growth. If your kitchen runs cooler, place the seed near a sunny window during the day and move it away at night. I've seen seeds take twice as long to sprout when kept in drafty spots. For humidity, try covering the setup with a plastic bag (with holes for air) if your home is dry—this mimics tropical conditions where avocados grow naturally. Watch for condensation buildup, though, and remove the bag if you notice mold creeping in.
Transition Timing: The moment you move your seedling to soil in Step 4 is critical. Wait until you see that 1-2 inch sprout AND the roots are at least 2-3 inches long—this ensures stability. When transferring, keep the toothpicks in place until the roots establish in soil (about 1 week). I've had better success using a small trowel to gently loosen the soil around the roots before planting, which reduces transplant shock. After repotting in Step 5, avoid watering for 3-4 days to let the roots adjust to their new home.
Pro Tips for How Do I Get An Avocado Seed To Sprout
- Real talk: The difference between a thriving avocado seedling and a failed experiment often comes down to these small details.
- Seed Extraction: When scooping out the seed in Step 1, work slowly to avoid cracking it.
- Water Level Precision: The instructions call for just the bottom ¼ inch of the seed submerged in Step 2, and this matters more than you'd think.
Frequently asked questions
Got questions about sprouting avocado seeds?
You’re not alone! Here are some of the most common queries—and their answers—to help you grow a thriving avocado plant with confidence.
How long does it take for an avocado seed to sprout?
Patience is key! Most avocado seeds take 2–6 weeks to sprout, depending on warmth, moisture, and humidity. Keep the toothpick setup in a warm, bright spot (but out of direct sun) and check the soil daily. If you see tiny roots peeking out, you’re on the right track!
Why isn’t my avocado seed sprouting?
No sprouts after 6 weeks? Try these fixes:
- Check moisture: The toothpick end should stay damp but not soggy. Adjust your watering schedule.
- Warmth matters: Seeds need 70–85°F (21–29°C). Move it to a warmer spot or use a seedling heat mat.
- Rot check: If the seed smells foul or feels mushy, it’s rotting. Start fresh with a new seed!
Can I plant the avocado seed directly in soil without the toothpick method?
Yes! Skip the toothpick and bury half the seed in moist potting mix, leaving the top exposed. Keep it humid with a plastic bag or dome. Just know this method may take longer to sprout (4–8 weeks) and requires more patience. The toothpick trick speeds things up!
How do I know if my avocado seedling is healthy?
A healthy seedling has:
- Firm, green leaves (not yellow or wilted).
- Steady root growth (1–2 inches per week).
- No mold or pests on the soil or leaves.
Can I grow an avocado tree indoors?
Avocado trees thrive indoors with bright, indirect light (near a south or west window). Rotate the pot weekly for even growth. Once it’s 18+ inches tall, you can transplant it outdoors (if you live in a USDA Zone 10–11) or keep it as a houseplant. Just be patient—it may take years to bear fruit!
Wrapping up and next steps
Growing an avocado seed into a thriving plant is easier than you think—especially with the twist-free extraction method! By following these simple steps, you’ll give your seed the best chance to sprout and flourish. All you need is patience, a little care, and the right environment.
Now that you’re ready to start, why not take the next step? Share your progress with fellow plant lovers or experiment with creative pots and decor to make your avocado plant a centerpiece. Happy growing—your future tree awaits! 🌱✨