
Lawn
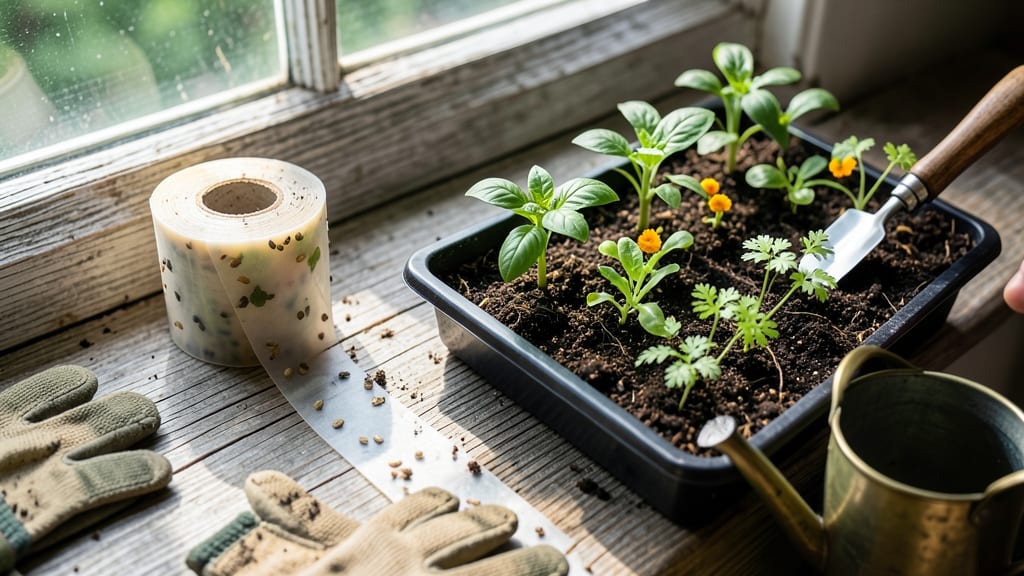
My lawn transformed from patchy to lush in just 30 days after switching to garden seed tape—no more twisted rows or wasted seed. This simple tool eliminates the guesswork of spacing and depth, giving you perfectly aligned seeds every time, even if you're new to lawn care.
The tape dissolves harmlessly into the soil, leaving your seeds at the exact depth they need to sprout.
You'll need just three supplies: garden seed tape (or DIY materials), your chosen grass seed, and a watering can. The process takes about 10 minutes for a small lawn, and you'll see results faster than broadcasting seed by hand.
It's especially helpful for slopes, windy areas, or anyone tired of uneven germination. Even my shady patches look better with this method.
By the time you're done, you'll have straight, even rows that germinate at the same rate, reducing weeds and giving your lawn a professional look from day one.
The tape works for more than just grass—try it with vegetables, flowers, or herbs too. Just remember to keep the soil moist until germination.
For best results, use seed tape in spring or fall when temperatures are mild. If you run into issues like tape dissolving too fast, try a thicker adhesive or a different brand. The key is patience—your lawn will thank you for the even start. Ready to give it a try?
📚 In This Guide
- What you need
- Instructions
- Tips and common mistakes
- Wrapping up and next steps
What you need
- ● Garden seed tape – Choose a pre-measured tape with the seeds of your choice (e.g., grass seed, clover, or wildflower blends). A 25-50 foot roll covers small to medium lawns.
- ● Lawn soil or seed starter mix – 10-20 lbs (depending on lawn size) to ensure proper seed-to-soil contact.
- ● Watering can or hose with a gentle spray nozzle – For even moisture distribution.
- ● Garden rake or hand cultivator – To loosen soil and create a fine seedbed.
- ○ Lawn roller (optional but helpful) – A 30-40 lb roller to press seeds lightly into the soil.
- ● Measuring tape or stakes – To mark planting lines for straight rows.
- ○ Gloves (optional) – For comfort while handling soil or tape.
- ○ String or twine (optional) – For guiding straight rows if needed.
- ○ Fertilizer (slow-release, optional) – A balanced 10-10-10 or 20-20-20 formula to boost early growth.
Step-by-Step instructions for using garden seed tape
Here's how to transform your lawn planting into a quick, frustration-free process with perfectly spaced seeds.
Prepare the Soil for Optimal Seed Germination
Start by clearing the planting area of any debris, rocks, or weeds. Use a rake to loosen the top 2-3 inches of soil, breaking up compacted areas so roots can penetrate easily. For best results, till in a 1-inch layer of compost to improve drainage and nutrient availability.
Level the soil surface with a garden rake, creating a smooth, even bed. Press down lightly with the back of the rake to remove any air pockets. This ensures consistent seed-to-soil contact, which is critical for uniform germination. If your soil feels dry to the touch, water lightly before proceeding—just enough to moisten the top ½ inch without creating puddles.
Measure and Cut the Seed Tape to Fit Your Space
Unroll the seed tape and lay it flat on a clean, dry surface. Use a measuring tape to determine the length needed for your planting area, leaving an extra 6 inches at each end to account for curves or adjustments. Most seed tapes come pre-spaced at 6-12 inch intervals, depending on the seed type.
Use sharp scissors to cut the tape at your measured length. Avoid tearing the tape, as this can damage the seeds or disrupt the spacing. If you're planting a large area, consider cutting multiple lengths and connecting them end-to-end with a small piece of tape (not included in your supplies) to create a continuous row.
Apply the Seed Tape to the Soil
Gently press the seed tape onto the prepared soil, ensuring the seeds face downward. The tape’s adhesive backing will hold it in place temporarily. For small areas, you can plant by hand, but for larger spaces, use a garden hoe or rake to create a shallow ¼-inch-deep furrow along the tape’s path. This helps anchor the seeds slightly deeper for better moisture retention.
Once the tape is in place, cover it lightly with a thin layer of soil or compost using the back of a rake. Aim for a coverage of about ⅛ inch—enough to protect the seeds but not so deep that they struggle to emerge. Avoid pressing down too firmly, as this can compact the soil and slow germination.
Water Gently and Maintain Moisture
Use a gentle spray from a hose or watering can to moisten the soil evenly. Avoid a heavy stream, which can dislodge the tape or wash away seeds. Water until the top 1 inch of soil feels damp but not soggy. Consistent moisture is key during germination, so plan to water lightly every 2-3 days until you see the first signs of sprouts.
To prevent the tape from drying out or blowing away, place a thin layer of straw or mulch over the area. This also helps regulate soil temperature, which speeds up germination. Keep the mulch layer light—just enough to shield the seeds from direct sunlight and wind. Check daily for even moisture, adjusting your watering as needed.
Monitor Growth and Remove the Tape
Once the seeds have sprouted and developed their first true leaves (usually within 7-14 days, depending on the seed type), it’s time to remove the tape. Gently pull the tape upward, being careful not to disturb the young seedlings. If any seeds remain attached, leave them in place—they’ll continue to grow.
After removing the tape, give the area a final light watering to settle the soil around the seedlings. Continue to monitor for even moisture and protect the young plants from heavy foot traffic or pets. Within a few weeks, you’ll see a lush, uniform lawn with minimal effort.
Tips & tricks for perfect garden seed tape planting
Here's what I've learned after trying this method in my own yard—and how to avoid the mistakes I made at first.
Soil Prep Secret: Don't skip the compost layer in Step 1! That 1-inch layer of compost isn't just about nutrients—it helps create the perfect seedbed texture. I learned this the hard way when my first attempt had uneven germination because the soil was too compacted. Use a garden fork to break up any stubborn clumps after loosening with the rake.
Tape Application Technique: When pressing the seed tape in Step 3, work in short sections. The adhesive backing can stick to your hands if you press too much at once, and you'll end up with messy spacing. Start at one end, press firmly for about 12 inches, then move to the next section. This keeps everything neat and aligned.
Watering Wisdom: The 1-inch dampness check in Step 4 is crucial—but don't rely solely on feel. Stick your finger about 1 inch deep and check for moisture. Sandy soil drains faster, so you might need to water every 1-2 days instead of the standard 2-3 days. A gentle morning watering works best to prevent evaporation.
Timing Tip for Tape Removal: Those 7-14 days in Step 5 can feel like forever, but patience pays off. I made the mistake of removing the tape too early when I saw the first sprouts—some seeds got pulled up with it. Wait until you see most seeds with their first true leaves before pulling. The tape will come off much easier then.
Pro Tips for Garden Seed Tape
- Here's what I've learned after trying this method in my own yard—and how to avoid the mistakes I made at first.
- Soil Prep Secret: Don't skip the compost layer in Step 1!
- Tape Application Technique: When pressing the seed tape in Step 3, work in short sections.
Frequently asked questions
What is garden seed tape, and how does it work?
Garden seed tape is a pre-measured strip of biodegradable material coated with grass seed or wildflower seeds. It eliminates the need for hand-spreading, ensuring even coverage and reducing waste. Simply unroll it like a carpet, water it, and watch your lawn grow faster and more uniformly!
When is the best time to plant garden seed tape?
The ideal time depends on your climate, but generally, plant in early spring or late summer when soil temperatures are between 60–75°F (15–24°C). Avoid extreme heat or frost—cool, moist conditions help seeds germinate best. Check your seed tape’s packaging for region-specific tips!
Is garden seed tape more expensive than regular grass seed?
Upfront, it may cost more than bulk seed, but it saves time, labor, and wasted seed. Think of it as an investment: fewer weeds, no uneven patches, and faster results. Plus, you’ll use less water and fertilizer long-term. For large areas, the convenience often pays off!
Can I use garden seed tape for vegetables or flowers, or just grass?
Most seed tapes are designed for grass or wildflowers, but some specialty tapes (like herb or vegetable seed tapes) exist for gardens. Check the label—if it’s labeled for lawn use, stick to grass. For veggies, hand-seeding or biodegradable pots may work better for precise spacing.
What should I do if my seed tape isn’t germinating?
First, ensure the tape is fully buried (1/4 inch deep) and kept moist (not soggy). Lack of sunlight, soil compaction, or uneven watering can stall growth. If needed, lightly rake the area, rewater, and monitor for 7–14 days. If still no luck, test your soil pH—seed tape thrives in slightly acidic to neutral soil (pH 6.0–7.0).
How often should I water seed tape after planting?
Keep the soil consistently moist (like a damp sponge) for the first 2–3 weeks. Water lightly but frequently—about ¼ inch daily—to avoid washing away seeds. Once sprouts appear, gradually reduce to 1–1.5 inches per week. A sprinkler or gentle hose attachment works best!
Wrapping up and next steps
Garden seed tape is your secret weapon for a neater, faster, and frustration-free lawn—no more tangled twine or uneven spacing! Whether you're a seasoned gardener or a beginner, this simple tool makes planting a breeze while ensuring perfectly aligned rows every time. 🌱✨
Ready to transform your yard? Grab your seed tape, follow the steps, and watch your lawn grow thicker and greener in no time. Happy planting—your future lawn will thank you! 🌿💚
Next step: Mark your calendar for regular watering and maintenance to keep your new lawn thriving!