
Lawn
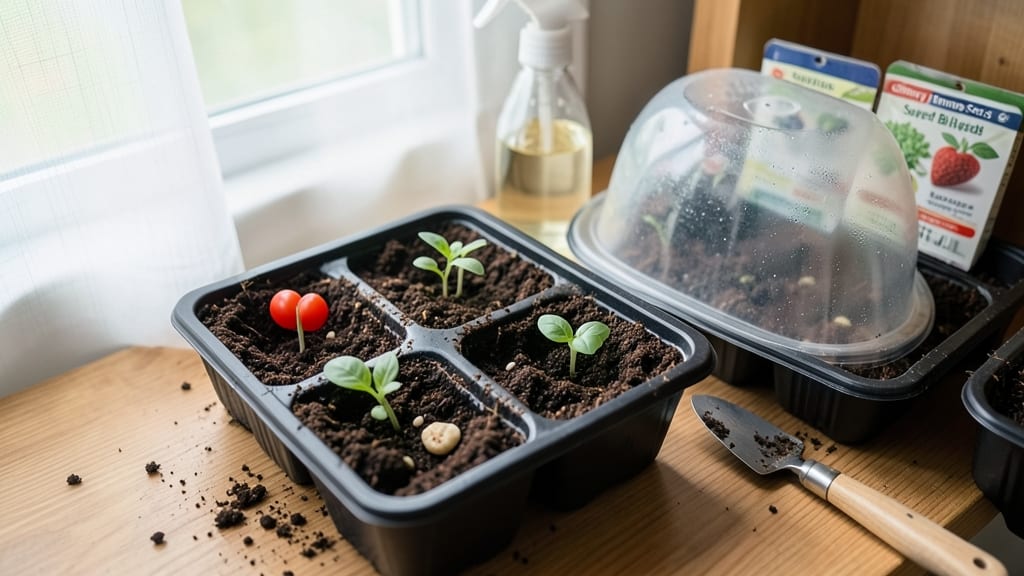
The right seed starter potting soil can turn your kitchen counter into a seedling factory. 🌱 Lightweight and sterile, it’s designed to give tiny roots the perfect head start—no compacting, no disease, just fast, even germination.
I’ve wasted months waiting for stubborn seeds to sprout, only to realize the soil was the real culprit. This isn’t your heavy garden soil—it’s fluffy, airy, and often mixed with perlite or vermiculite to keep moisture balanced without drowning roots.
The best blends are labeled for seed starting, but you can also DIY with coconut coir, peat moss, and a touch of compost. Just avoid garden soil—it’s too dense and packed with pathogens.
You’ll see sprouts emerge in 5-10 days (instead of weeks) when the mix is right, and seedlings develop strong, sturdy stems ready for transplanting. The key is keeping it moist but not soggy—think damp sponge, not swamp. Overwatering is the #1 killer of new roots.
Once those first leaves unfurl, you’ll want to transition to larger pots or outdoor beds. But first, let’s get the soil right—because the fastest start sets the stage for the whole growing season.
📚 In This Guide
- What you need
- Instructions
- Tips and common mistakes
- Wrapping up and next steps
What you need
- ● Seed starter potting soil (or seedling mix): 1–2 gallons (or enough to fill your seed trays/containers). Look for a lightweight, sterile mix with high organic matter (e.g., coconut coir, peat moss, or compost). Avoid garden soil—it’s too dense and can compact.
- ● Seed trays or containers: 1–2 trays (with drainage holes) or small pots (2–3 inches deep). Clear plastic or biodegradable options work great!
- ● Drainage material: Perlite, vermiculite, or small pebbles (½ cup per tray). This prevents waterlogging and keeps roots aerated.
- ● Watering can or spray bottle: With a fine mist setting to avoid disturbing seeds.
- ● Seeds: Your chosen varieties (check seed packets for planting depth and spacing).
- ● Labels or markers: To track seed types and planting dates.
- ● Seedling heat mat: For faster germination of cold-sensitive seeds (e.g., peppers, tomatoes).
- ● Grow lights or sunny windowsill: 12–16 hours of light per day keeps seedlings strong.
- ● Fertilizer (low-dose): A balanced, water-soluble fertilizer (5-10-5 ratio) to give seedlings a gentle nutrient boost after sprouting.
- ● Humidity dome or plastic wrap: To retain moisture until seeds germinate (remove once sprouts appear!).
- ● Tweezers or small spoon: For delicate seed placement.
How to create a lightweight seed starter mix for fast germination
Here's the foolproof blend I use to get seedlings popping in half the time—no fancy tools needed.
🌱 Step 1: Gather the Base Components
Start with 50% peat moss or coconut coir—this holds moisture without smothering roots. I measure 2 parts of this base into a clean bucket. The fluffy texture ensures air pockets for tender roots to breathe, which speeds up germination.
Add 30% perlite or vermiculite—this is your secret weapon for drainage and aeration. I use 1.5 parts of perlite because it stays light even when wet. Sift it in gently to avoid clumping, which can create air pockets that seedlings can't penetrate.
🌱 Step 2: Mix in Organic Matter for Nutrients
Now add 20% worm castings or compost—this gives seedlings a gentle nutrient boost without burning them. I use 1 part of castings because they're sterile and packed with beneficial microbes. Stir everything together with a garden trowel until it looks uniformly crumbly.
Here's the thing—don't skimp on the mixing. I take 5 minutes to break up any remaining clumps by hand. The goal is a texture like "wet sand" that holds shape when squeezed but crumbles easily. This ensures roots can explore without struggling.
💧 Step 3: Moisten to Ideal Germination Consistency
Gradually add warm water while mixing until the soil feels like a damp sponge. You'll know it's right when a handful holds together but water drips out when squeezed. I use a spray bottle for the final adjustment—this prevents compacting the mix.
Let it sit for 10 minutes while you prep your containers. This gives any dry pockets time to absorb moisture evenly. If it's still clumpy after resting, fluff it up again with your fingers. Seedlings won't germinate well in dense soil.
✂️ Step 4: Sterilize and Store for Fresh Use
For extra insurance against damping-off, microwave the mix in 1-minute intervals until steaming (don't let it boil). I use a microwave-safe container and stir between intervals. This kills pathogens without cooking the organic matter.
Store the mix in a sealed container until ready to use. I keep it in a plastic bin with a lid in my garage—cool and dark preserves its freshness. When you're ready to sow, give it one final fluff with your hands before filling containers. This prevents soil settling that can bury seeds too deep.
☀️ Step 5: Test Before Planting
Fill a small container with your mix and add 1/4 inch of water. If it drains freely within 10 minutes but holds moisture at the bottom, you're golden. I always do this test first—it catches any drainage issues before seeds go in.
Now your mix is ready for fast germination. The lightweight texture encourages roots to push through quickly, and the balanced moisture prevents both drought and rot. Watch those first sprouts emerge in 3-5 days instead of the usual week or more!
Tips & tricks for perfect seed starter mix
Here's what I've learned after years of experimenting with seedling mixes—these little details make all the difference between waiting a week for sprouts and seeing them pop in just days.
Texture is Everything: The 5-minute hand-mixing step in Step 2 isn't just about breaking clumps—it's about creating the perfect crumbly texture. Think of it like making pancake batter: you want it to hold together when squeezed but still break apart easily. If your mix feels too dense after mixing, add another 1/4 cup of perlite and fluff again. Too loose? Spritz with a bit more warm water and compress gently with your hands. This balance is what lets those delicate roots push through effortlessly.
Warm Water Wins: Using warm water in Step 3 isn't just about comfort—it helps activate beneficial microbes in the worm castings and ensures even moisture distribution. I always fill my kettle with fresh water and let it sit for 5 minutes to reach about 90°F before mixing. Cold water can shock the organic matter and create cold spots where seeds might rot. If you're in a hurry, just let the water sit for 10 minutes after boiling to reach the right temperature.
Sterilization Shortcut: The 1-minute microwave intervals in Step 4 are crucial for preventing damping-off disease, but I've found a quicker alternative: spread your mix on a baking sheet and bake at 200°F for 20 minutes. This achieves the same sterilization without risking overheating. Just stir halfway through to ensure even heat distribution. Either method kills pathogens while preserving the organic matter's beneficial properties—just don't let it get hot enough to cook the castings.
Storage Secret: Keeping your mix in a sealed plastic bin in the garage (as mentioned in Step 4) works perfectly, but here's the real trick: add a small handful of dry perlite to the container before sealing. This helps regulate moisture levels and prevents the mix from becoming compacted over time. I also label each container with the date—this mix stays fresh for up to 3 months when stored properly, but after that, the organic matter starts breaking down and loses effectiveness.
Pro Tips for Seed Starter Potting Soil
- Here's what I've learned after years of experimenting with seedling mixes—these little details make all the differenc...
- Texture is Everything: The 5-minute hand-mixing step in Step 2 isn't just about breaking clumps—it's about creating t...
- Warm Water Wins: Using warm water in Step 3 isn't just about comfort—it helps activate beneficial microbes in the wor...
Frequently asked questions
Got questions about seed starter potting soil? You’re not alone! Here are answers to the most common ones to help you grow confidently.
What’s the difference between seed starter soil and regular potting soil?
Seed starter soil is lighter and more sterile than regular potting mix, designed to promote fast germination and delicate root growth. It has higher organic matter, better aeration, and fewer nutrients to prevent overfeeding young seedlings. Think of it as a nutrient-light cradle for tiny sprouts!
When should I use seed starter soil instead of regular potting soil?
Use seed starter soil for anything from seeds to cuttings—veggies, flowers, herbs, or even succulents. Switch to regular potting soil once seedlings develop their first true leaves (not the initial seed leaves) and are ready to be transplanted. For bulbs or tubers, stick with regular mix from the start.
Can I make my own seed starter mix at home?
A simple DIY mix is 50% peat moss or coco coir, 30% perlite or vermiculite, and 20% compost or worm castings. Sterilize it by baking at 200°F (93°C) for 30 minutes to kill weeds/seeds. For extra fluffiness, add a handful of sphagnum moss.
Why are my seeds rotting even though I’m using starter soil?
Overwatering or poor drainage are the top culprits! Ensure your tray has drainage holes, and water only when the top inch feels dry. Avoid compacting the soil—use a soft touch when pressing seeds in. If mold appears, sprinkle a thin layer of sand or cinnamon on top to improve airflow.
Can I reuse seed starter soil after transplanting seedlings?
Not recommended! After seedlings are moved, the soil loses its sterility and nutrient balance. Instead, compost the leftover mix or use it as a top layer in garden beds. For future starts, buy fresh or sterilize old soil again. Pro tip: Label bags with dates to track freshness!
Wrapping up and next steps
Choosing the right seed starter potting soil is your secret weapon for fast, healthy germination and strong root growth! A lightweight, nutrient-rich mix ensures your seedlings thrive from day one, setting the stage for a lush, vibrant lawn.
Now that you’re armed with the perfect blend and expert tips, it’s time to get growing—pick your favorite seeds, roll up your sleeves, and watch your green dreams take root! 🌱✨
Ready to take the next step? Experiment with different seed varieties or even try your hand at homemade seed starter mixes to fine-tune your technique. Happy planting!