Lawn
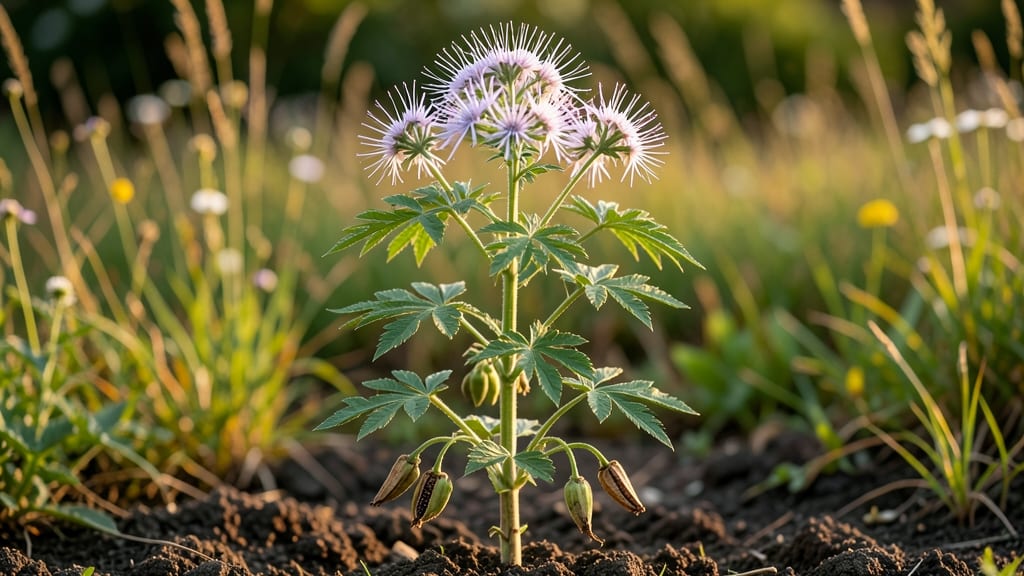
Those dramatic cleome seed pods are nature’s most striking botanical sculptures—and they’re your ticket to next year’s garden. 🌱 I’ve learned the hard way that letting them dry on the plant too long means losing seeds to birds or rot, but harvesting them at the right stage ensures a steady supply of next season’s blooms.
The key is timing: pods should turn from green to tan but still feel firm when gently squeezed.
You’ll need minimal supplies: sharp pruning shears, paper bags for drying, and a flat surface in a dry, shaded spot. Cleome thrives in full sun and well-drained soil, so if your plants are leggy or sparse, focus on deadheading spent blooms to encourage more pods.
The pods form naturally after flowers fade, but consistent watering keeps them healthy until harvest time—usually 6-8 weeks after flowering.
Once harvested, pods release seeds with a satisfying pop when dry. Store them in an envelope or jar in a cool, dark place until spring planting. The seeds themselves are large and easy to handle, making cleome one of the simplest annuals to propagate.
You’ll end up with lush, airy plants that attract pollinators and add vertical drama to any garden bed.
This method works for both gardeners and crafters—dried pods make stunning centerpieces or natural decor. Just avoid overcrowding plants, as that can weaken pod development. With the right timing, you’ll have a reliable source of seeds and a garden full of those iconic, spider-like blooms year after year.
📚 In This Guide
- What you need
- Instructions
- Tips and common mistakes
- Wrapping up and next steps
What you need
- ● Mature cleome seed pods: Allow pods to fully dry on the plant (turn brown and brittle) before harvesting—aim for at least 5-10 pods for reliable germination.
- ● Pruning shears or sharp scissors: For cleanly snipping pods from the stem (sterilize blades with rubbing alcohol if reusing).
- ● Paper bags or breathable cloth sacks: 2–3 medium-sized bags to collect pods and allow airflow (avoid plastic—it traps moisture!).
- ● Drying tray or flat surface: A shallow tray, baking sheet, or cardboard box lined with newspaper or parchment paper.
- ○ Fine-mesh strainer or sieve: (Optional but helpful) To separate seeds from chaff after drying.
- ● Pencil or toothpick: For gently prying open dried pods to release seeds.
- ● Small envelopes or seed packets: For storing seeds long-term (label with the date!).
- ● Desiccant packets: Place 1–2 in your storage container to absorb excess moisture.
- ● Handheld fan: Speed up drying by circulating air around pods for 1–2 hours.
- ● Labeling tape and marker: To track seed varieties and harvest years.
- ● Glove: Protects hands from cleome’s slightly irritating sap if you’re sensitive.
Step-by-step instructions for harvesting and drying cleome seed pods
Here's how I save cleome seeds year after year—no special tools, just patience and timing.
🌿 Step 1: Identify and Select Mature Seed Pods
Wait until the cleome pods turn from green to tan or light brown—this signals they're fully mature and ready for harvest. I look for pods that feel slightly papery when touched, not hard or crisp. Avoid pods that split open naturally, as those seeds have already scattered.
Gently twist each pod to check for resistance. A mature pod will release seeds easily when twisted, while an immature one will stay closed. Harvest on a dry, sunny morning when humidity is low—this prevents mold from forming during drying.
🪴 Step 2: Remove Pods and Prepare for Drying
Use clean pruning shears or your fingers to snip pods from the stems, leaving a short stem attached. Place them in a single layer on a paper towel or breathable mesh screen—never stack them, as this traps moisture. I like to work on a flat tray for easy airflow.
Find a warm, dry spot indoors with indirect sunlight—direct sun can overheat and crack the pods. A 65-75°F room works perfectly. Avoid basements or garages, as damp air slows drying and encourages mold. Check daily for any pods that may have split open.
⏰ Step 3: Dry the Pods for 2-3 Weeks
Let the pods dry for 2-3 weeks, flipping them every 2-3 days to ensure even drying. You'll know they're ready when the pods feel lightweight and crisp to the touch, like dry paper. If any pods develop mold or dark spots, remove them immediately to prevent spoiling the rest.
I test readiness by gently squeezing a pod—if it crumbles easily and seeds rattle inside, it's fully dry. If pods still feel slightly damp, extend drying time by another week. Patience here ensures seed viability for next season.
✂️ Step 4: Extract and Store Seeds
Once completely dry, place the pods in a paper bag and gently shake or roll them over a white sheet of paper to release the seeds. Cleome seeds are small and dark, so the white background makes them easy to spot. Discard any empty pods or debris.
Transfer the seeds into a small envelope or airtight container with a desiccant packet to absorb moisture. Label it with the variety and date—cleome seeds stay viable for 2-3 years when stored in a cool, dark place. I keep mine in the fridge for extra longevity.
💧 Step 5: Test a Few Seeds Before Full Planting
Before sowing all your saved seeds, test a few in small pots with well-draining soil. Water lightly and place in a sunny spot—if they germinate within 10-14 days, your drying method worked. If germination is slow or patchy, try a fresh batch of pods next year.
This simple test gives you confidence before committing to a full garden. I always plant a few extra seeds just in case—cleome grows so easily that even a small batch ensures next year's stunning blooms.
Tips & tricks for perfect cleome seed pod preservation
These little tricks will help you avoid common pitfalls and ensure your cleome seeds stay viable for planting next season.
Harvesting Timing: The key to successful seed saving is patience—harvest pods only when they've fully matured and turned tan or light brown. I've learned the hard way that harvesting too early means seeds won't germinate properly. Check pods by gently twisting them; mature ones will release seeds easily while immature ones stay closed. The best time to harvest is on a dry, sunny morning when humidity is low.
Drying Environment: Creating the right drying conditions is crucial for preventing mold and ensuring seed viability. I always set up my drying station in a warm, dry spot with indirect sunlight—direct sun can overheat and crack the pods. A room temperature between 65-75°F works perfectly. If your home tends to be damp, consider using a small fan on low setting to improve airflow without disturbing the pods. Remember to check daily for any pods that may have split open.
Testing Readiness: Don't guess when your pods are ready—test them! Gently squeeze a pod; if it crumbles easily and seeds rattle inside, it's fully dry. If pods still feel slightly damp, extend drying time by another week. This simple test saves you from planting underripe seeds that might not germinate properly. I've found that pods dried in this way maintain their viability for up to 3 years when stored properly.
Storage Strategy: Once you've extracted your seeds, store them in a small envelope or airtight container with a desiccant packet to absorb any moisture. Label it clearly with the variety and date—this simple step prevents mix-ups and helps you track seed freshness. For extra longevity, store your seeds in the fridge where they'll maintain viability for up to 3 years. I always plant a few extra seeds just in case, as cleome grows so easily that even a small batch ensures next year's stunning blooms.
Pro Tips for Cleome Seed Pods
- These little tricks will help you avoid common pitfalls and ensure your cleome seeds stay viable for planting next season.
- Harvesting Timing: The key to successful seed saving is patience—harvest pods only when they've fully matured and turned tan or light brown.
- Drying Environment: Creating the right drying conditions is crucial for preventing mold and ensuring seed viability.
Frequently asked questions
Got questions about harvesting and saving cleome seed pods?
You’re in the right place! Here are answers to the most common queries—from timing to troubleshooting—so you can ensure success for next year’s vibrant blooms.
When is the best time to harvest cleome seed pods?
Harvest cleome seed pods after they’ve fully dried on the plant but before they split open. This usually happens in late summer to early fall, depending on your climate. Look for pods that turn from green to a papery brown and feel crispy when touched. Pro tip: Morning harvests prevent humidity from causing premature splitting!
What do I do if my cleome seed pods split open before I can collect them?
Don’t worry—if pods split, scatter the seeds immediately onto fresh soil or a seed-saving tray. Cleome seeds are lightweight and germinate easily if kept dry. For next time, harvest pods earlier or use breathable mesh bags to contain them on the plant.
Can I save cleome seeds from store-bought flowers?
Yes, but check for hybrid labels first. If your cleome is a hybrid variety (like ‘Pinkie’ or ‘Violet Queen’), seeds may not produce true-to-type plants. For consistent blooms, source seeds from open-pollinated varieties or reputable seed savers.
How should I store cleome seeds for long-term viability?
Clean seeds, let them dry completely, then store them in a cool, dark, and dry place (like a sealed envelope or jar with silica packets). Cleome seeds stay viable for 2–3 years if kept below 32°F (0°C). Label them with the harvest date!
What if my cleome plants don’t produce seed pods?
Missing pods? Your plant might be too young, over-fertilized, or stressed by pests. Ensure full sun (6+ hours/day), well-draining soil, and minimal interference from aphids or spider mites. If blooms appear but no pods form, hand-pollinate with a soft brush to boost seed set.
Wrapping up and next steps
From collecting cleome seed pods to drying and storing them, you’ve now got everything you need to ensure next year’s garden bursts with vibrant blooms! 🌸 With just a little patience and care, these delicate pods can become the seeds of future beauty—perfect for gardeners who love a hands-on, rewarding process.
Ready to take the next step? Plant them in well-draining soil, keep them warm, and watch your cleome garden thrive!
- Pro Tip: Label your seed packets to track varieties and planting dates—future you will thank present you! 📝
- Action Step: Share your seed-saving journey with fellow gardeners or tag us in your blooming photos for inspiration! 🌿