
Lawn
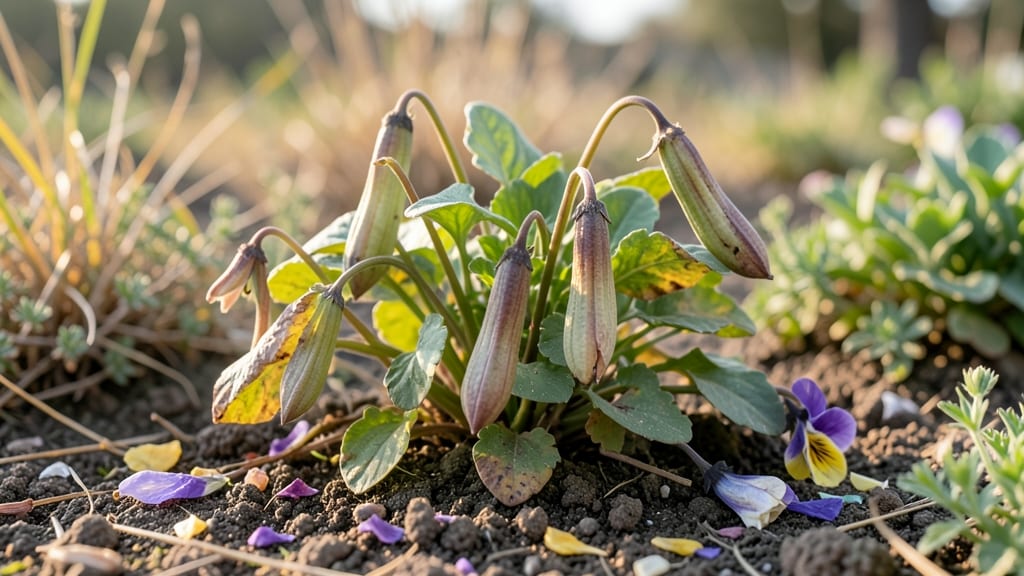
Your pansy seed pods hold the secret to next year's vibrant garden. 🌸 I've learned that drying them properly transforms these unassuming pods into a treasure trove of colorful blooms—far more reliable than store-bought seeds.
The key is timing: harvest when the pods turn brown but before they burst open, usually in late spring or early summer after flowering. You'll need just a few simple supplies: paper bags for collecting, a dry location with good airflow, and patience.
Once you've gathered them, the drying process takes about two weeks in a cool, dark spot. The goal is to preserve viability while preventing mold—think of it as giving nature a gentle nudge to hold onto its promise of spring.
By the time you're ready to plant, you'll have seeds that produce plants true to their parent's colors. The first flush of seedlings will appear within 10-14 days, and you'll be rewarded with pansies that bloom earlier and last longer than anything you've grown before.
No more waiting for nursery starts—just direct sowing and instant color. This method works for all pansy varieties, from classic violas to modern hybrids. The only real pitfall is rushing the drying process, so take your time. Here's how to make it work perfectly for your garden!
📚 In This Guide
- What you need
- Instructions
- Tips and common mistakes
- Wrapping up and next steps
What you need
- ● Mature pansy seed pods: Collect fully dried pods (brown, papery texture) from healthy plants. Aim for 10–20 pods, depending on your storage goals.
- ● Paper bags (brown kraft or breathable):** 2–3 medium-sized bags (8x10 inches) to allow airflow.
- ● Scissors or pruning shears: For cleanly snipping pods from stems.
- ● Labeling tags & permanent marker: To mark varieties (e.g., "Purple Heart" or "Cool Wave").
- ● Drying surface: A flat, dry area like a windowsill, mesh screen, or cardboard tray.
- ○ Air-tight containers: Small jars (1–2 oz) or resealable bags with silica gel packets (optional but recommended for long-term storage).
- ● Fan or dehumidifier: Speeds up drying in humid climates.
- ● Desiccant packets: Place 1–2 in storage containers to absorb moisture.
- ● Glassine envelopes: For individual pod storage (great for variety separation).
- ● Vacuum sealer: Extends seed viability for 2+ years.
- ● Notebook: Track harvest dates and pod sources for future reference.
How to harvest and dry pansy seed pods for next year’s flowers
Here’s the simple method I’ve used for years to save pansy seeds—no fancy tools, just patience and timing.
🌿 Step 1: Identify and Harvest Mature Seed Pods
Wait until your pansies finish blooming and the flowers drop back, leaving behind those distinctive round, pea-sized seed pods. They start green but turn brown and papery when ready—this usually happens in late summer or early fall, depending on your climate. Gently twist the pods off the stems (don’t pull too hard, or you’ll damage the plant).
I like to harvest on a dry morning after the dew has evaporated. This prevents moisture from sticking to the pods and speeds up drying. Place them in a single layer on a tray lined with paper towels—crowding them together will trap humidity and cause mold.
⏰ Step 2: Dry the Pods Properly
Find a warm, dry spot with good airflow—think 70-75°F and indirect sunlight. A sunny windowsill works well, but avoid direct sun, which can scorch the pods. I often use a mesh produce bag with holes punched in it to keep dust out while allowing airflow.
Check the pods every few days. When they’re completely dry, they’ll rattle when shaken and open easily with a gentle squeeze. This usually takes 2-3 weeks, depending on your humidity levels. If your home feels damp, speed things up with a small fan on low setting—just don’t let it blow directly on the pods.
🪴 Step 3: Extract and Store the Seeds
Once the pods are bone-dry, place them in a clean paper bag and crush them gently with your hands or a rolling pin. The seeds will spill out while the empty pod casings stay behind. I sift the mixture through a fine mesh strainer to separate seeds from chaff—this ensures only the good seeds make it to storage.
Store the seeds in an airtight container (like a small glass jar) with a silica gel packet to absorb moisture. Label it with the pansy variety and the year. Keep it in a cool, dark place—your fridge’s crisper drawer works perfectly. Viable pansy seeds stay good for 2-3 years, though germination rates drop after the first year.
💧 Step 4: Prepare for Next Season’s Planting
When you’re ready to sow, mix the seeds with a little sand to improve spacing (they’re tiny and clump easily). Plant them 1/8 inch deep in moist seed-starting mix and keep the soil consistently damp until germination, which usually happens in 10-14 days at 65-70°F.
Here’s the thing—pansies grown from saved seeds may not match their parent plants exactly. The colors might shift slightly, and growth habits can vary. But that’s part of the fun! Treat it like a surprise palette for next year’s garden.
Tips & tricks for perfect pansy seed pod preservation
Here's what nobody tells you about saving those delicate seed pods—these little tricks make all the difference between usable seeds and wasted effort.
Harvest Timing: The pods need to be fully brown and papery before harvesting, but don't wait until they start splitting open. I've learned the hard way that pods left too long on the plant will release seeds prematurely. Look for that crisp, dry texture—it's the only reliable indicator they're ready. Harvesting in the morning after dew dries prevents moisture from sticking to the pods and speeds up drying time significantly.
Drying Strategy: For the 2-3 week drying period at 70-75°F, I've found that placing pods on a screen or mesh tray instead of paper towels actually works better. The airflow prevents any trapped moisture from causing mold, and you can easily check the undersides for dryness. A small fan on low setting in a warm closet creates perfect conditions—just keep it away from direct airflow to prevent scattering seeds.
Seed Extraction: When crushing the dried pods, I use a clean rolling pin instead of my hands. It's more efficient and prevents accidental seed loss from squeezing too hard. After sifting through the fine mesh strainer, I give the seeds one final inspection under a bright light to spot any remaining chaff or debris. This extra step ensures only the best quality seeds make it to storage, which pays off when germination time comes.
Storage Wisdom: The silica gel packet in your storage jar is non-negotiable—it's the difference between seeds that stay viable for 2-3 years and those that lose potency in months. I also add a small piece of unbleached coffee filter paper to the jar to help absorb any residual moisture. Labeling with both the pansy variety and harvest year is crucial, especially if you're saving seeds from multiple varieties.
Pro Tips for Pansy Seed Pods
- Here's what nobody tells you about saving those delicate seed pods—these little tricks make all the difference betwee...
- Harvest Timing: The pods need to be fully brown and papery before harvesting, but don't wait until they start splitti...
- Drying Strategy: For the 2-3 week drying period at 70-75°F, I've found that placing pods on a screen or mesh tray ins...
Frequently asked questions
Got questions about harvesting and drying pansy seed pods? You’re not alone! Here are some of the most common queries gardeners have—plus quick, practical answers to keep your next season blooming beautifully.
When is the best time to harvest pansy seed pods?
Harvest pansy seed pods once they turn brown and begin to split open—usually late summer to early fall. Avoid harvesting when pods are still green or wet, as this can lead to mold or poor germination. Aim for dry, sunny days to ensure seeds stay viable.
What do I do if my seed pods won’t dry properly?
If pods stay damp or develop mold, try these fixes:
- Increase airflow: Space pods out on a screen or mesh tray in a well-ventilated area.
- Adjust humidity: Use a small fan or dehumidifier if your space feels muggy.
- Try a different method: If pods crack too soon, harvest seeds early (when pods are half-dry) and finish drying them in paper bags.
Can I collect pansy seeds from store-bought flowers?
Yes, but with a caveat! Many commercial pansies are hybrids and may not produce true-to-type seeds. If you’re okay with potential surprises (like different colors or sizes), go ahead. For consistent results, save seeds from heirloom or open-pollinated varieties.
How long do dried pansy seeds stay viable?
Under ideal conditions (cool, dry, and dark), pansy seeds can remain viable for 2–3 years. Store them in a paper envelope or breathable container to prevent moisture buildup. Label with the harvest date to track freshness!
What’s the easiest way to store seed pods for next year?
Once fully dry, store pods in brown paper bags or seed envelopes with silica gel packets to absorb excess moisture. Keep them in a cool, dark place (like a pantry or fridge) until planting season. Pro tip: Write the variety name on the bag!
Wrapping up and next steps
Growing pansies from seed pods is a rewarding way to bring vibrant color back to your garden next season!
By mastering the art of drying and storing them properly, you’ll ensure healthy, viable seeds ready for planting. Don’t let your hard work go to waste—start planning your next garden layout now! 🌸
Ready to take the next step? Grab your dried seed pods, sketch out your dream garden design, and mark your calendar for early spring planting. Happy gardening!