
Planting
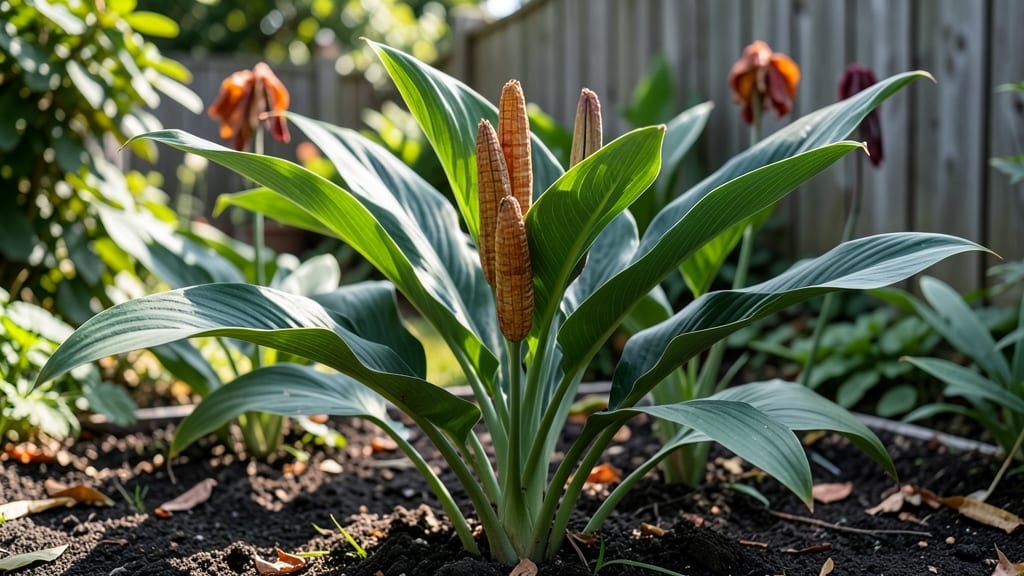
Those canna plant seed pods hold the secret to growing your own showstopper plants—if you know how to handle them right. 🌱 I’ve watched seed pods turn from green to brown and back again, learning that patience and timing make all the difference between a thriving garden and a pile of wasted potential.
The key is catching pods at the perfect moment—when they’re fully ripe but not yet split open. Harvest them carefully, then let them dry completely before cracking them open.
Store the seeds in a cool, dry place until planting season, and you’ll be rewarded with plants that bloom just like their parent, only bigger and bolder.
Germination can be tricky, but with the right soil warmth and moisture, those seeds will sprout into sturdy seedlings in just a few weeks. You’ll end up with cannas that outshine store-bought plants, their bold foliage and vibrant blooms turning heads in every garden.
If seeds don’t cooperate, don’t worry—rhizome division is a foolproof backup. Either way, you’ll have a garden full of drama, color, and that unmistakable canna magic by next summer.
📚 In This Guide
- What you need
- Instructions
- Tips and common mistakes
- Wrapping up and next steps
What you need
- ● Mature canna plants – Ensure they’ve produced seed pods (typically late summer/fall). Quantity: 1-3 plants per batch.
- ● Sharp pruning shears or scissors – For cleanly harvesting pods without damaging stems.
- ● Paper towels or newspaper – To line drying trays or containers.
- ● Plastic bags (resealable) – 2-3 per pod for ripening (e.g., quart-sized Ziploc bags).
- ● Small containers or trays – For drying pods (e.g., shallow plastic bins or seed trays).
- ● Fine-mesh sieve or colander – To separate seeds from dried pod debris.
- ● Planting medium – Seed-starting mix or well-draining potting soil. Quantity: Enough to fill small pots (2-3" deep).
- ● Spray bottle with water – For gentle moisture control during germination.
- ○ Grow lights or sunny windowsill – Optional but ideal for consistent warmth (70–80°F).
- ● Humidity dome or plastic wrap – To retain moisture during germination.
- ● Thermometer – To monitor soil warmth (canna seeds thrive in heat!).
- ● Label markers – For tracking seed varieties and planting dates.
- ○ Fungicide (mild) – Optional for preventing mold in damp conditions.
- ● Heat mat – Speeds up germination in cooler climates.
Step-by-Step instructions for harvesting and ripening canna seed pods
Here's how I transform those plump seed pods into germination gold—no guesswork, just proven tricks.
🌿 Step 1: Identify and Select Mature Seed Pods
Wait until the pods turn a deep, papery brown—this signals full maturity. I run my fingers along the pod seams; if they feel slightly stiff but still pliable, they're ready. Avoid pods that split open prematurely or feel hard and dry—they won't produce viable seeds.
Harvest pods when they're still attached to the plant but show these signs: the outer skin should look dull rather than glossy, and the pod should feel heavier than earlier stages. Use clean, sharp scissors to snip the stems, leaving a small portion attached to prevent seed loss during handling.
💧 Step 2: Dry and Cure the Pods Properly
Spread the harvested pods in a single layer on a mesh screen or paper towel in a dry, well-ventilated area with indirect light. Avoid direct sunlight—it can overheat the pods and cause them to crack prematurely. I keep mine in a shaded porch or under a shelf where air circulates freely.
Turn the pods every 2-3 days to ensure even drying. They're ready when the outer skin feels brittle and the pod rattles slightly when shaken. This process typically takes 2-3 weeks, depending on your climate's humidity levels. If your air feels damp, speed up drying with a small fan on low setting.
✂️ Step 3: Extract Seeds and Clean Them
Once fully dried, gently squeeze the pods between your palms to release the seeds. Don't crush them—just apply light pressure until you hear a soft popping sound. I spread the seeds on a clean white towel to inspect them; viable seeds are plump and dark, while shriveled or light-colored ones should be discarded.
Remove any remaining pod fragments by winnowing the seeds through a fine mesh strainer under running water. Let them air-dry completely on the towel for 24 hours before storing. This prevents mold and ensures a clean germination surface when you're ready to plant.
🪴 Step 4: Store Seeds for Optimal Germination
Place the dried seeds in a paper envelope (plastic traps moisture) and label it with the variety and harvest date. Store them in a cool, dark place—I keep mine in the fridge's crisper drawer—where temperatures stay between 35-45°F. This slows aging and maintains viability for up to 2 years.
Before planting, I give the seeds a quick 5-minute soak in lukewarm water to soften their tough outer coating. This isn't required but helps speed up germination, especially in cooler climates. After soaking, let them dry again briefly before sowing to prevent clumping in the soil.
Tips & tricks for perfect canna seed pod ripening
These little-known tricks will turn your canna seed pods into germination gold—no more wasted harvests!
Pod Maturity Test: I learned this the hard way after harvesting too early—press your thumb against the pod. If it feels slightly stiff but still gives just a little when pressed, it's perfect. Overripe pods split open on their own, while underripe ones stay too soft and won't dry properly. Harvest in the morning when pods are coolest for best texture.
Drying Environment Secrets: The 2-3 week drying time in Step 2 can vary wildly based on humidity. If your air feels damp (like after rain), place a small fan on low setting near your drying pods—just keep it out of direct airflow. I've seen drying times cut from 3 weeks to 10 days this way. Monitor daily for that telltale brittle skin and gentle rattle.
Seed Extraction Technique: When squeezing pods in Step 3, use a rolling motion with your palms rather than pressing straight down. This mimics how the pods naturally release seeds and prevents crushing. Spread the seeds on a white towel immediately—they'll show their viability through color contrast against the fabric, making it easy to spot shriveled ones.
Storage Wisdom: That 35-45°F temperature range in Step 4 is non-negotiable for long-term viability. I keep mine in the fridge's crisper drawer wrapped in a paper towel—this absorbs any excess moisture that might sneak in. Label your storage envelope with the harvest date so you can track how long seeds remain viable (most canna seeds stay good for 1-2 years this way).
Pro Tips for Canna Plant Seed Pods
- These little-known tricks will turn your canna seed pods into germination gold—no more wasted harvests!
- Pod Maturity Test: I learned this the hard way after harvesting too early—press your thumb against the pod.
- Drying Environment Secrets: The 2-3 week drying time in Step 2 can vary wildly based on humidity.
Frequently asked questions
Got questions about canna plant seed pods? You’re not alone—growing from seed can feel like a puzzle! Here are the answers to the most common queries, so you can confidently ripen those pods and kickstart your germination journey.
How do I know when canna seed pods are fully ripe for harvesting?
Canna seed pods are ready when they turn papery brown and begin to split open on their own. Gently squeeze a pod—if the seeds inside are hard and dark brown (not green or soft), they’re ripe! Harvest them before birds or wind scatter them. Pro tip: Morning harvests work best when pods are dry and crisp.
What’s the best way to speed up pod ripening if they’re taking too long?
If your pods stay green or dry slowly, try these tricks:
- Prune spent blooms: Remove wilted flowers to redirect energy to ripening pods.
- Reduce water: Slightly dry soil stress can trigger faster maturation.
- Move indoors: Place pods in a warm, dry spot (70–75°F) with bright indirect light.
Can I save canna seeds from store-bought plants, or do I need to grow my own?
Yes! Store-bought cannas can produce viable seeds if pollinated (by bees or hand-pollination). However, hybrid varieties may not true-to-type—meaning seedlings could look different from the parent plant. For consistent results, start with seeds from open-pollinated or heirloom cannas, or buy from reputable seed sellers.
What should I do if my canna seed pods mold or rot before ripening?
Mold or rot usually means excess moisture or poor airflow. To fix it:
- Immediately harvest healthy pods and let them dry in a shady, well-ventilated area (like a mesh bag).
- Adjust care: Water only at the base and avoid overhead spraying.
- Prevent future issues by spacing plants for airflow and using fungicide (like neem oil) if humidity is high.
How long does it take for canna seeds to germinate after harvesting?
Germination time varies, but most canna seeds sprout in 14–30 days under ideal conditions:
- Soak seeds in warm water (80°F+) for 24 hours before planting.
- Use a seedling heat mat (70–80°F) for faster results.
- Keep soil moist but not soggy—cannas hate soggy roots!
Wrapping up and next steps
Growing canna plant seed pods into thriving plants is all about patience, precision, and the right techniques! Whether you’re drying pods properly, storing seeds carefully, or prepping them for germination, these tricks will set you up for success.
With a little practice, you’ll soon be enjoying lush, vibrant cannas that bring bold color and texture to your garden.
Ready to dive in? Start with a few seed pods—experiment, learn, and refine your process. Soon, you’ll be sharing your germination gold with fellow plant enthusiasts! 🌱✨