
Lawn
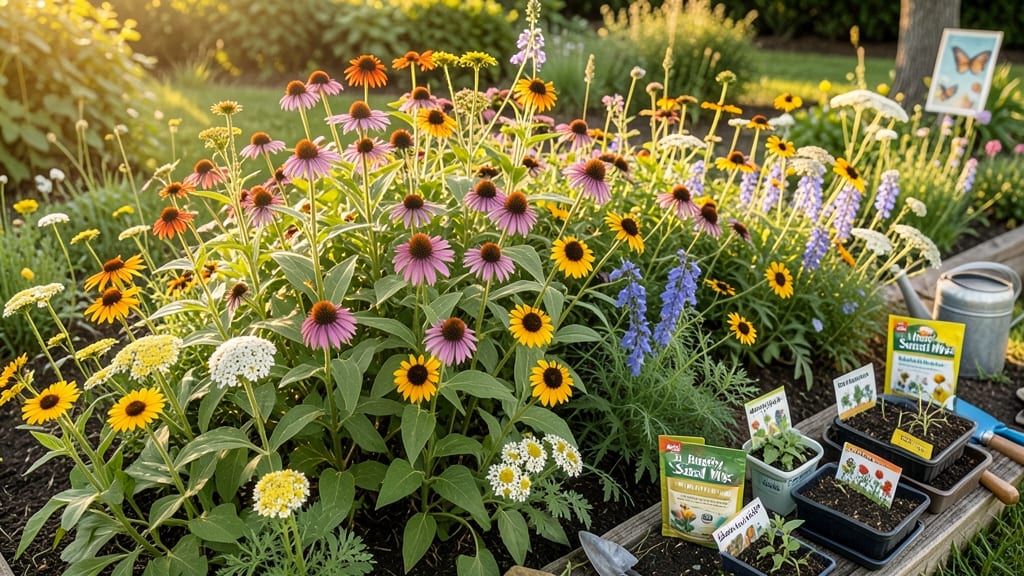
Transforming your yard into a butterfly magnet starts with a simple packet of seeds. 🌿 A butterfly seed mix turns bare spots into vibrant pollinator havens, and the best part?
These flowers thrive with minimal effort—no fancy gardening skills required. I’ve planted mine in everything from sunny borders to shady corners, and the results never fail to impress.
The secret lies in three simple steps: scatter seeds in well-draining soil, keep them lightly moist for the first month, and watch as bold blooms like milkweed, coneflower, and black-eyed Susan emerge.
Most mixes include native varieties that butterflies instinctively seek out, so you’ll see wings fluttering by within weeks. Even my black thumb can’t kill these plants—they’re that resilient.
By summer, your garden becomes a buzzing, fluttering paradise. Monarchs, swallowtails, and hummingbird moths will visit daily, while bees and other pollinators follow suit. The best part?
These plants self-seed, so you’ll have years of color with almost no maintenance. Just add water and sunshine, and let nature do the rest.
Works in full sun or partial shade, urban balconies, or rural meadows—anywhere with decent drainage. The key is planting early (spring or fall) to give roots time to establish before summer’s heat. Ready to turn your space into a pollinator hotspot? Let’s get those seeds in the ground!
📚 In This Guide
- What you need
- Instructions
- Tips and common mistakes
- Wrapping up and next steps
What you need
- ● Butterfly seed mix: 1–2 lbs (or enough to cover your desired planting area, typically 1–2 oz per 10 sq ft). Look for native wildflower blends with milkweed, coneflower, black-eyed Susan, or butterfly weed for maximum appeal.
- ● Garden soil or potting mix: 1–2 bags (depending on space). Use well-draining soil—sandy loam works best for most mixes.
- ● Watering can or hose: With a gentle spray nozzle for even moisture.
- ○ Gloves (optional but recommended): To protect your hands from prickly stems or dirt.
- ● Hand trowel or rake: For light soil prep (skip if sowing in loose soil or containers).
- ○ Compost or fertilizer: A handful of organic compost (like worm castings) boosts growth—optional but helpful for poor soil.
- ● Mulch (straw or shredded leaves): 1–2 inches to retain moisture and suppress weeds.
- ● Plant markers or flags: To label your mix (fun for tracking blooms!).
- ○ Bird netting (optional): If squirrels or birds love your seeds as much as butterflies do!
How to plant a butterfly garden with minimal effort
Here's the simple method I use to create a pollinator haven that thrives with almost no maintenance.
🌱 Step 1: Choose the Right Location and Prepare the Soil
Select a sunny spot that receives at least 6 hours of direct sunlight daily—most butterfly favorites thrive in full sun. Avoid low-lying areas where frost lingers, as butterflies need warmth to emerge in spring. Clear the area of weeds and loosen the top 6 inches of soil with a garden fork, breaking up any compacted layers.
Butterflies prefer well-draining soil, so if your garden sits in a depression, amend the area with 2-3 inches of compost to improve drainage and fertility. I like to work in a handful of slow-release organic fertilizer at this stage to give the seeds a nutrient boost once they germinate. The goal is loose, crumbly soil that lets roots spread easily.
💧 Step 2: Scatter Seeds and Lightly Cover
Open your butterfly seed mix and pour the seeds directly onto the prepared soil. Don't worry about spacing—these wildflowers self-seed beautifully, so you'll get a natural, dense display. Scatter them evenly, aiming for about 1 teaspoon per square foot of garden space. For a 4-patch garden, that's roughly 4 teaspoons total. Lightly rake the seeds into the soil, covering them with just ¼ inch of fine soil or compost.
Here's the thing—don't press the seeds down or pack the soil. You want them to make contact with the earth but still have room to push through. A gentle raking ensures they're not buried too deep, which can delay germination. Water the area lightly with a fine mist setting on your hose until the soil feels evenly moist but not soggy.
☀️ Step 3: Maintain Moisture and Wait for Germination
Keep the soil consistently moist for the first 2-3 weeks after planting, which is when most seeds will germinate. Water in the early morning so the foliage has time to dry before evening. You'll see the first tiny sprouts appear in 7-14 days, depending on your climate. Once they emerge, reduce watering to once every 2-3 days, allowing the top inch of soil to dry between waterings.
Butterfly seeds often contain a mix of annuals and perennials, so don't be surprised if some varieties bloom within 6-8 weeks while others take longer. The key is patience—once established, these plants will spread on their own, creating a self-sustaining meadow that attracts butterflies year after year.
✂️ Step 4: Encourage Blooms and Support Pollinators
As plants mature, you'll notice some flowers wilting after butterflies visit. This is normal! Leave some seed heads on the plants to provide food for birds and to ensure next year's blooms. However, if a plant looks exhausted by late summer, you can trim it back by one-third to encourage a second flush of growth. This is especially helpful for annuals like milkweed and coneflowers.
To maximize butterfly activity, plant in clusters rather than rows. Butterflies navigate by color, so a 4-foot square of the same flower type creates a visual beacon. I like to add a shallow dish of water with pebbles for drinking, placed near the garden. Butterflies will perch on the pebbles to sip, giving you a front-row seat to their visits.
🪴 Step 5: Seasonal Care for Year-Round Blooms
In late fall, cut back dead foliage but leave the stems of perennials intact. This protects overwintering insects and provides structure for early spring blooms. In early spring, add a 1-inch layer of mulch around plants to retain moisture and suppress weeds. Avoid heavy mulch near the base of young plants, as it can smother them.
If your garden includes annuals, you'll need to replant them each spring. However, many butterfly-friendly perennials, like bee balm and black-eyed Susan, will return year after year with minimal care. The real magic happens when you let nature take over—after the first year, your garden will self-seed and expand, creating a thriving habitat that requires almost no effort from you.
Tips & tricks for perfect butterfly seed mix plantings
These simple tricks will help you create a thriving pollinator haven with minimal effort—and avoid common gardening pitfalls along the way.
Sunlight Strategy: While the instructions specify 6 hours of direct sunlight, I've found that butterflies are most active in spots with full sun exposure (6+ hours). If your garden has partial shade, prioritize planting in the sunniest areas first—these will produce the most blooms and attract the most visitors. For shaded areas, consider adding shade-tolerant varieties like bee balm or astilbe if available in your seed mix. The key is to maximize sun exposure for maximum butterfly activity.
Soil Prep Secret: When loosening the top 6 inches of soil in Step 1, I like to add a thin layer of sand to improve drainage if my soil feels heavy or clay-like. This is especially helpful if you're planting in a depression where water pools. The goal is to create that loose, crumbly texture mentioned in the instructions—think of it like fluffing a pillow for your seeds. You can also work in a handful of egg shells (crushed) to add calcium, which helps prevent blossom end rot in some varieties.
Germination Timing: The 7-14 day germination window can feel like an eternity, but there are ways to speed things up slightly. After planting, I cover the area with a thin layer of clear plastic sheeting (like a greenhouse cover) for the first 3-5 days to retain moisture and warmth. This creates a mini greenhouse effect without overwatering. Just remove it once you see the first sprouts—usually around day 7. The instructions' 2-3 week moisture maintenance period becomes even more critical during this time, as seeds need consistent dampness to break dormancy.
Cluster Planting: For maximum butterfly appeal, I recommend creating 3-4 foot diameter clusters of the same flower type rather than the suggested 4-foot square. Butterflies have limited vision and navigate by color contrast, so larger, concentrated patches become visual beacons. For example, plant a 3-foot circle of milkweed surrounded by a 4-foot circle of coneflowers. This creates a layered effect that attracts different butterfly species at different heights. The 1 teaspoon per square foot guideline still applies, but arranging it in circular patterns makes the garden more effective for pollinators.
Pro Tips for Butterfly Seed Mix
- These simple tricks will help you create a thriving pollinator haven with minimal effort—and avoid common gardening p...
- Sunlight Strategy: While the instructions specify 6 hours of direct sunlight, I've found that butterflies are most ac...
- Soil Prep Secret: When loosening the top 6 inches of soil in Step 1, I like to add a thin layer of sand to improve dr...
Frequently asked questions
Got questions about growing butterfly seed mixes? You’re not alone! Here are answers to the most common queries to help you get the most out of your pollinator-friendly garden.
How long does it take for butterfly seed mix to sprout and bloom?
Most butterfly seed mixes sprout in 7–21 days after planting, depending on soil warmth and moisture. You’ll see delicate blooms in 6–12 weeks, with peak flowering lasting 4–8 weeks. Some varieties, like cosmos, reseed themselves for continuous blooms all season!
Can I plant butterfly seed mix in containers or small spaces?
Butterfly seed mixes thrive in containers, window boxes, or raised beds as long as they get 5–6 hours of sunlight daily. Choose compact varieties like lobelia or alyssum for pots, or mix in annuals like zinnias for vibrant color. Just ensure well-draining soil to prevent soggy roots.
Will butterfly seed mix attract bees or other pests?
While butterfly seed mixes primarily attract butterflies and hummingbirds, they’ll also draw bees, hoverflies, and beneficial insects—all great for pollination. To minimize pests, avoid overwatering (which invites fungus gnats) and space plants 6–12 inches apart for airflow. If aphids appear, blast them off with water!
What if my seeds don’t germinate? Troubleshooting tips?
If seeds aren’t sprouting, check these fixes:
Soil too cold? Wait until soil temps reach 60°F+ or use a seedling heat mat.
Not enough moisture? Keep soil consistently damp (not soggy) until sprouts appear.
Seeds too deep? Most butterfly seeds need just a light covering (¼ inch max).
Old seeds? Test viability by soaking a few in water—if they sink, they’re likely good!
If all else fails, try direct-sowing fresh seeds or swap in a pre-mixed pollinator blend.
Can I mix butterfly seeds with wildflower seeds?
Yes! Combining butterfly seed mixes with native wildflowers (like milkweed or coneflowers) extends your blooming season and supports more pollinators. For best results, plant in layers: fast-bloomers (like sweet alyssum) first, followed by perennials. Just avoid overcrowding—aim for 30–50% open space for airflow.
Wrapping up and next steps
Transforming your outdoor space into a buzzing pollinator paradise doesn’t have to be complicated—just sprinkle some butterfly seed mix and let nature do the rest! 🌸 With minimal effort, you’ll enjoy vibrant blooms and happy visitors all season long.
Whether you’re a busy gardener or a beginner, this easy solution delivers big rewards.
Ready to take the next step? Pick your favorite seed mix, grab your tools, and plant today! Your garden—and the butterflies—will thank you. 🦋✨