
Lawn
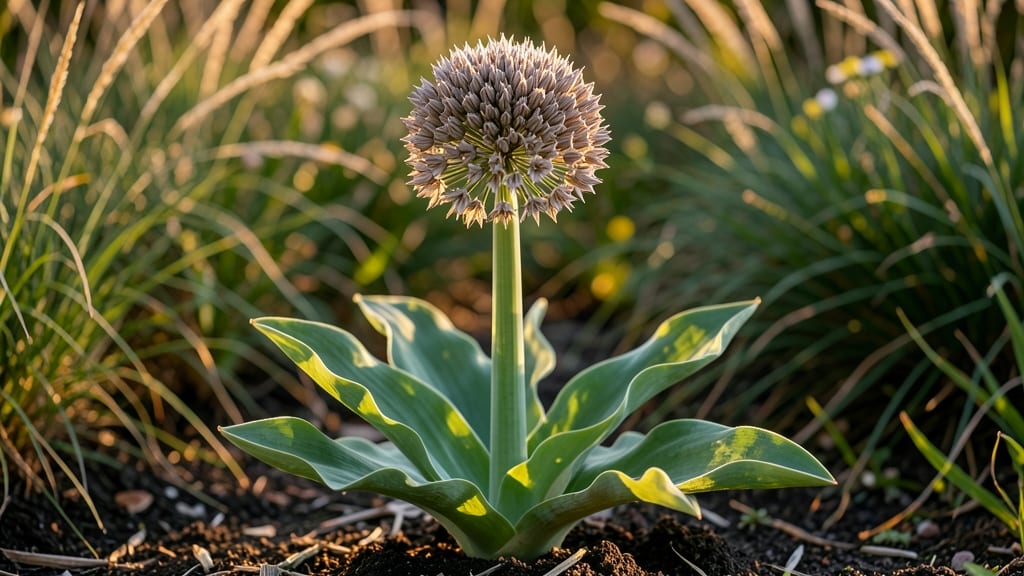
Allium seed heads transform your garden from ordinary to strikingly dramatic—and the best part? You don’t need to twist them off to save seeds. 🌿 These papery globes add winter structure when everything else fades, plus they’re perfect for dried arrangements that last for months.
I’ve used them in everything from rustic wreaths to modern centerpieces, and they always steal the show.
Start by letting seed heads mature fully on the plant—they’ll turn from green to dry and papery, usually by late summer or early fall. Snip them at the base with clean shears, then hang them upside down in a dry, airy spot to finish drying.
Once completely dry, you can either shake out the seeds for next year’s garden or preserve the heads for crafts and decor.
The possibilities are endless: tuck them into winter bouquets for a frosty, elegant look, scatter them in dried arrangements for texture, or use them as natural filler in floral designs. Their unique shapes add height and movement, making them a gardener’s secret weapon for year-round interest.
Plus, they’re budget-friendly—no need to buy expensive dried flowers when you’ve got these right outside your door.
For extra flair, try painting the dried seed heads with metallic gold or silver spray for a festive touch, or bundle them with twine for rustic charm. Whether you’re a seasoned gardener or just starting out, allium seed heads are an easy way to add textural drama without the fuss.
Let’s get creative with what you’ve already grown!
📚 In This Guide
- What you need
- Instructions
- Tips and common mistakes
- Wrapping up and next steps
What you need
- ● Allium plants: Mature, fully bloomed alliums (e.g., Allium sphaerocephalon, Allium giganteum, or Allium moly) with dried seed heads 🌼.
- ● Pruning shears or sharp scissors: Clean, sterilized tools (avoid dull blades to prevent crushing stems).
- ● Brown paper bags or breathable mesh bags: 1-2 per seed head (or a large tray for bulk drying).
- ○ Twist ties or rubber bands: Small, sturdy ones to secure stems (optional but helpful for hanging).
- ● Labeling tags & marker: Waterproof labels to mark varieties (e.g., "Allium 'Globemaster' – 2024").
- ● Drying area: A well-ventilated space (garage, shed, or porch) with indirect sunlight and low humidity.
- ○ Glove (optional): Lightweight gardening gloves to protect hands from prickly stems.
- ● Seed envelope kit: For storing seeds long-term (e.g., blank">Apex Seed Vault or DIY envelopes).
- ● Hanging wire or string: To create a drying rack for seed heads (e.g., twine or floral wire).
- ● Fine mesh screen: For sifting seeds from dried heads (if you plan to clean them thoroughly).
- ● Spray bottle with water: To lightly mist heads if your climate is too dry during drying.
- ● Journal or app: To log harvest dates, varieties, and growing conditions (e.g., blank">Gardenate).
How to harvest allium seed heads without twisting the stems
Here’s my foolproof method for collecting seed heads while keeping plants strong for next year’s blooms.
🌱 Step 1: Wait Until Seed Heads Turn Fully Brown
Leave the seed heads on the plant until they’ve dried completely—this usually takes 4-6 weeks after flowering. You’ll know they’re ready when the papery outer layers turn a uniform tan or light brown and the seed pods inside rattle slightly when shaken. Harvesting too early means immature seeds that won’t germinate.
I like to check them weekly starting 2 weeks after flowering. Gently squeeze a seed head—if it crumbles easily, it’s ready. If it’s still green or firm, wait another week. Patience here ensures viable seeds for next season.
✂️ Step 2: Cut Stems Cleanly at the Base
Use clean, sharp pruners to snip the stems 1-2 inches above the ground. This prevents disease from lingering in old stem tissue. Hold the plant firmly at the base while cutting—twisting can damage the root system, weakening next year’s growth. A clean cut also makes it easier to bundle and dry the seed heads later.
Don’t pull the stems—this can uproot the bulb or leave jagged cuts that invite rot. If you’re harvesting multiple alliums, cut them at slightly different lengths (like a bouquet) so they don’t all touch the ground and collect moisture.
🪴 Step 3: Bundle and Dry Seed Heads Upside Down
Gather 4-6 stems and tie them together at the top with twine or a rubber band. Hang them upside down in a dry, well-ventilated spot—like a garage or shed—where they’ll stay out of direct sunlight. This prevents mold and ensures even drying. You’ll need 2-3 weeks of drying time, depending on humidity.
Check weekly for mold or pests. If you see fuzzy spots, remove those seed heads immediately and move the bundle to a drier location. Once fully dry, the seed pods will open easily when rubbed between your fingers—this is your signal they’re ready for storage.
⏰ Step 4: Store Seeds in a Cool, Dark Place
Once dry, gently tap the seed heads over a paper bag to collect the seeds. Store them in an airtight container (like a small jar) in a cool, dark place—like a pantry or refrigerator. Label the container with the allium variety and the year. Properly stored seeds remain viable for 2-3 years, though germination rates drop after the first year.
Don’t skip the labeling—allium varieties look alike once dried! I also include a note about the original planting location, as some alliums thrive better in certain spots. This way, you’ll know exactly where to replant next spring for the best results.
Tips & tricks for perfect allium seed harvesting
Here's what I've learned after years of saving my own allium seeds—tricks that'll keep your plants healthy and your seeds viable.
Timing Secret: In Step 1, when you're checking for readiness, pay attention to the time of day. Harvest on a dry morning after dew has evaporated—this prevents moisture from lingering on the seed heads during drying. I've ruined batches by harvesting damp seed heads that took twice as long to dry properly.
Tool Upgrade: For Step 2, invest in a pair of bypass pruners with a sharp blade—these make clean cuts that won't crush the stems. I use a pair of Felco F-2 pruners that cost about $20 but have lasted me a decade. Dull pruners crush stems, which can damage the bulb and reduce next year's growth potential.
Drying Strategy: In Step 3, if you're in a humid climate, consider adding a small dehumidifier or fan near your drying area. The 2-3 weeks drying time can stretch to 4-5 weeks in high humidity. I've had success using a small box fan set to low speed to create gentle airflow around the bundles—just don't let it blow directly on them.
Storage Wisdom: For Step 4, I've found that adding a small packet of silica gel to your storage container extends seed viability. Place it in a little muslin bag and tuck it into the container with your seeds. This absorbs any remaining moisture that could cause mold or reduce germination rates over time.
Pro Tips for Allium Seed Heads
- Here's what I've learned after years of saving my own allium seeds—tricks that'll keep your plants healthy and your s...
- Timing Secret: In Step 1, when you're checking for readiness, pay attention to the time of day. Harvest on a dry morn...
- Tool Upgrade: For Step 2, invest in a pair of bypass pruners with a sharp blade—these make clean cuts that won't crus...
Frequently asked questions
about allium seed heads—because even the simplest tasks can spark curiosity! Here are answers to the most common queries to help you master the art of harvesting and preserving these ornamental blooms.When is the best time to harvest allium seed heads?
Harvest seed heads once they’ve fully dried and turned brown, typically 4–6 weeks after flowering. Wait until the pods are crispy to the touch but haven’t yet scattered seeds. Morning harvests prevent humidity buildup, ensuring viability for next year’s garden.
Can I save seeds from store-bought alliums?
Unfortunately, no. Most commercially sold alliums (like Allium giganteum) are sterile hybrids and won’t produce viable seeds. Stick to seeds from open-pollinated varieties or seed heads you’ve grown yourself for guaranteed germination.
What should I do if my seed heads mold or rot?
Mold or rot usually means excess moisture during drying. To fix it, move seed heads to a dry, well-ventilated space (like a mesh bag in a garage) and avoid plastic containers. If already moldy, discard them—mold can kill seeds.
How long can I store allium seeds before planting?
Allium seeds stay viable for 1–2 years if stored in a cool, dark, dry place (like a sealed envelope in the fridge). Label them with the harvest date to track freshness. For best results, plant within 6 months.
Are there alternatives if I don’t want to harvest seed heads?
Leave them for wildlife (birds love the seeds) or cut them before drying for dried floral arrangements. Just avoid cutting too early—wait until blooms fade but stems stay sturdy for longevity.
Wrapping up and next steps
Harvesting allium seed heads doesn’t have to be a twist of frustration—with the right tools and techniques, you can ensure viable blooms for next season while keeping your garden thriving! 🌱 Whether you’re a seasoned gardener or just starting out, mastering this simple process will save you time and money while supporting pollinators like bees and butterflies.
Ready to put your new skills to work? Grab your pruners, head outdoors, and start harvesting those seed heads today! Your future allium blooms will thank you—plus, you’ll be one step closer to a stunning, low-maintenance garden. Happy gardening! 🌸