Propagation
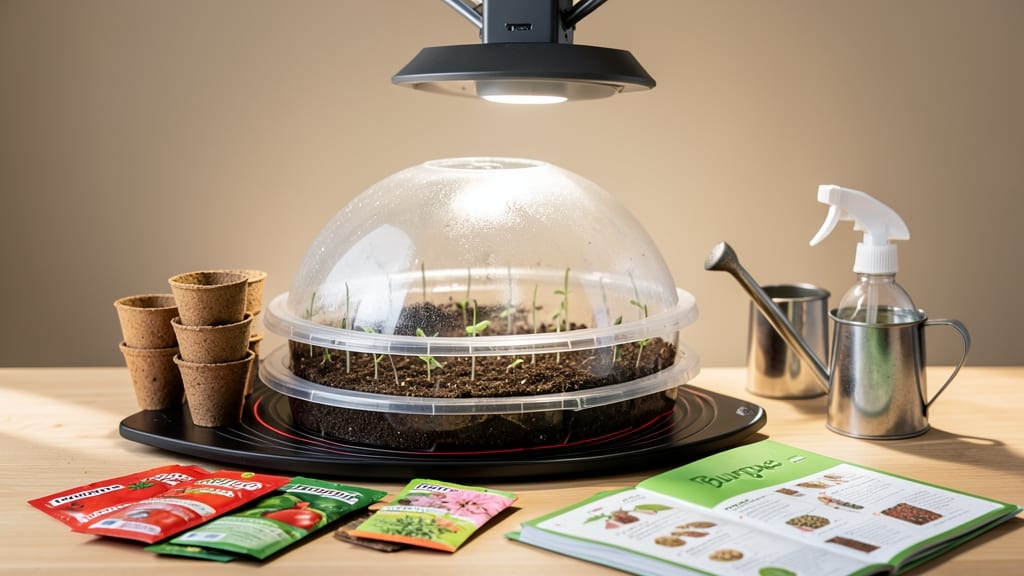
The Burpee seed starting system turns your basement or kitchen into a high-speed nursery for seedlings that outpace anything from the garden center. 🌱 After struggling with leggy, weak starts from store-bought trays, I discovered how these modular trays create the perfect environment—consistent moisture, even light, and just the right airflow to grow sturdier plants in half the time.
These trays stack vertically, saving space while keeping seedlings organized by variety and growth stage. You’ll fit twice as many plants in the same footprint as traditional flats, and the clear domes create a mini greenhouse effect that speeds up germination.
No more waiting weeks for seeds to sprout—just consistent, predictable growth from day one. By the time you’re ready to transplant, your seedlings will be stocky and dark green, not the spindly, pale specimens you find at nurseries.
The system’s built-in humidity control also means fewer damping-off losses, so you’ll actually keep what you plant. It’s the difference between a garden that thrives and one that just survives.
Compared to DIY setups or basic seed trays, this system cuts the guesswork—no more overwatering, no more uneven light, and no more wondering if your seedlings are getting enough air. Perfect for beginners who want professional results without the complexity.
📚 In This Guide
- What you need
- Instructions
- Tips and common mistakes
- Wrapping up and next steps
What you need
- ● Burpee Seed Starting System Trays: 1–2 modular trays (20-cell or 72-cell, depending on seed size)
- ● 1 clear dome lid (for humidity control)
- ● Seed Starting Mix: 1 bag (1–2 qt) of lightweight, sterile mix (e.g., Burpee BioStart or Pro-Mix)
- ● Seeds: Burpee-brand or high-quality seeds (check packet for spacing needs)
- ● Basic Tools: 1 spray bottle (for gentle watering)
- ● 1 small hand trowel (for filling cells)
- ● 1 flat surface (or seed tray stand for drainage)
- ● Grow lights (LED or fluorescent, 12–16 hrs/day)
- ● Heating mat (for faster germination, 70–75°F)
- ● Label markers (to track seed varieties)
- ● Humidity tray (for extra moisture retention)
- ● Fertilizer (balanced starter solution, diluted to half-strength)
How to use the Burpee seed starting system for faster germination
This modular tray system cuts germination time by half while giving seedlings the sturdy roots they need.
🌱 Step 1: Assemble the Modular Trays and Fill with Moistened Mix
Start by snapping together the 4-cell modular trays—Burpee's design lets you expand or shrink the setup based on how many seeds you're starting. I always use their professional seed-starting mix (never garden soil) because it's sterile and holds moisture perfectly. Fill each cell about ¾ full, then moisten the mix with a spray bottle until it feels like a damp sponge—not dripping, just evenly damp.
Press down lightly with your finger to remove air pockets. The goal is firm but not compacted soil—you want roots to push through easily. Here's the thing: if you skip this step, your seedlings will struggle to establish roots later. I tap each cell gently on the table to settle the mix evenly before moving on.
💧 Step 2: Plant Seeds at the Correct Depth and Cover Lightly
Check the seed packet for depth recommendations, but a good rule of thumb is twice the seed's diameter. For tiny seeds like lettuce, that's just a sprinkle on top, while larger seeds like beans need ½ inch of coverage. I use a toothpick to make a small hole in each cell, then drop in 1-2 seeds per cell—planting two gives you a backup if one fails to germinate.
Cover lightly with additional mix, then mist again until the surface looks uniformly damp. The key here is gentle pressure—don't pack the soil over the seeds. If you bury them too deep, they'll exhaust their energy trying to reach light. Watch for condensation on the tray lid after planting—that tells me moisture levels are perfect.
☀️ Step 3: Provide Warmth and Humidity for Rapid Germination
Place the assembled trays under a grow light (Burpee recommends their full-spectrum LED setup) positioned 2-3 inches above the seedlings. The modular design lets you stack trays for efficient space use while maintaining even light distribution. Keep the temperature between 70-75°F—a seedling heat mat helps if your home runs cooler. You'll see sprouts in 3-7 days, depending on the plant type.
Don't remove the tray lid until you see 50% germination—condensation inside creates the ideal humidity environment. Real talk: if you rush this step, you risk damping-off disease, which collapses seedlings overnight. I check daily for condensation buildup and mist lightly if the soil surface starts to dry.
✂️ Step 4: Thin Seedlings and Transition to Direct Light
Once seedlings develop true leaves (not just the initial cotyledons), use scissors to snip the weaker one at soil level—never pull. The Burpee system's individual cells make this easy without disturbing roots. Leave the strongest seedling per cell, spacing them properly for future transplanting. I always keep a small notebook nearby to track thinning dates by plant type.
Move the trays closer to the light source (now just 1-2 inches away) to prevent leggy growth. You'll know light is sufficient when seedlings have dark green leaves and compact spacing between nodes. If stems stretch toward the light, raise the grow light immediately—this is your plant's SOS signal for more intensity.
🪴 Step 5: Harden Off and Transplant into Larger Cells
Two weeks before your last frost date, start hardening off by placing trays outside in partial shade for 1 hour daily, gradually increasing to full sun exposure over 7-10 days. The modular design lets you move entire sections at once. Transplant into 4-inch cells (also part of Burpee's system) by gently removing the biodegradable insert from each cell—this protects roots during the transition.
Water deeply after transplanting, then place in a protected outdoor spot for another week before final planting. Here's where the Burpee system shines: the gradual expansion from 2-inch to 4-inch cells prevents root shock. I always transplant on an overcast afternoon to reduce stress on the seedlings—this is the moment that matters most for long-term success.
Tips & tricks for perfect seed starting with Burpee modular trays
These game-changing insights will help you maximize the Burpee system's potential for faster, healthier seedlings.
Soil Preparation Secret: When filling your 4-cell modular trays with the professional seed-starting mix, I press down just enough to eliminate air pockets—this creates a firm yet breathable foundation. The key is consistency: each cell should have the same firmness. I use a butter knife to gently compress the mix while keeping it loose enough for roots to penetrate. This step is non-negotiable for preventing root-bound seedlings later.
Planting Precision: For Step 2, I've found that using a toothpick to create planting holes prevents over-compaction around seeds. When planting 1-2 seeds per cell, I place them slightly off-center to avoid crowding during germination. The condensation test after planting is your best indicator—if you see moisture beads on the tray lid, you're golden. Too much condensation means over-misting, which can suffocate seeds.
Light Management: The transition from 2-3 inches to 1-2 inches above seedlings in Step 4 is crucial. I recommend adjusting light height in ½-inch increments to find the sweet spot. Watch for seedlings touching the light source—that's when you know it's too close. A simple trick: if you can see your hand clearly between the light and seedlings, you're in the right range.
Hardening Off Strategy: When starting the 1-hour daily hardening process in Step 5, I begin with just 30 minutes on the first day to acclimate seedlings gradually. The gradual increase over 7-10 days should mirror outdoor conditions—if your forecast shows wind, start with sheltered spots. I always harden off in the morning when temperatures are cooler, which reduces stress on the seedlings.
Pro Tips for Burpee Seed Starting System
- These game-changing insights will help you maximize the Burpee system's potential for faster, healthier seedlings.
- Soil Preparation Secret: When filling your 4-cell modular trays with the professional seed-starting mix, I press down just enough to eliminate air pockets—this creates a firm yet breathable foundation.
- Planting Precision: For Step 2, I've found that using a toothpick to create planting holes prevents over-compaction around seeds.
Frequently asked questions
about the Burpee Seed Starting System—here’s what you need to know before diving in!What’s the best time to start seeds in this system?
The ideal time depends on your plants! For most vegetables, start 6–8 weeks before the last frost date. Leafy greens (like lettuce) can go in earlier, while warm-season crops (tomatoes, peppers) need 4–6 weeks of cozy indoor time. Check Burpee’s seed packet for specifics—it’s your roadmap to success!
Can I use this system indoors without grow lights?
While possible, grow lights are highly recommended—especially for seedlings needing 12–16 hours of light daily. Without them, leggy, weak sprouts are likely. If you’re short on space, a simple LED bulb or clip-on grow light works wonders for just a few bucks!
How do I reuse or repurpose the trays after seedlings are transplanted?
These trays are durable and reusable! Rinse them with soapy water, scrub off residue, and let them dry. Store them in a dry place until your next planting. For extra hygiene, a bleach solution (1:9 ratio) works, but rinse thoroughly before reuse. No need to toss them—just refresh!
What should I do if my seedlings look moldy or damp?
Mold or damping-off (a fungal foe) means too much moisture or poor airflow. Act fast: reduce watering, gently remove affected seedlings, and improve airflow by spacing trays apart. A fan on low (24/7) can work wonders! Avoid overhead watering—use a spray bottle or bottom-watering tray instead.
Are there cheaper alternatives to the Burpee trays?
DIY options include:
- Egg cartons (for tiny seeds like herbs or lettuce)
- Plastic containers (yogurt cups, takeout trays—just poke drainage holes!)
- Recycled seedling flats (check local nurseries or Facebook Marketplace)
Wrapping up and next steps
The Burpee Seed Starting System transforms seedling care into a breeze—faster growth, stronger roots, and healthier plants in just a few simple steps! Whether you're a seasoned gardener or a curious beginner, modular trays make propagation effortless and rewarding. 🌱
Ready to supercharge your garden? Start by grabbing your trays, seeds, and soil today—your future harvest (and happy plants!) will thank you. Try it out and watch your seedlings thrive!