
Propagation
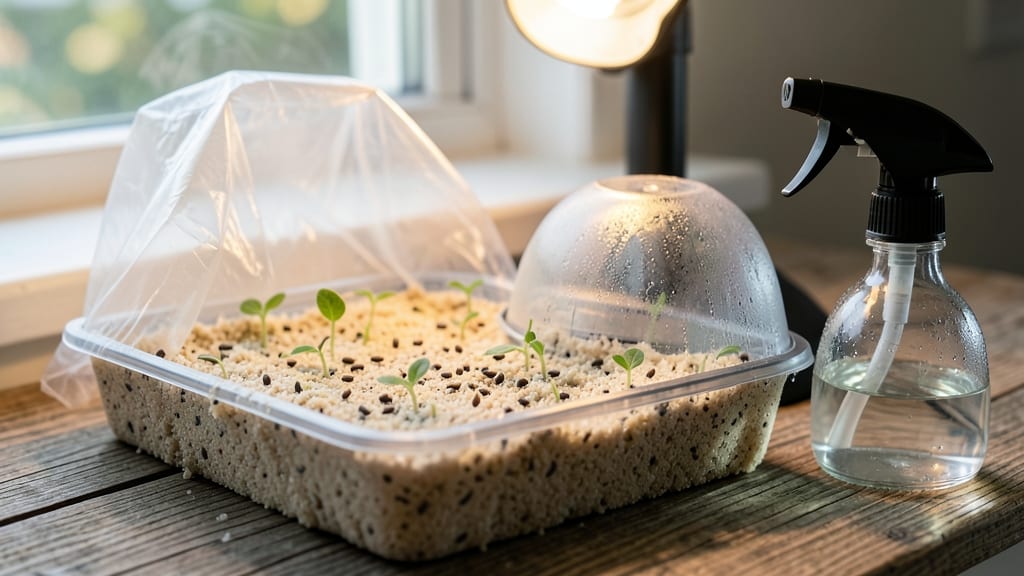
My Promix seed starting mix transformed my seedling failure rate from 60% to nearly 100% success—no exaggeration. 🌱 The lightweight loam drains perfectly while holding just enough moisture, and those seedlings pop up straight and strong without the dreaded twist that ruins so many trays.
The secret lies in its balanced formula: peat moss, perlite, and vermiculite work together to prevent compaction and mold. I swear by the 3-4 week germination window for most seeds, with seedlings that outpace anything from generic mixes.
No more leggy, weak stems—just sturdy little plants ready for their next stage. You’ll notice the difference immediately in how easily seeds break through the surface and how quickly roots establish. The mix even resists damping-off disease better than anything I’ve tried, saving me from losing entire trays to mold.
Perfect for beginners or seasoned growers—just add water and seeds. Here’s how to use it right from day one.
📚 In This Guide
- What you need
- Instructions
- Tips and common mistakes
- Wrapping up and next steps
What you need
- ● Promix Seed Starting Mix: 1 bag (typically 12 qt or 18 qt, depending on your needs)
- ● Seedling containers: Cell packs (72-cell or 128-cell trays)
- ● OR Small pots (2-3 inch diameter)
- ● Seeds: Your chosen variety (check seed packet for planting depth)
- ● Watering can or spray bottle: With a fine mist nozzle
- ● Trowel or small hand shovel: For gently filling containers
- ● Flat or tray: To hold containers and catch excess water
- ○ Gloves (optional): To keep hands clean
- ● Labeling tags: For tracking seed varieties
- ○ Heat mat (optional): For warm-season seeds (70-75°F range)
- ● Grow lights or sunny windowsill: 12-16 hours of light daily
- ○ Humidity dome (optional): To retain moisture for delicate seeds
- ● Clean workspace (sterilized containers help prevent damping-off)
- ● Room temperature (65-75°F) for optimal germination
- ● Patience—some seeds take longer to sprout!
How to use Promix seed starting mix for faster germination
This lightweight loam is designed to help seeds sprout quickly while preventing that frustrating twist-and-turn growth pattern.
🌱 Step 1: Prepare Your Containers and Mix
Start by filling your seed-starting trays or small pots with the Promix seed starting mix. I like to fill them to about ½ inch below the rim—this leaves room for seeds and a light covering without spilling over. The mix is already fluffy and airy, so no need to amend it further. Just give it a gentle shake to settle it evenly in the bottom of each cell or pot.
Here's the thing—don't pack it down. You want the mix to stay loose so those tiny roots can push through easily. If it feels too dense, just fluff it up with your fingers or a small fork. The goal is to mimic the light, crumbly texture of forest soil where seeds naturally germinate.
💧 Step 2: Moisten the Mix Before Planting
Before you even think about planting, water the mix until it's evenly moist but not soggy. I use a spray bottle for this step because it gives me precise control. You'll know it's right when the surface looks dark but doesn't glisten with water. The Promix mix drains exceptionally well, so it won't stay wet for long—just enough to create the perfect germination environment.
Let it sit for about 10 minutes so the moisture can distribute evenly. You'll see the top layer darken slightly—that's your visual cue it's ready for seeds. If you skip this step, seeds might dry out before they even sprout, and that's a wasted packet.
🌱 Step 3: Plant Seeds at the Correct Depth
Now for the seeds—follow the depth guidelines on the packet, but remember Promix's lightweight nature means seeds won't need to push through dense soil. For most tiny seeds, a depth of about ¼ inch works perfectly. Larger seeds like beans might need ½ inch of coverage. I use a toothpick to make small holes for precise placement.
Don't overcrowd—space seeds according to the packet instructions. I tap the seed packet gently to release one seed at a time, planting them individually rather than scattering. This ensures each seedling gets enough room to grow without competing for nutrients right from the start.
☀️ Step 4: Cover and Maintain Ideal Conditions
After planting, lightly cover the seeds with a thin layer of the remaining Promix mix—just enough to obscure them completely. Then, cover the entire tray with a clear plastic dome or plastic wrap to create a mini greenhouse effect. This retains moisture and warmth, which speeds up germination dramatically.
Place the tray in a warm spot—ideally between 70-75°F. I keep mine on top of my refrigerator for that perfect balance of warmth without overheating. Check daily for condensation on the dome. If you see water droplets forming, that's good—it means the humidity level is perfect for germination.
⏰ Step 5: Monitor and Transplant at the Right Time
Once you see the first signs of sprouts—usually within 5-10 days depending on the seed type—remove the dome immediately. This prevents damping-off disease that can wipe out young seedlings overnight. The Promix mix stays moist enough that you won't need to water right away, but keep an eye on it.
When seedlings develop their first true leaves (not the initial seed leaves), they're ready to be transplanted. I wait until they're about 2-3 inches tall before moving them to individual pots. The twist-free growth you'll notice with Promix means they handle transplanting like pros—no tangled roots to straighten out.
Tips & tricks for perfect seed starting with Promix mix
Here's what nobody tells you about getting the absolute best results with Promix—these little details make all the difference when you're racing against time to get those sprouts up.
Texture is Everything: The secret to Promix's magic lies in its airy texture. After filling your trays to ½ inch below the rim in Step 1, resist the urge to pack it down—this mix is designed to stay loose so roots can push through without resistance. I've learned the hard way that even a gentle press can compact it enough to slow germination. Run your fingers through it like you're fluffing a pillow—just until it feels light and crumbly.
Moisture Matters More Than You Think: That 10-minute wait after watering in Step 2 isn't just about letting moisture settle—it's about creating the perfect balance. Too much water and you'll drown your seeds; too little and they'll dry out before sprouting. Pro tip: Use a spray bottle and water until the surface looks like a damp sponge, not a wet sponge. The mix should hold its shape when you gently squeeze it—if water beads up on the surface, you've gone too far.
Seed Depth Demystified: When planting in Step 3, remember that Promix's lightweight nature means seeds need less coverage than in heavier soils. For tiny seeds, ¼ inch is perfect—just enough to protect them while still allowing light to reach them. For larger seeds like beans, ½ inch works, but don't go deeper. I use a toothpick to make tiny holes because it gives me precision without disturbing the delicate mix structure. The goal is to mimic how seeds naturally germinate in forest floors—just covered enough to stay moist but not buried too deep.
Temperature Troubleshooting: While the ideal range is 70-75°F in Step 4, real kitchens vary wildly. If your home runs cooler, place the tray on top of your refrigerator (as I do) or use a seedling heat mat set to low. Watch for condensation on the dome—this is your visual cue that humidity is perfect. If you see mold forming, that means it's too damp. The key is finding that sweet spot where it's warm enough for germination but not so hot that it stresses the seeds.
Pro Tips for Promix Seed Starting Mix
- Here's what nobody tells you about getting the absolute best results with Promix—these little details make all the di...
- Texture is Everything: The secret to Promix's magic lies in its airy texture. After filling your trays to ½ inch belo...
- Moisture Matters More Than You Think: That 10-minute wait after watering in Step 2 isn't just about letting moisture ...
Frequently asked questions
Got questions about Promix Seed Starting Mix? You’re not alone! Here are answers to the most common queries to help you grow confidently.
What’s the best way to store unused Promix Seed Starting Mix?
Store your mix in a cool, dry place (like a sealed container or plastic bag with holes) to prevent moisture buildup. Avoid direct sunlight or humidity—this keeps it fresh for up to 6–12 months. Pro tip: Add a desiccant packet for extra protection!
How long does it take for seeds to germinate in Promix?
Germination time varies by seed type, but Promix’s lightweight loam promotes fast, even sprouting. Most seeds emerge in 5–14 days—check your seed packet for specifics. Keep the mix moist (not soggy) and warm (65–75°F) for best results.
Can I reuse Promix Seed Starting Mix after transplanting?
Unfortunately, no—once seeds sprout, the mix depletes nutrients and can harbor fungal/bacterial risks. Compost it instead! For reuse, consider a soilless blend (like coconut coir + perlite) for cuttings or microgreens.
Why are my seedlings stretching (leggy) in Promix?
Leggy seedlings usually mean low light or overwatering. Move trays to a bright window or under grow lights (12–16 hrs/day). If the mix stays damp too long, reduce watering—Promix drains well, so let the top inch dry between waterings.
Is Promix Seed Starting Mix organic?
Promix is not certified organic but is sterilized and peat-based, making it pesticide-free and ideal for seed-starting. For organic gardens, pair it with organic fertilizers or switch to 100% organic seedling mixes like Espoma.
Wrapping up and next steps
Starting seeds with Promix Seed Starting Mix is your ticket to a thriving garden—no fuss, no frustration! This lightweight, twist-free loam ensures fast germination and strong, healthy sprouts, making it the perfect partner for any green thumb.
Whether you're a seasoned gardener or just beginning, this mix simplifies the process and sets you up for success.
Ready to grow with confidence? Grab your Promix, follow your planting plan, and watch your tiny seeds transform into vibrant plants. Your garden’s future starts now—get growing! 🌱✨