
Lawn
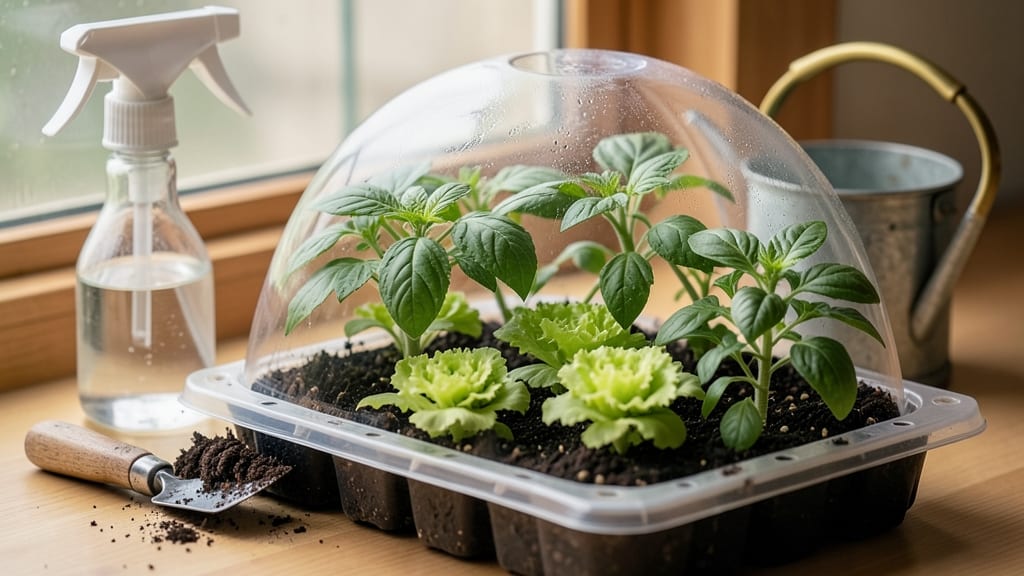
Seed trays in a greenhouse cut germination time in half—no more waiting weeks for stubborn seeds to wake up. 🌱 I learned the hard way that cheap trays lead to twisted roots and fragile seedlings, but the right setup makes all the difference.
The key is matching tray size to seed type, ensuring proper drainage, and keeping humidity just right. Plastic trays with clear domes are my go-to for fast results—they trap moisture while allowing light through. For delicate seeds like lettuce or snapdragons, biodegradable peat pots work wonders, eliminating transplant shock entirely.
Just avoid those flimsy plastic cell packs; they collapse when seedlings outgrow them. You’ll see sprouts in 5-7 days with consistent warmth (70-75°F) and gentle bottom heat. The secret is misting trays daily and removing domes once seeds emerge to prevent mold.
Sterilize trays with a 10% bleach solution before reuse to stop damping-off disease. Once seedlings hit their second set of leaves, harden them off by moving trays outside for 2-3 hours daily. This gradual transition prevents shock when they finally graduate to the greenhouse or garden beds.
📚 In This Guide
- What you need
- Instructions
- Tips and common mistakes
- Wrapping up and next steps
What you need
- ● Seed Trays: 10–20 trays (depending on scale), preferably biodegradable or reusable with drainage holes (e.g., 1020 or 50-cell trays).
- ● Size: 10" x 20" (standard for most greenhouses).
- ● Growing Medium: 1–2 cubic feet of sterilized seed-starting mix (lightweight, well-draining, and free of weeds/seeds). Avoid garden soil—it’s too dense!
- ● Seeds: Your chosen seeds (check depth requirements on seed packets—most need ¼" to ½" coverage).
- ● Watering Tools: A spray bottle or fine-mist watering can (to avoid disturbing seeds).
- ● Greenhouse Essentials: Humidity dome or plastic wrap (to retain moisture during germination).
- ● Grow lights or a sunny greenhouse spot (if natural light is insufficient).
- ● Heat Mat: A seedling heat mat (70–80°F range) for faster germination of slow starters.
- ● Labeling Supplies: Toothpicks + permanent marker (to track seed varieties).
- ● Fertilizer: A balanced starter fertilizer (5-5-5 or 10-10-10) for post-germination growth.
- ● Tray Stand: Adjustable shelves to optimize airflow and light exposure.
How to use seed trays for maximum greenhouse germination success
Here's my go-to method for getting seeds to sprout quickly while keeping them strong and damage-free.
🌱 Step 1: Select the Right Seed Tray and Prepare the Surface
Choose a seed tray with individual cells that are 2-3 inches deep—shallow trays dry out too fast, while deeper ones risk overwatering. I like trays with clear domes because they trap heat and moisture perfectly for germination. Fill each cell with sterile seed-starting mix up to 1/2 inch below the rim, leaving space for watering.
Tap the tray gently on the table to settle the soil without compacting it. The surface should feel firm but still crumbly—like a moist sponge. This prevents seeds from sinking too deep when you water. I always pre-moisten the mix with a spray bottle until it's damp throughout but not soggy.
💧 Step 2: Plant Seeds at the Correct Depth and Water Gently
Follow the seed packet's depth recommendation, but never plant deeper than twice the seed's diameter. For tiny seeds like lettuce, press them just below the surface with your fingertip. Larger seeds like beans go 1/2 inch deep. I use a toothpick to make a small hole for each seed—this ensures consistent depth and prevents overcrowding.
Water immediately after planting with a fine-mist spray bottle. The soil should look evenly damp but not glisten with excess water. Avoid soaking the tray from above, as this can wash seeds away. Cover the tray with its dome or a clear plastic sheet to create a greenhouse effect—this keeps humidity high and speeds up germination.
☀️ Step 3: Position Trays for Optimal Heat and Light
Place the seed trays in your greenhouse where temperatures stay between 65-75°F during the day and don't drop below 55°F at night. A heat mat underneath the trays can help maintain consistent warmth, especially if your greenhouse runs cooler. I position mine on a lower shelf where they get indirect light at first—direct sun can overheat the dome and dry out the soil.
Check the trays daily for condensation on the dome. If it's foggy inside, you're doing it right—this means high humidity. Wipe the dome occasionally to prevent mold growth. Once you see the first signs of sprouts (usually 5-14 days depending on the seed), remove the dome immediately to prevent damping-off disease.
🌿 Step 4: Monitor and Maintain Ideal Conditions
After germination, move the trays to a brighter spot but avoid direct sunlight until seedlings are 1-2 inches tall. You'll know they need more light if they start stretching toward the greenhouse glass (a sign of legginess). Water from the bottom by placing the tray in 1/4 inch of water for 10 minutes—this encourages strong root development without disturbing the seedlings.
Thin seedlings if they're crowded, using small scissors to snip at soil level rather than pulling. This prevents disturbing the roots of remaining plants. I always wear gloves for this step—seedlings can be surprisingly sharp! Keep the soil consistently moist but never soggy, and watch for pests like fungus gnats, which love damp seed trays.
⏰ Step 5: Prepare for Transplanting
When seedlings have 2-3 true leaves (not just the initial seed leaves), they're ready for their first move. Harden them off by placing the trays outside in a shaded spot for 1-2 hours daily, gradually increasing exposure over 7-10 days. This helps them adjust to outdoor conditions without shock.
Before transplanting, water the seedlings thoroughly so the roots are hydrated. Gently remove them from the tray by sliding a knife around the edges of the cell. Handle them by the leaves, not the stems, to avoid damage. Plant in your greenhouse beds or larger containers, burying them to the same depth they were in the tray—any deeper and they'll struggle to establish.
Tips & tricks for perfect greenhouse germination
A few simple adjustments can make all the difference between fragile sprouts and sturdy seedlings ready for transplanting.
Seed Depth Precision: When planting seeds in Step 2, I find using a toothpick to create a tiny hole for each seed prevents overcrowding and ensures consistent depth. For seeds like lettuce, press them just below the surface with your fingertip—any deeper and they won't have enough energy to break through. The 1/2 inch rule for larger seeds like beans is perfect, but I measure from the top of the soil, not the bottom of the cell.
Temperature Consistency: Maintaining the 65-75°F daytime range in Step 3 is crucial for fast germination. If your greenhouse runs cooler, place trays on a heat mat set to 70°F—this creates a stable environment without overheating. I monitor nighttime temps too, ensuring they never dip below 55°F, as cold snaps can shock delicate sprouts.
Humidity Management: The foggy dome in Step 3 is your friend, but condensation needs to be controlled. Wipe the dome every 2-3 days to prevent mold growth, especially in humid climates. Once sprouts appear, remove the dome immediately to prevent damping-off disease—this is the 5-14 day window where seedlings are most vulnerable. I often set up a small fan on low to improve air circulation while keeping humidity high.
Light Transition Strategy: In Step 4, when moving seedlings to brighter light, I gradually increase exposure over 3-4 days rather than all at once. Start with morning sun only, then add afternoon light. This prevents leggy seedlings that stretch toward the light source. The 1-2 inch height threshold is key—wait until they've developed some strength before full exposure.
Pro Tips for Seed Trays For Greenhouse
- A few simple adjustments can make all the difference between fragile sprouts and sturdy seedlings ready for transplan...
- Seed Depth Precision: When planting seeds in Step 2, I find using a toothpick to create a tiny hole for each seed pre...
- Temperature Consistency: Maintaining the 65-75°F daytime range in Step 3 is crucial for fast germination. If your gre...
Frequently asked questions
Got questions about using seed trays in your greenhouse? You’re not alone! Here are some of the most common queries—and their straightforward answers—to help you grow with confidence.
What’s the best material for seed trays in a greenhouse?
Opt for plastic or biodegradable trays for ease of use and sustainability. Plastic trays are durable and reusable, while biodegradable options (like peat or coconut coir) break down naturally, reducing transplant shock. Avoid metal unless it’s coated—it can overheat in direct sunlight.
How long does it take for seeds to germinate in seed trays?
Germination time varies by plant type, but most seeds sprout within 5–14 days in ideal greenhouse conditions (warmth, moisture, and indirect light). Check seed packets for specifics—some fast growers (like lettuce) may appear in 3–7 days, while slower ones (like tomatoes) take 10–20 days.
Can I reuse seed trays, or should I replace them each season?
Yes! Clean and sanitize plastic trays with a 10% bleach solution between uses to prevent mold and disease. Biodegradable trays should be composted after one use. Reusing trays saves money and reduces waste—just ensure they’re free of residue or pests before repurposing.
What’s the best way to water seed trays without drowning the seeds?
Use a spray bottle or gentle watering can to mist the soil evenly, keeping it moist but not soggy. Bottom-watering (placing trays in a shallow tray of water) is another trick—let the seeds soak up moisture from below to avoid over-saturating the surface. Drain excess water within 15 minutes to prevent root rot.
Why are my seeds moldy or rotting in the trays?
Mold or rot usually signals too much moisture or poor airflow. Thin out crowded seedlings, improve ventilation (use a small fan or crack a window), and avoid overhead watering. If mold appears, sprinkle cinnamon or hydrogen peroxide (3%) on the soil surface to treat it naturally.
Wrapping up and next steps
Choosing the right seed trays for your greenhouse can make all the difference in nurturing healthy, thriving plants from the start. Whether you prioritize durability, drainage, or ease of use, the perfect tray ensures fast germination without the risk of damaging delicate seeds.
With the right setup, you’re well on your way to a lush, vibrant garden—one seed at a time!
Ready to take the next step? Start small—test a few trays with your favorite plants, observe what works best, and soon, you’ll have a greenhouse routine that’s as rewarding as it is efficient. Happy planting! 🌱