Lawn
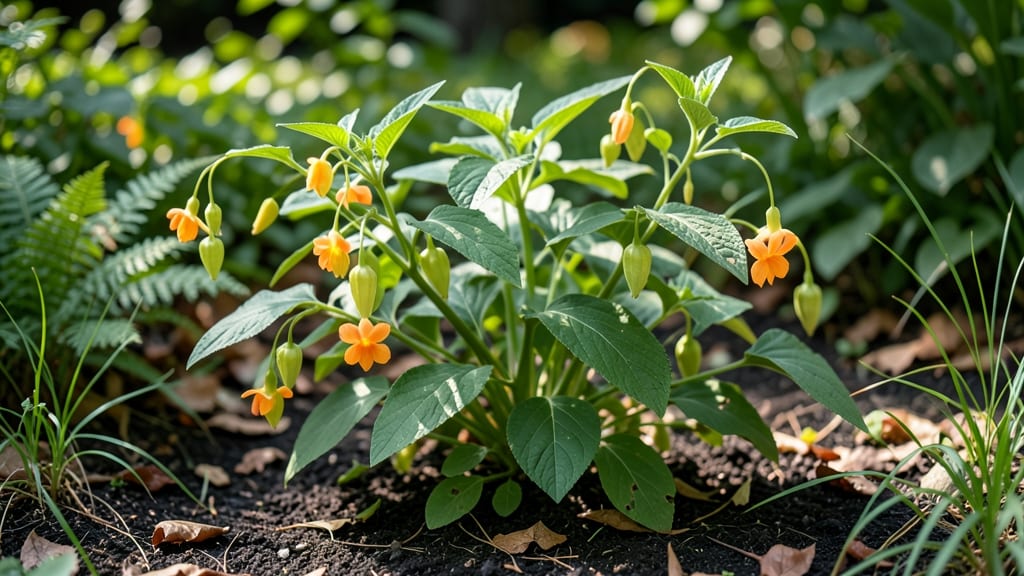
Harvesting touch me not seed pods before they explode is the secret to growing these delicate blooms again next year. ✨ I’ve learned the hard way—when those pods go off like tiny firecrackers, you’re left with scattered seeds and no control over where they land.
The key is timing, technique, and a little patience to preserve those seeds for future gardens.
These plants thrive in partial shade with consistently moist soil, making them perfect for woodland edges or shaded garden beds. The pods themselves are the real showstoppers—they start green, ripen to a papery brown, and pop when mature, sending seeds flying up to 20 feet away.
That’s why harvesting them early is crucial for saving seeds.
By collecting the pods before they burst, you’ll have fresh seeds ready for next spring’s planting. The process is simple: gently twist the pods off the stems when they’re dry but still intact, then store them in a cool, dry place.
You’ll end up with a stash of seeds that’ll grow into those same vibrant, nodding blooms you love.
This method works for both gardeners and wildflower enthusiasts—just be ready for the pods’ explosive nature. Once you master the timing, you’ll never buy touch me not seeds again. Here’s exactly how to do it without losing a single seed to the wind.
📚 In This Guide
- What you need
- Instructions
- Tips and common mistakes
- Wrapping up and next steps
What you need
- ● Touch Me Not plants (Impatiens capensis): Mature plants with fully developed seed pods (typically late summer to fall). Aim for at least 3–5 healthy plants for a decent seed yield.
- ● Pruning shears or sharp scissors: For cleanly snipping seed pods without damaging the stems.
- ● Brown paper bags or breathable fabric sacks: 2–3 medium-sized bags (12"x18" or larger) to collect pods and prevent moisture buildup.
- ● Newspaper or cardboard: To line a flat surface (like a tray or table) for drying seeds.
- ● Rubbing alcohol (70% isopropyl) and cotton swabs: For sterilizing tools to avoid mold or bacterial contamination.
- ● Pencil or marker: To label bags with the harvest date and plant variety.
- ● Glove: Protects hands from Touch Me Not’s sticky sap (though it’s non-toxic!).
- ● Fan or dehumidifier: Speeds up drying in humid climates.
- ● Seed tray or mesh bags: For long-term seed storage (if saving for next year).
- ● Camera: Capture the explosive moment when pods release seeds—it’s a hoot!
Step-by-Step guide for harvesting touch-me-not seed pods
Here's how to collect seeds from these explosive blooms without losing a single pod to their famous twist.
🌱 Step 1: Identify Mature Seed Pods
Wait until the seed pods turn a deep brown color and feel dry to the touch. These pods will be firm and slightly papery, unlike the green, plump pods that haven't matured yet. I always check pods in the morning when dew has dried—they'll be easier to handle without sticking to my fingers.
Gently shake a few pods over a brown paper bag to test. If they explode and scatter seeds, they're ready. If they stay closed, wait another 2-3 days. The pods need to dry completely on the plant for the seeds to fully mature and separate.
✂️ Step 2: Harvest Pods Without Triggering the Explosion
Use clean, sharp scissors to snip the stem just below the pod. I hold the pod firmly between my thumb and forefinger to stabilize it while cutting. Never pull or twist the pods—they'll explode in your hand. Work on a dry day when humidity is low to prevent seeds from sticking to everything.
Place pods immediately in a paper bag or envelope. I label each bag with the date and plant variety if I'm working with multiple types. Store them in a cool, dry place away from direct sunlight until you're ready to process the seeds.
🪴 Step 3: Dry and Store Seeds Properly
Spread the harvested pods on a clean, dry surface like a baking sheet or cardboard. Let them dry for an additional 3-5 days in a warm, dry spot. The seeds will rattle inside when fully dry. I tap the pods gently with a spoon to release any seeds that might still be clinging.
Once completely dry, open the pods carefully and pour the seeds into a small envelope or airtight container. Store them in a cool, dark place where they'll remain viable for 2-3 years. I always include a moisture packet in the container to prevent any potential mold growth.
🌿 Step 4: Prepare for Next Year's Blooms
After collecting seeds, you can leave the spent plants in the garden as mulch or compost. The dried stems will break down naturally and add nutrients to the soil. If you want to encourage more blooms next year, consider lightly fertilizing the area in early spring with a balanced, slow-release fertilizer.
For future seed collections, plant your touch-me-nots in a location where they won't be disturbed by foot traffic or pets. These plants thrive in partial shade and moist soil, making them perfect for woodland garden edges or near ponds where they can spread naturally.
Tips & tricks for harvesting touch-me-not seed pods
These simple strategies will help you collect seeds without losing a single pod to their infamous twist.
Timing Secret: The 2-3 day waiting period in Step 1 is crucial—don't rush it! I've learned the hard way that immature pods won't release seeds properly. Check pods in the morning when dew has evaporated; this makes them easier to handle and prevents seeds from sticking to your fingers. If you're unsure, do the paper bag test—it's the only sure way to confirm readiness.
Harvesting Technique: In Step 2, I can't emphasize enough how important it is to use sharp scissors and cut just below the pod. The moment you pull or twist, you'll trigger that explosive release. I've lost entire batches this way! Place pods immediately in paper bags—they'll still release seeds if left loose. Labeling bags with dates and varieties saves headaches later when you're ready to plant.
Drying Strategy: The 3-5 day drying period in Step 3 is your best friend for seed viability. Spread pods on a clean surface in a warm, dry spot—this prevents moisture buildup that could cause mold. I tap pods gently with a spoon to release any lingering seeds, then store them with moisture packets. This simple step ensures your seeds stay viable for years.
Storage Wisdom: For long-term storage, I use small envelopes with moisture packets—this keeps seeds fresh for up to 3 years. Store them in a cool, dark place like a pantry or seed vault. The key is preventing moisture exposure, which can trigger premature germination or mold growth. I also include a tiny note with planting instructions to avoid confusion when the time comes.
Pro Tips for Touch Me Not Seed Pods
- These simple strategies will help you collect seeds without losing a single pod to their infamous twist.
- Timing Secret: The 2-3 day waiting period in Step 1 is crucial—don't rush it!
- Harvesting Technique: In Step 2, I can't emphasize enough how important it is to use sharp scissors and cut just below the pod.
Frequently asked questions
How do I know when Touch Me Not seed pods are ready to harvest?
Harvest pods when they turn from green to a papery brown and feel dry to the touch. If they’re still green or slightly moist, they won’t open easily. Wait until late summer or early fall for the best results—this ensures seeds are fully matured but haven’t scattered yet.
Why won’t my Touch Me Not pods open when I try to twist them?
If pods resist opening, they may not be fully dry. Try placing them in a paper bag for a few days to speed up drying. Alternatively, gently tap them against a hard surface to encourage natural opening. Avoid forcing them—this can damage the seeds inside.
Can I harvest Touch Me Not pods without twisting them?
Yes! If twisting feels too risky, use clean scissors to snip open the pods. Lay them flat on a tray and let them air-dry completely before handling. This method preserves seeds and reduces the chance of accidental scattering. Just be patient—rushing can ruin the harvest!
What’s the best time of day to harvest Touch Me Not seed pods?
Morning is ideal! Dew-free conditions make pods easier to handle, and cooler temps slow seed dispersal. Avoid harvesting after rain or in high humidity—moisture can cause pods to stick together or mold. Early harvests also mean fewer seeds lost to wildlife.
What should I do with harvested Touch Me Not pods before planting?
Once pods are dry and open, remove seeds by gently shaking them into a bowl. Store seeds in a cool, dry place (like a sealed envelope) until spring. For extra protection, mix seeds with sand to prevent clumping. Plant them shallowly—just ¼ inch deep—for best germination.
Still stumped? Drop your question below—we’re happy to help!
Wrapping up and next steps
Harvesting Touch-Me-Not seed pods may seem tricky, but with the right technique, you can ensure healthy blooms for seasons to come! 🌿 These delicate pods reward patience—twist-free harvesting keeps seeds viable and your garden thriving.
Whether you're a seasoned gardener or just starting, this method is your secret to effortless propagation.
Ready to touch (and release) the magic of next year’s blooms? Grab your gloves, head outdoors, and give it a try—your future garden will thank you! 🌸 For more tips, explore our gardening guides or share your progress with the community.