
Lawn
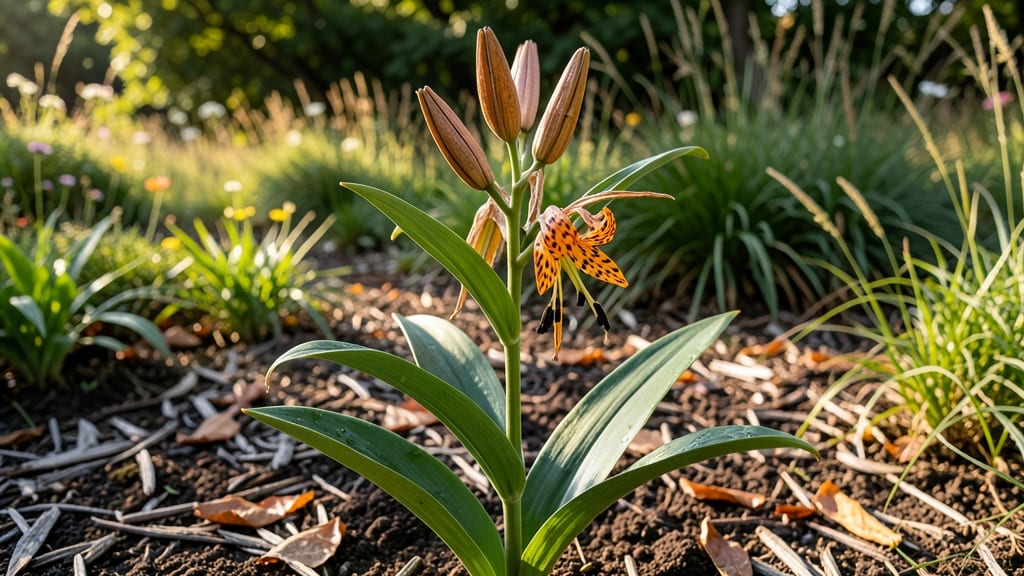
Those papery tiger lily seed pods hold next season's bold orange blooms. 🌺 I've learned that harvesting them at the right time and giving them the proper treatment is the secret to growing tiger lilies from seed—something that's surprisingly reliable once you know the steps.
First, wait until the pods turn brown and dry completely before harvesting—usually in late fall. Gently twist them off the stem and let them dry in a paper bag for a week or two.
Once fully dry, open the pods to reveal the seeds inside, which are the size of small peas and have a papery coating.
Stratification is key: mix the seeds with slightly damp sand and refrigerate them for 6-8 weeks to mimic winter. After that, sow them in well-draining soil, about 1 inch deep, and keep them moist but not soggy.
You'll see sprouts in 2-4 weeks, and with patience, you'll have thriving tiger lilies in their second year.
These plants love full sun and rich soil, and they'll reward you with dramatic blooms for years. The best part? You'll have a new variety of tiger lilies that you grew yourself—something you won't find in garden centers.
📚 In This Guide
- What you need
- Instructions
- Tips and common mistakes
- Wrapping up and next steps
What you need
- ● Mature tiger lily seed pods: Harvest 5–10 fully ripened pods (brown, papery, and slightly dried but not brittle). Aim for healthy-looking pods from your garden or a trusted source.
- ● Pruning shears or sharp scissors: 1 pair (sterilized with rubbing alcohol for hygiene). Use for cleanly snipping pods from the stem.
- ● Brown paper bags or breathable mesh sacks: 2–3 medium-sized bags (10"x12" or larger) for drying. Avoid plastic—it traps moisture!
- ● Newspaper or cardboard: 1–2 sheets (for a drying tray or surface). Line with a thin layer to protect your workspace.
- ● Small fan or well-ventilated area: Gentle airflow speeds up drying. A desk fan on low works perfectly!
- ● Fine-mesh strainer or sieve: 1 (for separating seeds from dried pod debris). A kitchen strainer with ¼" holes is ideal.
- ● Plastic zip-top bags or airtight containers: 3–5 small bags (quart-sized or smaller) for storing stratified seeds.
- ● Moistened paper towels or peat moss: Enough to lightly dampen (like a wrung-out sponge) for stratification.
- ● Permanent marker and labels: 1–2 (to mark seed bags with variety names and dates).
- ● Refrigerator or cool, dark space: A spot to maintain 35–45°F (2–7°C) for stratification (e.g., a fridge crisper drawer).
- ● Desiccant packets (silica gel): 1–2 (place in drying bags to absorb excess moisture if humidity is high).
- ● Seed catalog or journal: For tracking varieties and germination notes over time.
- ● Spray bottle with water: To lightly mist pods if your climate is very dry during drying.
- ● Heat mat or seedling heat pad: (For post-stratification warmth if you’re eager to speed up germination!).
- ● Digital scale: To weigh seed pods before/after drying (fun for tracking moisture loss!).
Step-by-step instructions for harvesting and preparing tiger lily seed pods
Here's how to turn those spent blooms into next year's showstopper flowers.
🌱 Step 1: Identify and Harvest Mature Seed Pods
Wait until the seed pods turn a deep brown color and begin to split open naturally—this usually happens in late summer or early fall. The pods should feel dry and papery to the touch, not soft or squishy. I always harvest on a dry morning so the pods stay intact during handling.
Use clean gardening shears to snip the pods from the stem, leaving about ½ inch of stem attached. This small stem piece helps prevent moisture loss during drying. Place the pods in a single layer on a paper towel-lined tray to prevent them from touching each other.
💧 Step 2: Dry the Seed Pods Properly
Find a warm, dry location with good air circulation—like a sunny windowsill or a well-ventilated room at 70-75°F. Avoid direct sunlight, which can overheat the pods and cause them to crack prematurely. You'll know they're properly dried when they feel completely light and brittle, about 2-3 weeks later.
Gently open one pod to check for seed readiness. The seeds should be dark brown and firm, not still attached to the pod's inner membrane. If they're still moist or attached, give them another week or two. I like to label each pod with the variety name and harvest date to keep track of my collections.
✂️ Step 3: Extract and Clean the Seeds
Once completely dry, place the pods in a clean paper bag and gently crush them with your hands or a rolling pin. The seeds will fall out easily while the pod debris stays behind. Sift the mixture through a fine-mesh strainer to separate the seeds from chaff and pod fragments.
Spread the cleaned seeds on a fresh paper towel and let them air dry for another 24 hours. This final drying step ensures any lingering moisture evaporates, which is crucial for successful stratification later. Store the seeds in a sealed envelope or small paper bag in a cool, dry place until you're ready to stratify them.
⏰ Step 4: Stratify for Successful Germination
Tiger lily seeds need a cold period to break dormancy. Mix the seeds with slightly damp sand or perlite in a sealed container, then refrigerate for 8-12 weeks at 35-40°F. I use a small plastic bag with a tiny hole for air circulation—just enough to keep the mix moist but not soggy.
After stratification, plant the seeds ½ inch deep in well-draining potting mix at 65-70°F. Germination can take 2-4 weeks, so be patient. Keep the soil consistently moist but never waterlogged during this time. The first true leaves will appear as small, narrow green blades—this is your signal that germination has succeeded.
Tips & tricks for perfect tiger lily seed pod preparation
Turning those spent blooms into next year's flowers takes patience—and these little tricks will help you avoid common pitfalls.
Harvest Timing: Don't rush the harvest! The pods must be completely dry and beginning to split naturally. I've learned the hard way that harvesting too early means seeds won't mature properly. Look for that deep brown color and papery texture—it's your green light to harvest. The ½ inch of stem you leave attached is crucial too; it helps prevent moisture loss during drying, which could ruin your seeds.
Drying Strategy: That 2-3 week drying period at 70-75°F is non-negotiable for tiger lily seeds. I place mine on a windowsill with indirect light—direct sun can overheat and crack the pods. A gentle fan on low helps with air circulation without blowing the pods around. Test readiness by gently opening a pod; seeds should be dark brown and firm, not still attached to the membrane.
Seed Extraction: The 24-hour final drying after sifting is where many gardeners cut corners. Trust me on this—any lingering moisture can cause mold during stratification. I use a fine-mesh strainer and tap it gently over a bowl to catch all the seeds. A rolling pin works great for crushing the pods, but go slow to avoid crushing seeds along with the pod material.
Stratification Secrets: For that 8-12 week cold treatment at 35-40°F, I use a simple plastic bag with a tiny hole for air circulation. The mix should stay slightly damp—like a wrung-out sponge. Too wet and you risk mold; too dry and stratification fails. I label each bag with the variety and date so I don't forget which seeds need planting when spring arrives.
Pro Tips for Tiger Lily Seed Pods
- Turning those spent blooms into next year's flowers takes patience—and these little tricks will help you avoid common...
- Harvest Timing: Don't rush the harvest! The pods must be completely dry and beginning to split naturally. I've learne...
- Drying Strategy: That 2-3 week drying period at 70-75°F is non-negotiable for tiger lily seeds. I place mine on a win...
Frequently asked questions
Got questions about harvesting, drying, or storing tiger lily seed pods? You’re not alone! Here are some of the most common queries—and their answers—to help you get the most out of your blooms next season.
How do I know when tiger lily seed pods are ready to harvest?
Harvest seed pods when they turn brown and papery (usually 6–8 weeks after flowering). If they’re still green, they’re not ready. Wait until they’re fully dried and slightly crunchy to the touch—this ensures the best germination rates. Pro tip: Harvest on a dry day to prevent mold.
How long does it take for tiger lily seeds to germinate?
With proper stratification (cold treatment), tiger lily seeds typically germinate in 4–12 weeks. If sown directly in fall, they may sprout the following spring. For faster results, mimic winter conditions by refrigerating seeds for 4–6 weeks before planting. Patience is key—don’t rush the process!
Can I save tiger lily seeds from store-bought flowers?
Yes, but with a caveat: seeds from nursery-bought lilies may not grow true to the parent plant (hybrids often revert to wild types). If you want reliable blooms, save seeds from homegrown lilies or buy certified seeds. For store-bought flowers, try it as a fun experiment—just don’t expect identical results!
What should I do if my tiger lily seed pods mold or rot?
Mold or rot usually happens from excess moisture. To prevent it, store pods in a cool, dry place (like a paper bag with ventilation) and avoid plastic containers. If mold appears, discard the affected pods immediately. For extra protection, sprinkle a little dried silica gel in the storage container. Never store them in damp basements or garages!
Do tiger lily seeds need special soil to germinate?
Not necessarily! Use a well-draining mix (like 50% potting soil + 50% perlite or sand) to prevent waterlogging. Tiger lilies thrive in average garden soil, but seedlings appreciate a little extra aeration. Avoid heavy clay—it can suffocate young roots. Bonus: Add a light layer of compost for nutrients!
Wrapping up and next steps
Growing tiger lily seed pods into vibrant blooms next season is a rewarding journey that blends patience with nature’s beauty!
By mastering the steps—drying, extracting, and stratifying—you’re not just nurturing seeds; you’re cultivating a legacy of bold, golden-orange flowers. 🌸 Whether you’re a seasoned gardener or a curious beginner, every small effort brings you closer to a stunning, lush garden.
Ready to take the next step? Start by planting your stratified seeds in well-draining soil this fall, and watch your hard work transform into a breathtaking display. Happy gardening! 🌱