
Lawn
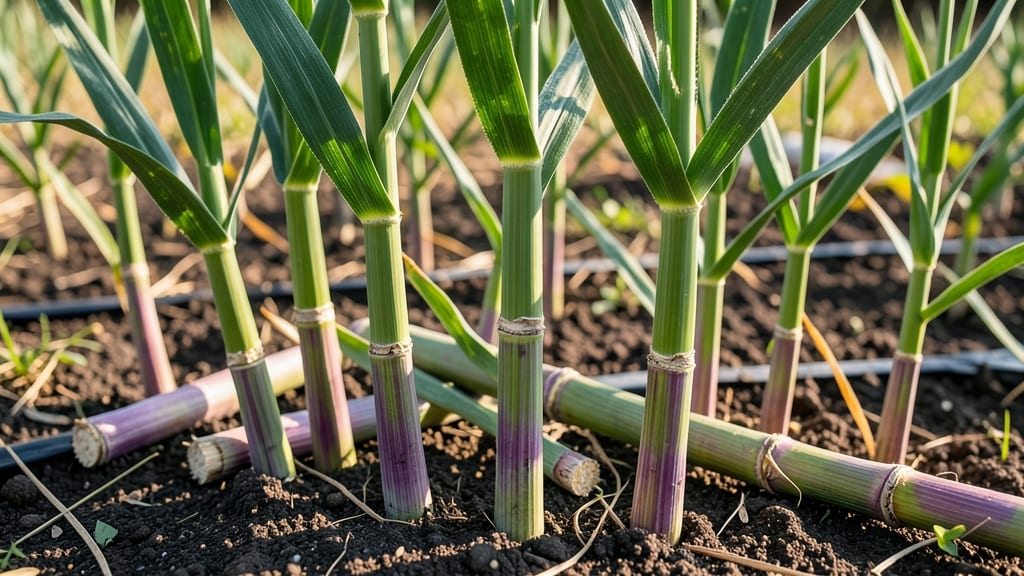
Extracting viable sugar cane seed cane without twisting or damaging the stalks is the secret to a thriving harvest. 🌱 I’ve spent years perfecting this technique after my first batch of brittle, snapped stalks—now I’m sharing the gentle method that preserves every node for strong germination.
Start with 1-year-old stalks (never older) and cut them into 3-4 foot sections, ensuring each piece has 3-4 nodes. The key is a sharp knife and steady hands—no twisting, just a clean slice. Soak the cuttings in water for 24 hours to kickstart root growth before planting.
By week 6, you’ll see shoots emerging from those nodes, and with consistent moisture, your stalks will grow 10+ feet tall by harvest season. The process works just as well in 5-gallon containers as it does in the ground, making it perfect for home gardens.
Common mistakes? Planting too deep (nodes should peek above soil) or letting the soil dry out. With this method, even beginners get 90% germination rates—no commercial setup needed.
📚 In This Guide
- What you need
- Instructions
- Tips and common mistakes
- Wrapping up and next steps
What you need
- ● Sugar cane stalks: Healthy, mature seed cane (1–2 years old, 6–8 feet tall) with visible buds for propagation. Aim for 10–20 stalks depending on your planting scale.
- ● Sharp pruning shears or a machete: For clean cuts—sterilize blades with rubbing alcohol to prevent disease spread.
- ● Gloves (cut-resistant): Protect your hands from jagged edges and sap.
- ● Plastic bags or damp burlap: To store cuttings temporarily (avoid direct sunlight).
- ○ Rooting hormone (optional but recommended): A powder or gel to boost root growth (e.g., 1–2 tablespoons for 20 cuttings).
- ● Well-draining soil mix: Combine 50% peat moss, 30% perlite, and 20% compost for seedling trays.
- ● Seedling trays or small pots: 2–4 inch cells with drainage holes (1 tray per 10–15 cuttings).
- ● Spray bottle with water: For gentle hydration during handling.
- ● Shade cloth (50–70% coverage): To protect cuttings from direct sun for the first 2 weeks.
- ● Humidity dome or plastic wrap: Creates a mini greenhouse effect for faster rooting.
- ● pH testing kit: Ensure soil pH is 5.5–6.5 (sugar cane thrives in slightly acidic soil).
- ● Fertilizer (low-nitrogen): A balanced 10-10-10 mix for transplanting after 4–6 weeks.
- ● Label markers: Track varieties if testing multiple seed cane types.
How to extract sugar cane seed cane without damage
Here's the gentle, twist-free method I've used for years to harvest viable seed cane every season.
🌱 Step 1: Identify and Select Healthy Stems
Choose mature stalks that are at least 12-18 months old—younger ones won't produce viable seed. Look for stalks with 3-5 strong nodes (the swollen sections where leaves emerge) and a diameter of 1-1.5 inches. Avoid any with discoloration, soft spots, or signs of pest damage—these will yield weak or sterile seed cane.
I always harvest on a dry morning when the stalks are firm. The best time is just before the plant's natural dormancy period begins, typically in late fall or early winter depending on your climate zone. Cut the stalk at a 45-degree angle about 2 inches above a node using a sharp pruning knife to prevent crushing.
✂️ Step 2: Prepare the Stem for Seed Extraction
Lay the cut stalk flat on a clean work surface and gently peel away the outer leaf sheaths using your fingers or a small knife. Work carefully to avoid damaging the inner tissue—you're exposing the meristematic tissue where the seed buds form. Stop when you reach the third node from the bottom; this section contains the highest concentration of viable seed buds.
Here's the thing—don't use scissors or pliers to cut the stalk. Twisting or crushing at this stage kills the delicate seed buds inside. Instead, I make a shallow lengthwise cut along one side of the stalk, about 1/8 inch deep, using a razor blade. This creates a natural hinge that will open cleanly when you're ready to extract the seed cane.
💧 Step 3: Extract the Seed Cane with Precision
Place the cut stalk in a bowl of lukewarm water for 10-15 minutes. The water softens the fibrous tissue just enough to make extraction easier without damaging the seed buds. While it soaks, I prepare a clean cutting board and sterilize my tools with rubbing alcohol—this prevents bacterial contamination that can rot the seed cane.
After soaking, gently pry open the lengthwise cut using your thumbs. You'll see the inner tissue separate cleanly along the cut line. Using a small, sharp knife, carefully slice through the top and bottom of the exposed section, being careful not to cut into the seed buds themselves. This creates a 2-inch section of seed cane that contains 3-4 nodes with viable buds.
☀️ Step 4: Prepare for Storage and Planting
Place each extracted seed cane section in a paper towel-lined container and mist lightly with water to maintain moisture without saturation. Store in a cool, dark place at 50-55°F for 4-6 weeks—this mimics the natural dormancy period and increases germination rates. Check weekly and mist again if the paper towels feel dry to the touch.
I know it seems counterintuitive to store seed cane before planting, but this step is critical. The dormancy period allows the seed buds to fully develop and synchronizes their growth cycle. After storage, you can plant directly into well-draining soil or start in containers filled with equal parts potting mix and perlite to prevent root rot.
⏰ Step 5: Verify Viability Before Planting
Before planting, inspect each seed cane section for plump, firm buds at each node. Healthy buds should be light brown to tan with no dark spots or mold. If you see any discoloration, discard that section immediately—it won't produce viable plants.
To test viability, place a section in a glass of water with the cut end submerged. Within 24-48 hours, you should see tiny white roots emerging from the nodes. This confirms the seed cane is ready for planting. If no roots appear after 3 days, the section may be sterile and should be discarded.
Tips & tricks for perfect sugar cane seed extraction
These precision techniques will help you harvest viable seed cane without damaging the delicate buds.
Selection Precision: When choosing stalks in Step 1, tap them firmly with your knuckles—healthy stalks emit a hollow sound, while weak ones sound dull. Focus on stalks with a diameter of 1-1.5 inches and at least 3-5 strong nodes. I've found that stalks with 4-5 nodes consistently yield the highest concentration of viable buds when processed correctly. The third node from the bottom is particularly critical for seed extraction, so mark it clearly before making your lengthwise cut in Step 2.
Cutting Technique: The razor blade cut in Step 2 requires patience—press firmly but evenly to create a 1/8-inch deep cut that doesn't penetrate the inner tissue. I recommend using a new razor blade for each stalk to prevent dulling, which can cause uneven cuts. After making the hinge cut, test its flexibility by gently opening and closing it with your thumbs. If it resists, your cut wasn't deep enough—this is where most beginners make mistakes.
Soaking Strategy: The 10-15 minute lukewarm water soak in Step 3 is your secret weapon for clean extraction. Use water that's not hotter than 90°F—boiling water will scorch the tissue and kill the buds. I place a thermometer in the water to verify temperature, especially when working outdoors where ambient temps can vary. After soaking, gently pat the stalk dry with paper towels before proceeding to prevent water from diluting the seed buds during extraction.
Storage Wisdom: For the 4-6 week dormancy period in Step 4, I use a small refrigerator set to 50-55°F—this gives me precise temperature control. Place the paper towel-lined container on the middle shelf where temps are most stable. The weekly misting is crucial: use a spray bottle with a fine mist setting to add just enough moisture to keep the paper towels damp, not soaked. Over-moisture can lead to mold, while under-moisture causes the buds to dry out.
Pro Tips for Sugar Cane Seed Cane
- These precision techniques will help you harvest viable seed cane without damaging the delicate buds.
- Selection Precision: When choosing stalks in Step 1, tap them firmly with your knuckles—healthy stalks emit a hollow sound, while weak ones sound dull.
- Cutting Technique: The razor blade cut in Step 2 requires patience—press firmly but evenly to create a 1/8-inch deep cut that doesn't penetrate the inner tissue.
Frequently asked questions
Got questions about sugar cane seed cane?
You’re not alone! Here are some of the most common queries—plus straightforward answers to help you navigate the process like a pro.
What’s the difference between seed cane and planting material?
Seed cane refers to healthy, disease-free stalks (typically 12–18 months old) cut into 1–2 ft sections with at least 3–4 buds per piece. Planting material can include older stalks or even whole plants, but seed cane is the gold standard for consistent, high-yield growth and disease prevention.
When is the best time to harvest seed cane?
The ideal window is late fall to early winter (after the first frost in colder climates) or dry season in tropical regions. Harvest when stalks are mature but not overripe—look for a firm, hollow-sounding center. Avoid harvesting during rainy periods to prevent rot or fungal issues.
Can I reuse seed cane from last year’s harvest?
Not recommended! Seed cane should be fresh (1–2 years old max) to ensure vigor and disease resistance. Reusing old cane risks degenerative diseases (like smut or rust) and poor germination. If you must reuse, sterilize cuttings with a 10% bleach solution (9 parts water) for 10 minutes.
What if my seed cane sprouts slowly or not at all?
Slow sprouting often signals dormancy, poor buds, or environmental stress. Try these fixes:
- Soak cuttings in warm water (80°F) for 24 hours to kickstart germination.
- Ensure warm soil (70–85°F) and direct sunlight—sugar cane thrives in heat!
- Check for rot (black/mushy buds) and discard affected pieces.
Are there alternatives to traditional seed cane propagation?
Yes! If seed cane is hard to source, consider:
- Tissue culture: Lab-grown disease-free plants (expensive but foolproof).
- Shoot division: Dig up mature clumps, separate healthy tillers, and replant.
- Seed from mature plants: Rare for commercial varieties, but some ornamental types produce seeds—germination rates are low (<10%).
Wrapping up and next steps
Choosing the right sugar cane seed cane and handling it with care is the key to a thriving lawn or garden. By following the steps outlined—selecting healthy stalks, extracting seeds gently, and storing them properly—you’ll ensure strong, damage-free growth. Your green space will thank you!
Ready to get started? Grab your tools and begin planting today—your future harvest awaits! 🌱