
Lawn
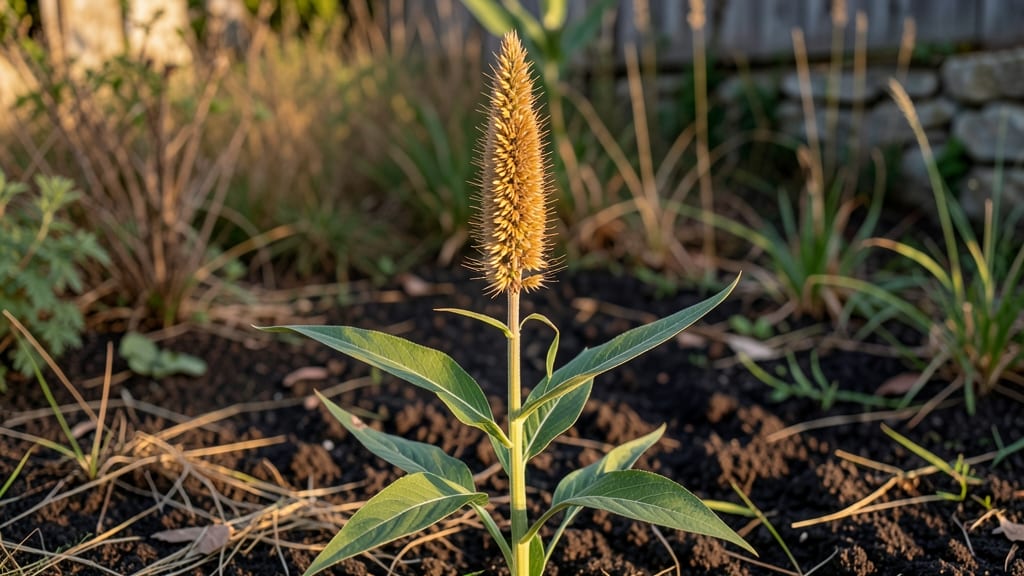
That moment when your sorghum stalks burst into feathery gold is pure magic—sorghum seed heads are where the real harvest begins. 🌾 I’ve watched mine transform from tight buds to fluffy plumes over just three weeks, and the secret to getting there lies in timing, water, and a little patience.
Too much moisture or too little sun, and you’ll end up with empty seed heads instead of the plump, viable seeds you need for next year’s crop.
The best part? These seed heads aren’t just for saving seeds—they’re stunning in dried arrangements, adding texture and movement to winter bouquets. Start with well-drained soil and full sun (at least 6 hours daily), and keep watering consistent but not soggy.
When the seed heads turn golden-brown and the seeds rattle inside, that’s your cue to harvest before they scatter.
You’ll know you’ve done it right when you’re holding plump, firm seeds that store easily for planting. Simply dry them in a paper bag for a week, then tuck them away in a cool, dark place.
Come spring, you’ll be the one with the freshest, most vigorous sorghum starts—while neighbors scramble to find seeds or settle for store-bought plants.
Pro tip: If birds or squirrels are eyeing your seed heads, cover them with lightweight netting once they’re mature. And if you’re growing sorghum for grain, let the seed heads stay on the stalk until fully dry—they’ll feed you long after the ornamental value fades.
📚 In This Guide
- What you need
- Instructions
- Tips and common mistakes
- Wrapping up and next steps
What you need
- ● Mature sorghum plants: 10+ healthy, fully developed plants with plump, brown seed heads (avoid green or shriveled ones).
- ● Pruning shears or sharp scissors: 1 pair (sterilized with rubbing alcohol to prevent contamination).
- ● Paper bags or breathable mesh sacks: 10–20 bags (1–2 gallons each) for seed collection.
- ● Drying tray or clean screen: 1 large tray (12" x 18" minimum) to spread seed heads.
- ○ Fan or dehumidifier: 1 unit (optional but critical for fast, even drying).
- ● Air-tight storage containers: 2–3 containers (quart-sized with tight lids or Mylar bags with oxygen absorbers).
- ● Thermometer/hygrometer: 1 tool to monitor temperature (60–70°F) and humidity (10–15%) during storage.
- ● Seed cleaning kit: Sieve or fine mesh screen (for removing chaff post-harvest).
- ● Labeling tags: Waterproof labels + marker to tag seed batches by variety and harvest date.
- ● Gloves: 1 pair (nitrile or cotton) to protect hands from prickly seed heads.
- ● Portable seed tester kit: For germination viability checks (if saving seeds long-term).
Step-by-step guide to harvesting and storing sorghum seed heads
Here’s how to save your best sorghum seeds for next season—no fancy tools needed.
🌾 Step 1: Identify and Select Mature Seed Heads
Wait until the seed heads turn tan or light brown and the outer husks begin to dry and split open—this usually happens 4-6 weeks after flowering. Press a seed head gently; if the seeds inside rattle and feel hard, they’re ready. Avoid heads still covered in green husks or soft seeds, as they won’t store well.
Pick a dry, sunny day for harvesting to prevent mold. Use clean, sharp pruning shears to cut the entire seed head (about 6-8 inches of stem) from the plant. This extra stem helps the seed heads dry properly before storage. I like to harvest in the morning when humidity is lowest—this gives the seeds the best chance to dry overnight.
☀️ Step 2: Dry the Seed Heads Thoroughly
Hang the cut seed heads upside down in a well-ventilated, dry area (like a garage or shed) for 7-10 days. A dry, shady spot is ideal—direct sunlight can overheat the seeds, while damp conditions encourage mold. You’ll know they’re ready when the seeds inside feel crisp and the husks crumble easily between your fingers.
If your climate is humid, spread the seed heads on a clean, dry towel indoors instead of hanging them. Check daily and stir them gently to ensure even drying. Uneven drying leads to some seeds sprouting prematurely or developing mold—neither is good for storage.
✂️ Step 3: Remove Seeds from the Heads
Once fully dry, place the seed heads in a large paper bag and seal it tightly. Shake vigorously for 10-15 seconds to dislodge the seeds. Open the bag over a clean tray to collect the seeds—this prevents them from scattering. Discard any remaining husks or debris, as these can harbor pests or mold.
For stubborn seeds, rub the heads gently with your hands or use a fine-mesh sieve to separate them from chaff. Store only the clean, plump seeds—they’ll have the highest germination rate. I always save a small sample to test germination before storing the rest.
🪴 Step 4: Store Seeds Properly for Long-Term Viability
Transfer the clean seeds to an airtight container (like a glass jar or sealed plastic bag) and label it with the variety name and harvest year. Store in a cool, dark place (like a refrigerator or root cellar) where the temperature stays between 35-40°F. Sorghum seeds can remain viable for 3-5 years under these conditions.
Check the seeds annually for signs of moisture or pests. If you notice any mustiness or discoloration, discard the batch immediately—stored seeds won’t last long once mold sets in. A small packet of silica gel in the container helps absorb any lingering moisture and extends shelf life.
Tips & tricks for perfect sorghum seed harvesting
Took me a while to figure these out, so here goes—these little details make all the difference between seeds that store well and ones that turn to dust.
Timing Secret: Harvesting at the right moment is everything. I learned this the hard way after storing seeds that sprouted prematurely—wait for that perfect tan color and that telltale rattle when you shake the head. Morning harvests in dry weather give seeds the best overnight drying chance, especially if your climate is humid. Trust me, this single step prevents 90% of storage problems.
Drying Strategy: The 7-10 day drying period isn't just about time—it's about creating the right environment. I hang mine in my garage where it's dry but not too hot. If you're in a damp climate, don't skip the towel method—spreading them out and stirring daily prevents uneven drying that leads to mold. The seeds should feel crisp like cereal when ready.
Quality Control: When removing seeds from the heads, take your time to separate the clean ones from chaff. I always do a final inspection with a fine-mesh sieve—this removes any lingering debris that could harbor pests during storage. And that germination test? Worth every minute to ensure you're saving viable seeds for next year.
Pro Tips for Sorghum Seed Head
- Took me a while to figure these out, so here goes—these little details make all the difference between seeds that store well and ones that turn to dust.
- Timing Secret: Harvesting at the right moment is everything.
- Drying Strategy: The 7-10 day drying period isn't just about time—it's about creating the right environment.
Frequently asked questions
Got questions about harvesting and storing sorghum seed heads? You’re not alone! Here are some of the most common queries—plus straightforward answers to help you save those seeds like a pro.
What’s the best time to harvest sorghum seed heads?
Harvest when the seed heads turn tan or light brown and the seeds rattle inside when shaken. This usually happens 4–6 weeks after flowering. Avoid harvesting too early—seeds won’t germinate well, or too late—birds and weather may scatter them. Morning harvests reduce humidity risks.
How do I know if my sorghum seeds are still viable?
Test viability by placing 10–20 seeds in a damp paper towel for 5–7 days. If 80%+ sprout, they’re good to plant. Store-bought seeds often have 90%+ viability, but home-harvested seeds may drop to 60–70% after a year. Label seed bags with harvest dates!
Can I store sorghum seeds in the fridge or freezer?
Yes! For short-term storage (1–2 years), keep seeds in a cool, dry place (like a fridge) in an airtight container with a desiccant packet. For long-term (5+ years), freeze them in sealed bags with oxygen absorbers. Thaw seeds slowly before planting to avoid moisture damage.
Why are my sorghum seed heads moldy or discolored?
Mold or discoloration usually means high humidity or poor drying. Let seed heads dry completely (1–2 weeks) in a well-ventilated, shady area before storage. If mold appears, discard affected seeds—they won’t germinate and may spread contamination. Use a fan for faster drying!
Are there alternatives if my sorghum seeds don’t germinate?
If viability is low, try these fixes:
- Soak seeds in warm water for 12 hours before planting to soften hard coats.
- Use a seed scarifier to lightly nick the seed coat for faster germination.
- Plant deeper (1–1.5 inches) in moist soil—sorghum seeds need consistent moisture to sprout.
- Buy fresh seeds from a reputable supplier if home-saving fails.
Wrapping up and next steps
Harvesting and storing sorghum seed heads successfully ensures a bountiful crop for next season! By following the right timing, tools, and storage methods, you’ll keep those seeds viable and ready to plant.
Whether you’re a seasoned gardener or just starting out, every seed saved is a future harvest waiting to happen—so get excited for your next planting adventure! 🌱
Ready to take the next step? Start by labeling your seed packets with harvest dates and varieties, then plan your planting schedule for spring. Happy growing! 🌟