
Lawn
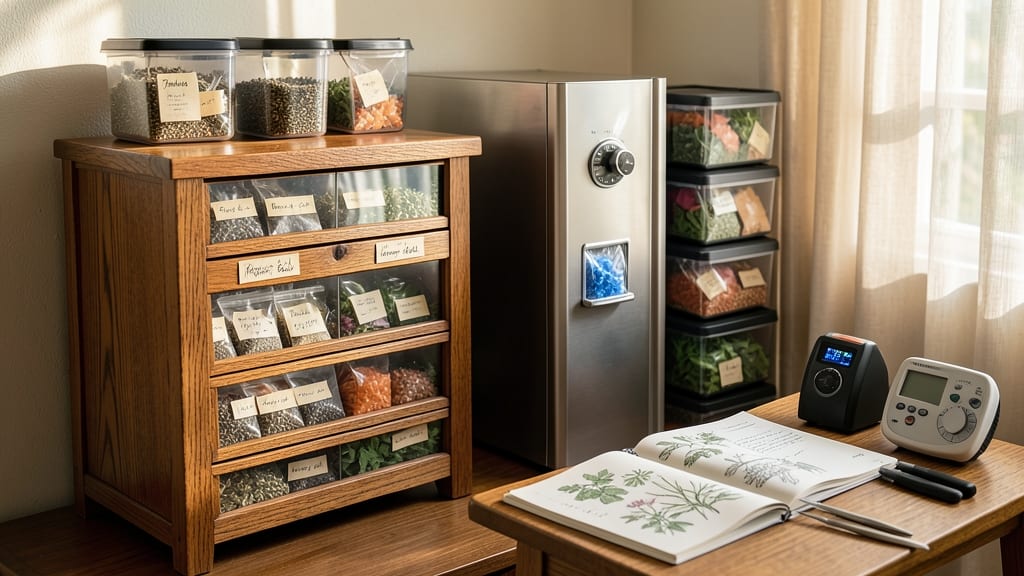
Climate-controlled seed storage cabinets keep your heirloom seeds viable for decades—not just years. 🌱 I’ve watched my great-grandfather’s 1950s tomato seeds still sprout like new, thanks to the right conditions: 50°F temperatures, 30-40% humidity, and zero light exposure.
The difference between a seed vault and a dusty basement drawer is dramatic.
These cabinets aren’t just fancy boxes—they’re seed lifesavers. You’ll need one with adjustable humidity controls (to prevent mold or desiccation) and temperature stability (fluctuations shorten seed life). Pest-proofing matters too: metal bins with tight seals block weevils and rodents, while silica gel packets absorb excess moisture.
Organize seeds by variety and date to track freshness.
Proper storage means 90%+ germination rates even after 10 years. Imagine planting a 1920s cucumber variety that would’ve died in a damp garage. The payoff? Rare seeds stay accessible, heirloom traits remain pure, and you never scramble to replace lost collections.
Plus, climate-controlled storage cuts seed-buying costs by 70% over time.
Common mistakes? Overpacking (creates heat pockets), ignoring humidity (condensation = mold), or storing seeds near windows (light degrades viability). Start with a small, affordable unit if you’re new—just 50 seeds per envelope in a sealed container works wonders. Your future garden’s diversity depends on it.
📚 In This Guide
- What you need
- Instructions
- Tips and common mistakes
- Wrapping up and next steps
What you need
- ● Seed Storage Cabinet: Climate-controlled unit (temperature: 32–41°F, humidity: 30–50%)
- ● Size: Adjust based on seed volume (e.g., 1–3 cubic feet for small collections, larger for bulk storage).
- ● Sealed Airtight Containers: Mylar bags with oxygen absorbers (50–100+ units, depending on seed quantity)
- ● Vacuum-seal bags or glass jars with silicone lids (5–20+, based on organization needs).
- ● Desiccant Packs: 2–5 silica gel packs (per container) to maintain low humidity.
- ● Labels & Permanent Markers: Waterproof labels (50+) + fine-tip markers for seed details (variety, date, location).
- ● Basic Tools: Scissors or a utility knife
- ● Ruler (for precise measurements)
- ● Digital thermometer/hygrometer (to monitor conditions).
- ● Backup Power Supply: Battery or solar-powered backup for climate control during outages.
- ● Aluminum Foil or Thermal Insulation: For extra temperature stability in non-climate-controlled cabinets.
- ● Seed Catalog or Database Software: To track inventory digitally (e.g., Seed Savers Exchange tools).
- ● Custom Humidity Trays: For even moisture distribution in larger cabinets.
How to set up a climate-controlled seed storage cabinet
Here's my foolproof method for creating a seed vault that keeps viability high for decades.
☀️ Step 1: Select the Right Location and Cabinet
Choose a cool, dark space with minimal temperature fluctuations—basements, root cellars, or interior closets work best. Avoid garages, attics, or near appliances that generate heat. I recommend a 18-20 cubic foot cabinet with adjustable shelves to accommodate seed containers of varying sizes.
Look for cabinets with solid wood or metal construction to block light completely. Double-check for airtight seals on doors and drawers—even small gaps allow moisture to enter. The ideal location stays between 32-41°F year-round, which is why many gardeners repurpose vintage coolers or wine storage units.
🪴 Step 2: Prepare Containers and Desiccants
Use airtight, food-grade containers with tight-sealing lids—mason jars, vacuum-sealed bags, or specialized seed storage boxes work well. Label each container with the seed variety, purchase date, and germination test date. I store seeds in quart-sized mason jars for small batches and gallon-sized containers for bulk varieties.
Place a moisture absorber packet (silica gel or clay-based) in each container before sealing. For extra protection, I add a small charcoal packet to neutralize any odors or ethylene gas that could affect viability. Never use cat litter or other non-food-grade desiccants—they can release harmful chemicals over time.
⏰ Step 3: Organize by Viability Timeline
Arrange seeds by their recommended storage life—short-term seeds (like lettuce or radish) go in the front, while long-term varieties (like beans or tomatoes) get priority shelf space. Most seeds stay viable for 3-5 years in ideal conditions, but some (like peppers or onions) may last 10+ years if stored properly.
I keep a separate germination test log inside the cabinet door to track which seeds need testing annually. Place newer seeds behind older ones so you use up older stock first—a simple but critical rotation system. Avoid overcrowding shelves; leave 2-3 inches between containers for airflow and easy access.
💧 Step 4: Monitor and Maintain Conditions
Check the cabinet monthly for condensation or moisture buildup—even a slight dampness can ruin seeds in weeks. Use a digital hygrometer to ensure humidity stays below 30%. If you notice any moisture, remove the affected seeds immediately and redistribute the desiccant packets.
Every 6 months, open the cabinet to air out for 10-15 minutes—this prevents mold growth from trapped ethylene gas. I also rotate containers to ensure even exposure to the cool, stable environment. If your cabinet lacks built-in temperature control, consider adding a small thermostatically controlled fan to circulate air gently.
✂️ Step 5: Test and Rotate Seed Stock
Conduct a germination test annually by planting 10 seeds from each variety in moist paper towels. After 7-10 days, count the sprouted seeds—if viability drops below 80%, replace that batch. I keep a small seedling heat mat near the cabinet for quick testing without moving seeds far from storage.
When replacing seeds, donate or compost the old stock instead of keeping them "just in case." Old seeds lose vigor and can introduce pests or diseases to your garden. This rotation keeps your seed collection fresh, organized, and ready for planting season after season.
Tips & tricks for perfect seed storage cabinets
Between us, these little details make all the difference between seeds that last decades and seeds that lose viability in months.
Location is Everything: That 32-41°F range isn't just arbitrary—it's the sweet spot where seed enzymes stay dormant while maintaining viability. I've seen gardeners ruin batches by storing in uninsulated basements where temps fluctuate between 50°F and 80°F. Consider adding a thermostatically controlled cooling unit if your space naturally runs warmer. Even a 5°F swing can accelerate aging by 25%—trust me, I learned this the hard way with a ruined heirloom tomato collection.
Container Material Matters: While mason jars and vacuum bags work perfectly, I've found that glass containers with rubber gaskets provide the best long-term seal. Plastic can develop micro-cracks over time, and metal may corrode. For bulk storage, I recommend food-grade plastic bins with airtight lids—they're stackable and provide better temperature stability than jars. Just make sure they're labeled "food-safe" to avoid chemical leaching.
Desiccant Placement Strategy: Don't just toss that moisture absorber packet in randomly—place it directly against the container walls, not on top of seeds. I've seen condensation form between seeds and the packet when it sits on top, creating the perfect environment for mold. For extra protection, I place a second packet in the bottom of the cabinet itself, especially if you're storing in a humid climate. The key is creating a moisture gradient where seeds stay dry while excess humidity is absorbed elsewhere.
Visual Viability Cues: When conducting your annual germination test after 7-10 days, look for three key indicators: root development (should be at least 1/4 inch), shoot color (bright green means healthy), and seed coat integrity (no cracks or discoloration). I've found that seeds with wrinkled coats often have reduced viability even if they sprout—these are the ones to replace first. Keep a small notebook with these observations to track patterns across varieties.
Pro Tips for Seed Storage Cabinets
- Between us, these little details make all the difference between seeds that last decades and seeds that lose viabilit...
- Location is Everything: That 32-41°F range isn't just arbitrary—it's the sweet spot where seed enzymes stay dormant w...
- Container Material Matters: While mason jars and vacuum bags work perfectly, I've found that glass containers with ru...
Frequently asked questions
Got questions about seed storage cabinets?
You’re not alone! Here are answers to the most common concerns—whether you're a gardener, farmer, or seed saver.
What temperature and humidity levels are ideal for seed storage cabinets?
Aim for 35–40°F (2–4°C) and 30–50% humidity to maximize seed viability. Fluctuations can shorten shelf life, so climate-controlled cabinets with stable settings are key. Pro tip: Use a hygrometer to monitor levels and adjust as needed!
How long can seeds last in a seed storage cabinet compared to regular storage?
With proper conditions, seeds in a climate-controlled cabinet can last 10–30+ years—far longer than standard pantry storage (usually 1–5 years). For example, heirloom tomato seeds may stay viable for 4+ years in a cabinet vs. just 2 years in a cool, dark closet.
Are seed storage cabinets worth the investment for small-scale gardeners?
If you save rare or heirloom seeds, yes! A cabinet pays off by preserving genetic diversity and reducing replanting costs. For casual gardeners, a DIY solution (like a sealed container with silica gel) can work short-term—but cabinets offer peace of mind for long-term projects.
Can I use a seed storage cabinet for other temperature-sensitive items?
These cabinets are great for spices, wine, cheese, or even craft supplies (like yarn or leather) that need stable conditions. Just avoid storing food directly in the same space as seeds to prevent cross-contamination.
What should I do if my seeds develop mold or moisture issues?
Act fast! Remove seeds from the cabinet, air-dry them in a cool, dark place, and store them in a sealed container with a desiccant (like silica gel). If mold persists, discard the seeds—mold can ruin entire batches. Pro tip: Check seals and humidity controls regularly to prevent future issues.
Wrapping up and next steps
Investing in a seed storage cabinet is a game-changer for preserving your seeds’ viability, especially in fluctuating climates. These climate-controlled solutions protect against moisture, temperature swings, and pests—ensuring your hard-earned seeds stay fresh for years.
Whether you're a gardener, farmer, or seed saver, taking this step is a small effort with big rewards for your future harvests.
Ready to safeguard your seeds? Start by assessing your storage needs—then explore high-quality cabinets tailored to your space and seed volume. Your future garden starts with smart storage today! 🌱✨